Scrambler82
Old Bastard !

Joined: Fri Dec 22nd, 2017
Posts: 2108
Name: Grev B ... Occupation: Quality Assurance Engineer ... Interests: Rangers, Photography, Metal Bending ...
Reputation Points: 2108

|
My part are suppose to arrive today and hoping everything is there and correct.
I didn't go with the The Retrofit Source, (TRS), Kits for two reasons, one being they do not carry the Diode Dynamic's Three-Stage Halos, Bright White - DRL, Dim White - Driving at night, and Amber - Directinals; and two I saved a lot of money going with Lightwerkz.
The Lightwerkz offered 15% off right away of as a welcome mat, then the basic price for the same kit was almost $25 dollars less (sale) they had the Diode Dynamics Halos, and offered free USPS Priority Shipping. Three days !
So I got the same products, (Projectors-D2S, Harnesses - Morimoto, 5500K Bulbs, (Not sure what I wanted here) and the Halos I wanted (three-Stage), they tossed in the Housing Sealer, ($12), along with free shipping !
Just so everyone know the pricing, so if they are thinking about Retrofitting your headlights, the whole package shipped was $336.00.
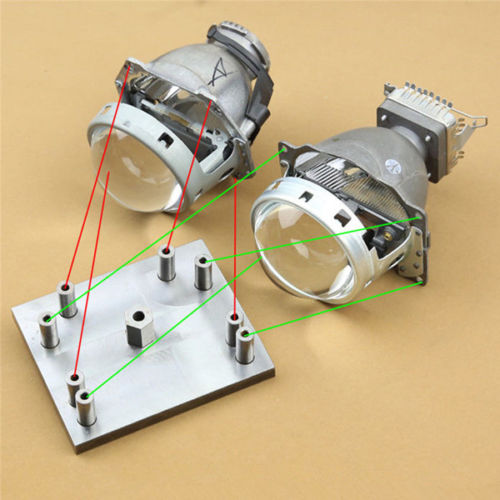
Again, what's in the box:
D2S, 4.0, Projectors
Morimoto, XB35 Drivers
HD Harness for 9007 Bulbs
5500K Bulbs
Apollo 3.0 Shrouds
Diode Dynamic's Three-Stage Halos
Headlight Housing Sealer
JB Weld
Toroids, one for each power line, to help with RF Interference - just in case, I run a CB and a VHF Amateur Radios in the Rig.
Morimoto Di-Electric Grease
And best of all, it turns out the package was sent via USPS, instead of UPS which I asked for, still free shipping but after talking to Lightwerkz about the mix up they offered the cost of reshipping UPS, off of the overall cost... and extra $20 off... I'm liking this Shop more and more all the time.
A note: I liked TRS, they have a lot of information and don't try to get you to buy to get it, nice ! When I asked about the Halos I want they didn't try to sell me their Hals (Morimoto's) they just said we don't carry what I want and let it go. They didn't cut the others down, they didn't pull a hard sell, they were good about it ! They do offer as a new customer, and often through the year, a 10% discount but when confronted with the extra discount from other companies they just said they don't have that, as with the parts. There was no hard sales pitch but as I said they offered all of the help up front without a sale, a good shop for sure !
I went with Lightwerkz because of the reasons above, they too offered help as TRS, but they were a little willing to discount to get the sale, not a bad feature at all, and I, in my opinion, took advantage of it.
Now to see if the parts are correct and if they are willing to help after the sale, which at this point I am expecting full after sale customer service.
I will get pictures of the shipping packaging and the parts as received for your comments, and I am hoping to get pictures of the build but I will not be in a rush, I am never in a rush these days, so if the pictures don't get there too quick, it is me as usual !Last edited on Thu May 3rd, 2018 01:32 pm by Scrambler82
____________________
Ltr,
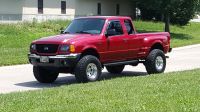
2003 EDGE, Std Cab, Steppie, E4 Red, 5sp, 4x
5" SuperLift, 33" x 12.50 x 15"
Hurst Shifter
Mod'd Backrack to fit Steppie
Front and Rear Bumpers by Custom 4x4 Fabrication, OK; now Mike's Welding and Fabrication.
Working on more Mods, just need more time, longer days would work !
|