Ford-Rangers.com Ranger Forum HomeFord-Rangers.com Ranger Forum Home
Home Recent Topics New posts Search search Menu menu Not logged in - Login | Register

Ford-rangers.com is a discussion forum, a Ranger forum for people who have questions about fixing or modifying
their Ford Rangers or people who just admire their Ranger. Please join and enjoy sharing experiences!

2000 Ranger 300K earned a v8       #: 2221
 Moderated by: Mike69, MaDMaXX, Page:  First Page Previous Page  1  2  3  4  5  6  Next Page Last Page  
New Topic Reply
 Rate Topic 
 Posted: Sun Nov 1st, 2020 07:56 am
PM Quote Reply
101st Post
Junglejoe
Member


Joined: Tue Jun 30th, 2020
Location: Missouri USA
Posts: 293
Name: 
Occupation: 
Interests: 
Status: 
Offline
Reputation: 
Reputation Points: 293
Thats exactly what I needed to know on that EVAP  hose J. Thank ya sir!! That is the last thing I needed..I think. Im going to see if it starts today if I get time..

Hmmm...I see your fan and fan shroud... not in as far as mine.. maybe I should move my engine back about a 1/2 inch?
 The top of my fan/shroud.. Im a 1/4 inch sticking out

 I assume you used a dual core radiator? Thats what came in my donor. Ill be replacing all that with brand new stuff as well.

 Man,  like mentioned.. looks like a ford explorer engine bay!  Perfect!!!

Last edited on Sun Nov 1st, 2020 07:59 am by Junglejoe


____________________
2000 EFI 302 Zspec T5 swap ranger
Back To Top PM Quote Reply

 Posted: Tue Nov 3rd, 2020 09:54 am
PM Quote Reply
102nd Post
410customs

Idahome


Joined: Wed May 2nd, 2018
Location: Panhandle, Idaho USA
Posts: 2165
Name: Jamie ...
Occupation: Elevator Design Worlds Tallest Buildings ...
Interests: Ranger Based Vehicles and OFFROAD ...
Status: 
Offline
Reputation: 
Reputation Points: 2165
Yours is fine! The 5.0 in this truck is sitting on stock mounts engine and trans, it is fine to push the engine forward slightly like you have, not going to hurt anything!!  your truck is CUSTOM 5 speed, the 2000 I am building is also custom, but built to be very much like a stock 5.0 ranger could have been done...so my jasper 306 is sitting in the exact spot Ford would have put it.... this way everything lines up the downpipes, the stock trans mount, exhaust mounts, etc etc.............

Yes this is a 5.0 radiator and a autozone fan shroud, it fits great but we do not have the same fan coverage as you because you shoved your engine forward 1" or so


____________________
I build custom RBV, specializing in drivetrain conversions, wiring, suspension and complete custom trucks
Back To Top PM Quote Reply

 Posted: Tue Nov 3rd, 2020 11:19 am
PM Quote Reply
103rd Post
Junglejoe
Member


Joined: Tue Jun 30th, 2020
Location: Missouri USA
Posts: 293
Name: 
Occupation: 
Interests: 
Status: 
Offline
Reputation: 
Reputation Points: 293
Ok... just want ro make sure before I button this thing up solid in case I needed to move the engine back 1/2 inch or so


____________________
2000 EFI 302 Zspec T5 swap ranger
Back To Top PM Quote Reply

 Posted: Tue Nov 3rd, 2020 11:42 am
PM Quote Reply
104th Post
410customs

Idahome


Joined: Wed May 2nd, 2018
Location: Panhandle, Idaho USA
Posts: 2165
Name: Jamie ...
Occupation: Elevator Design Worlds Tallest Buildings ...
Interests: Ranger Based Vehicles and OFFROAD ...
Status: 
Offline
Reputation: 
Reputation Points: 2165
you do not need to move it nope

BUT be careful if you ever jack up the transmission, make sure the fan does not hit rad!
Your shroud to fan coverage is excellent....


____________________
I build custom RBV, specializing in drivetrain conversions, wiring, suspension and complete custom trucks
Back To Top PM Quote Reply

 Posted: Tue Nov 3rd, 2020 01:13 pm
PM Quote Reply
105th Post
Junglejoe
Member


Joined: Tue Jun 30th, 2020
Location: Missouri USA
Posts: 293
Name: 
Occupation: 
Interests: 
Status: 
Offline
Reputation: 
Reputation Points: 293
10-4 J.  Thanks


____________________
2000 EFI 302 Zspec T5 swap ranger
Back To Top PM Quote Reply

 Posted: Wed Nov 4th, 2020 09:43 pm
PM Quote Reply
106th Post
410customs

Idahome


Joined: Wed May 2nd, 2018
Location: Panhandle, Idaho USA
Posts: 2165
Name: Jamie ...
Occupation: Elevator Design Worlds Tallest Buildings ...
Interests: Ranger Based Vehicles and OFFROAD ...
Status: 
Offline
Reputation: 
Reputation Points: 2165
Nope, 2000 Ranger already has pats. I had posted some PATS wiring info because I thought pats was not in the ranger until 2001....nope turns out I learned something 99 was first year
Made my job to install pats here MUCH EASIER
Nervous hearts pounding truck is getting fluids talking to computer systems check go we are turning the key for open header video very soon


____________________
I build custom RBV, specializing in drivetrain conversions, wiring, suspension and complete custom trucks
Back To Top PM Quote Reply

 Posted: Fri Nov 6th, 2020 08:47 am
PM Quote Reply
107th Post
410customs

Idahome


Joined: Wed May 2nd, 2018
Location: Panhandle, Idaho USA
Posts: 2165
Name: Jamie ...
Occupation: Elevator Design Worlds Tallest Buildings ...
Interests: Ranger Based Vehicles and OFFROAD ...
Status: 
Offline
Reputation: 
Reputation Points: 2165
All right people yesterday we buttoned up all the loose ends, did some final checks and turned the key
here is the result
This is the very first time the key was turned...............


Be kind this is also my very first Ranger youtube video and our 6 month old puppy gets very excited in the shop (dang mutt!)

Open headers w downpipes!!


____________________
I build custom RBV, specializing in drivetrain conversions, wiring, suspension and complete custom trucks
Back To Top PM Quote Reply

 Posted: Fri Nov 6th, 2020 08:51 am
PM Quote Reply
108th Post
Junglejoe
Member


Joined: Tue Jun 30th, 2020
Location: Missouri USA
Posts: 293
Name: 
Occupation: 
Interests: 
Status: 
Offline
Reputation: 
Reputation Points: 293
Hell yeah J!!! Gota love that!!!


____________________
2000 EFI 302 Zspec T5 swap ranger
Back To Top PM Quote Reply

 Posted: Fri Nov 6th, 2020 09:20 am
PM Quote Reply
109th Post
410customs

Idahome


Joined: Wed May 2nd, 2018
Location: Panhandle, Idaho USA
Posts: 2165
Name: Jamie ...
Occupation: Elevator Design Worlds Tallest Buildings ...
Interests: Ranger Based Vehicles and OFFROAD ...
Status: 
Offline
Reputation: 
Reputation Points: 2165
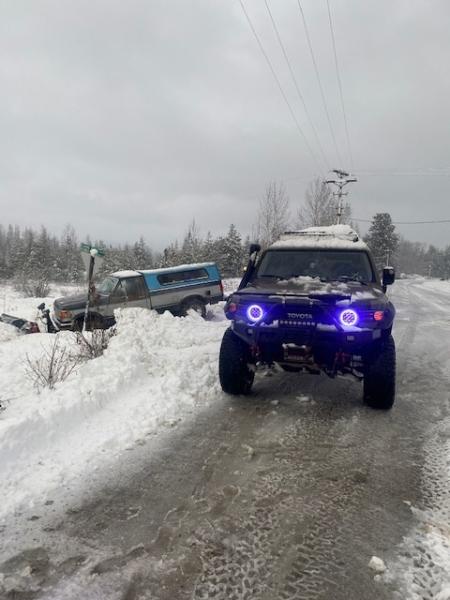
I wish I never rotated the camera, but hey you want to talk about wrecked nerves each and every time I do this there is many sleepless nights and nervous heart pounding hours that lead up to that moment, I waited for the neighbors to come over so they could see the progress and help me turn the key.......before we even attempted to start the truck there was much work involved. Many final checks, then fluids, then finally time to bump the key...will the starter turn? Will the engine fire? Will there be leaks? Did Jasper build the 306 correctly? all of these things lead up to this one moment where you find out if you are worth your salt......

I remember a few years back I saw a video on Youtube "Ranger 5.0 done right" and there were MANY things in that short video that I spotted that were indeed not done properly....so here we are


Now lets re cap all the final work that was done to get this sucker running........

First up the shop dogs (Ranger and Ace) are chomping at the bit to hear this baby run


The 300K battery cables have seen better days, this won't cut it here in my shop so we had to fix them up. All of my battery cables get copper lugs and marine terminals. This truck is no different.


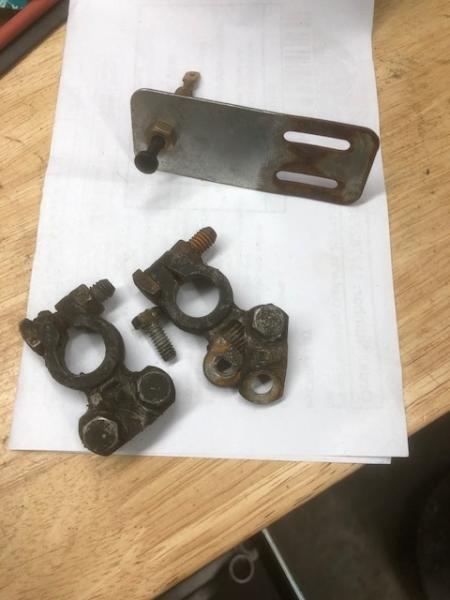
What we are dealing with


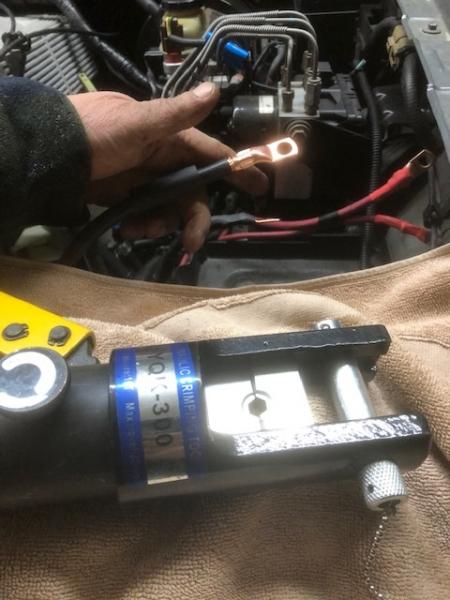
To quote Post Malone "Better now"


Hydraulic crimp tool, me likey
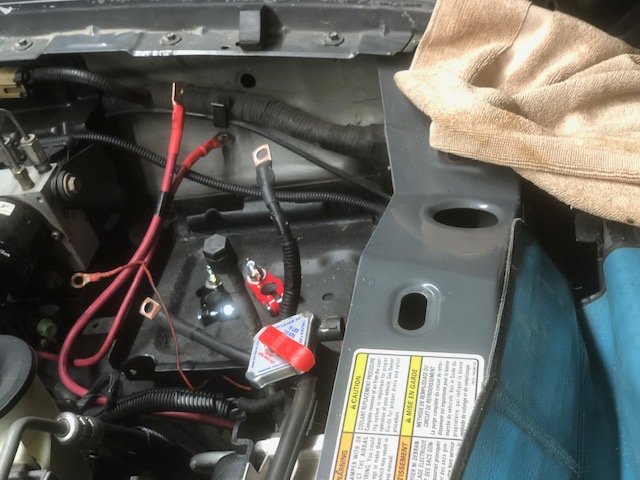

end result


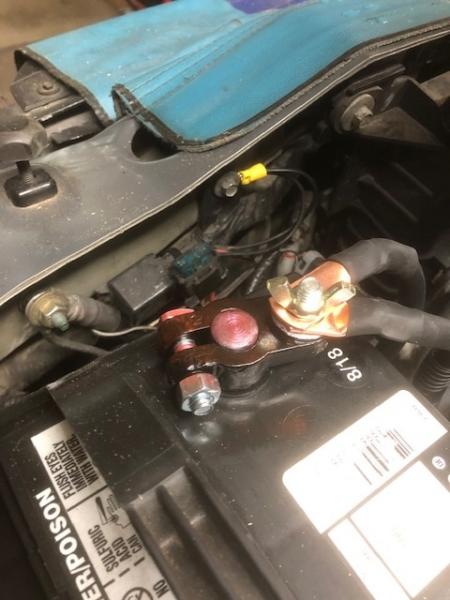
Don't forget the anti corrosion spray

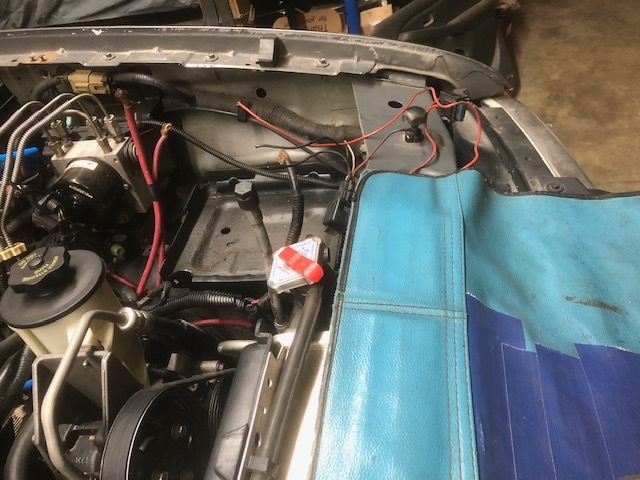
Now you guys should take note, the one large ground wire comes from the 5.0, the other was ADDED, it feeds the radiator core support to act as the main body ground.
The two large power wires, one is the starter feed, the other is the PJB feed, the small power wire is for the led bar relay
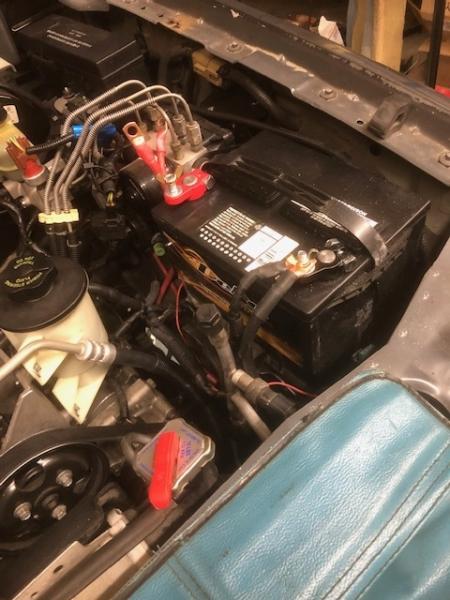
Now that is all cleaned up we can move forward. Battery was put on trickle charge, time to move into the interior

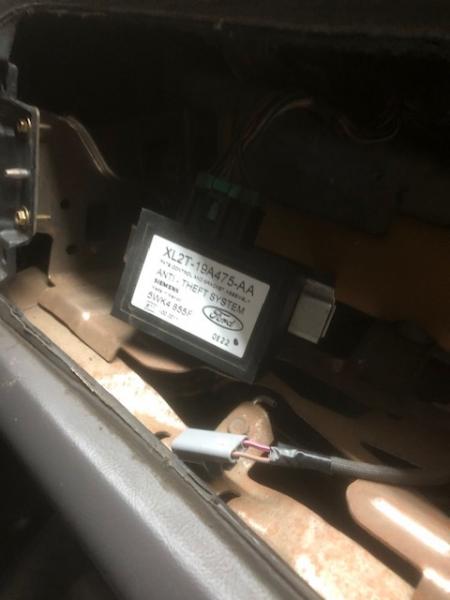
Now 2000 Rangers came with PATS, in fact 99 was the first year of PATS in the Ranger. So all I had to do was remove the v6 pats module and ignition tumbler and replace with our v8 stuff

I was provided with the v8 pats module, key and ignition tumbler and also a halo. You do not have to swap halo's as all they do is read the key
If the key matches the pats module which matches the PCM your truck will be happy
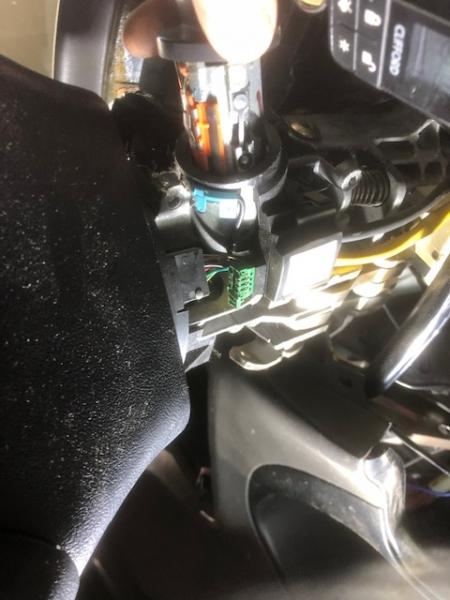
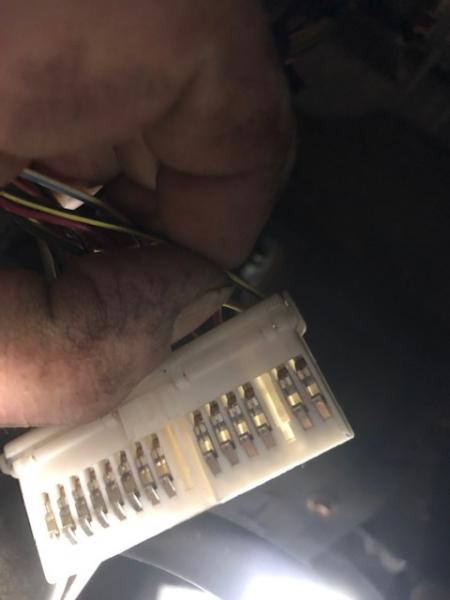
PATS module is located behind the pass airbag, v6 module remove, v8 module plugged in


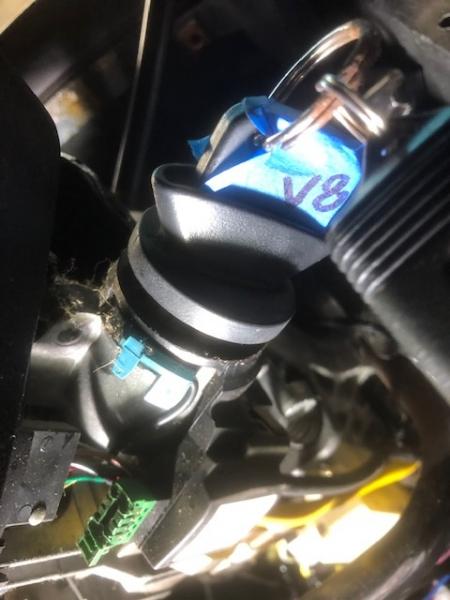
To change out ignition tumbler and key you need to turn the key to the run position and using awl push in the check ball


Tumbler slides out


install v8 stuff


That's it, when doing 2000 Ranger to 2000 Explorer, PATS is done. 
Two paths going forward we can use our Snap on Star commander to program some keys so the original v6 key that fits the doors can be made to work the v8 pats, or we can swap the door lock cylinder to match the new v8 key. I will likely swap the door lock cylinders since they were provided to me AND I am much faster at doing doors them messing with the star commander (on loan from friend Brett) Either way the same key that works the ignition will fit the doors, as if Ford built a 5.0 Ranger.

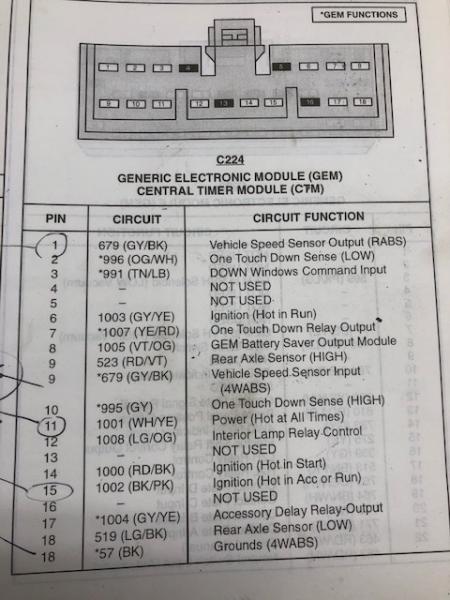
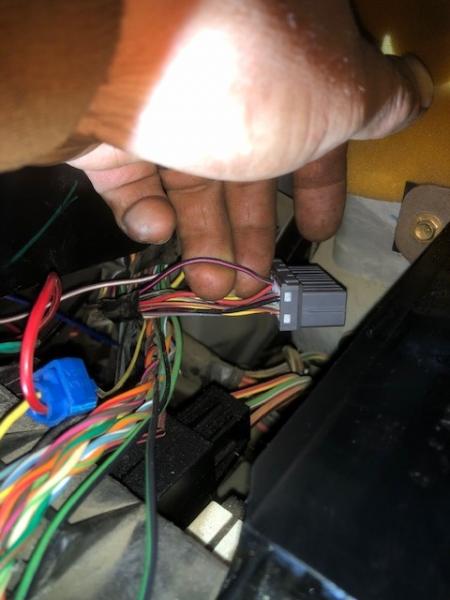
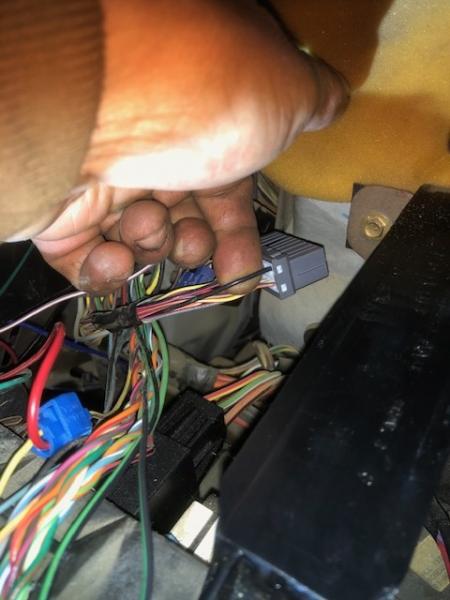
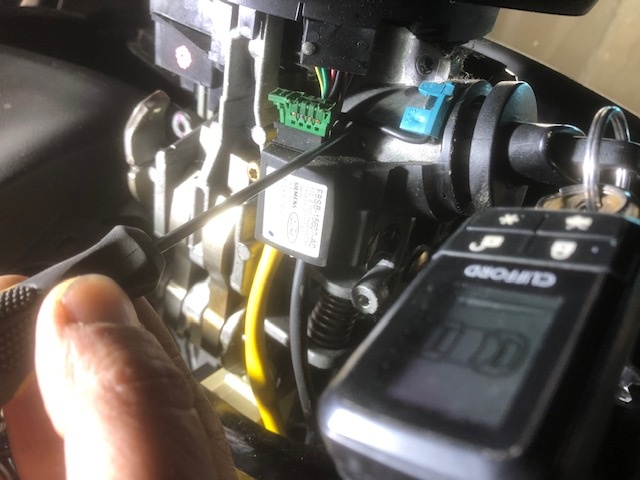
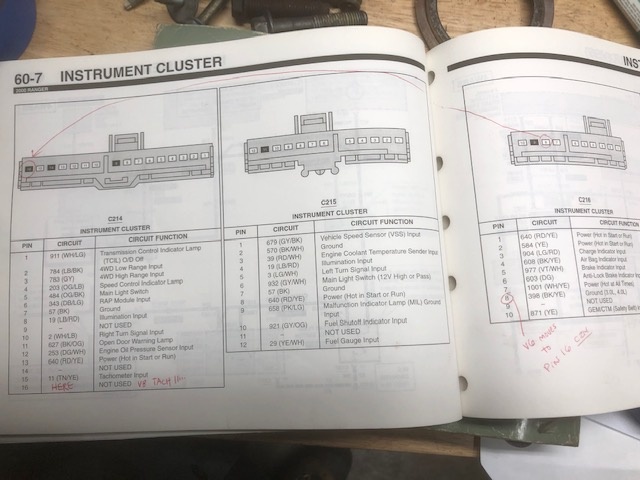
Now the tachometer ground wire needs to move positions. For a v6 truck the wire is in one spot, for the v8 we need it to be in another
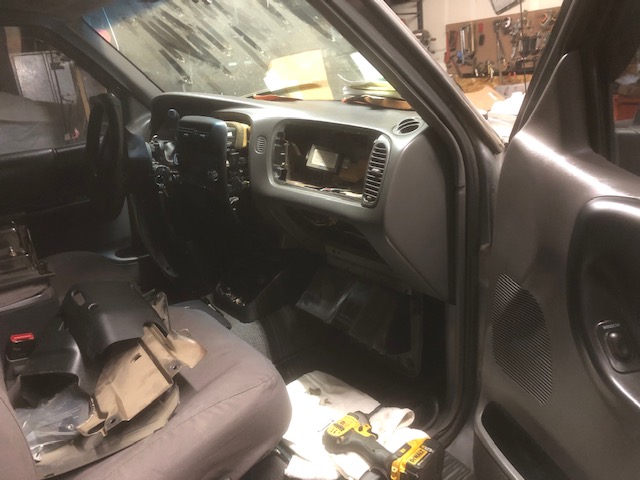
Instrument cluster pulled, wire moved

This truck uses a silver cluster from a 03+

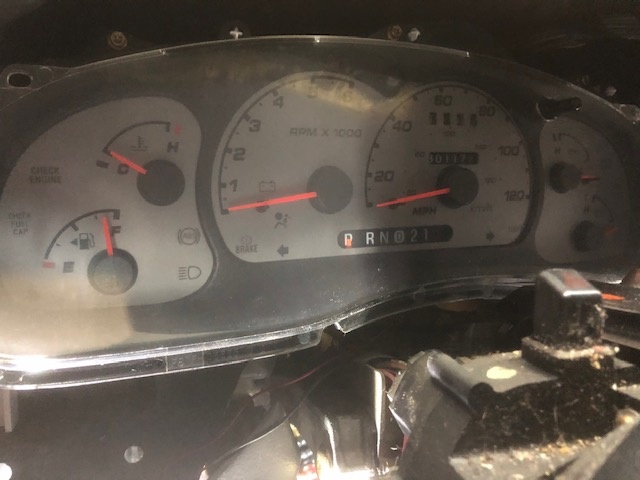
 Yes I cleaned up the 301K miles worth of debris under the column shrouds


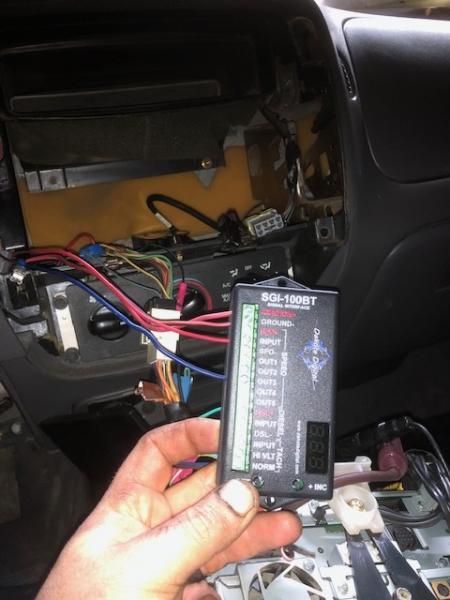
Tachometer now reads for a v8
Time to hook up the battery and scanner and talk to our PCM, check for a properly operating THEFT light


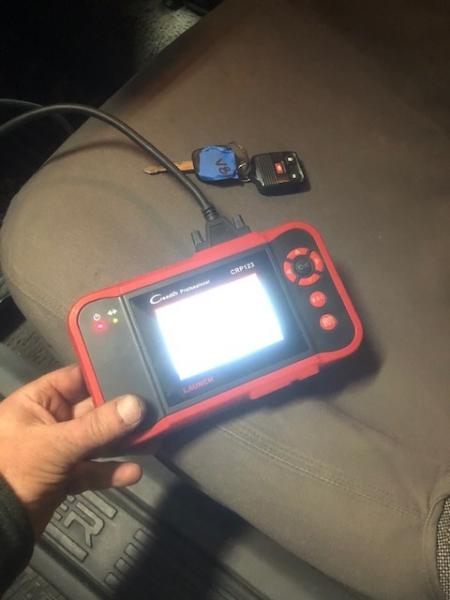
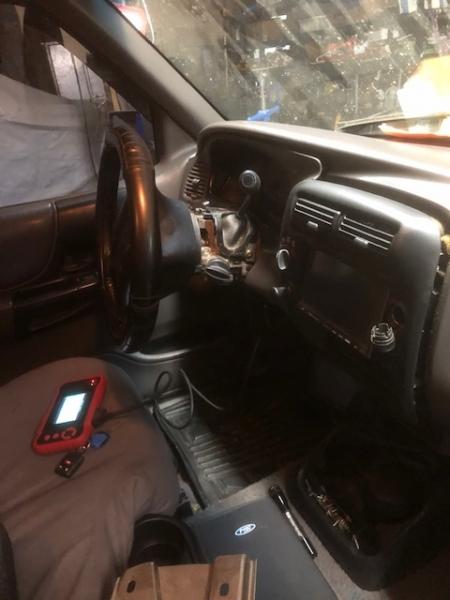
Did some onboard diagnostics and system checks, all modules present and all systems are GO
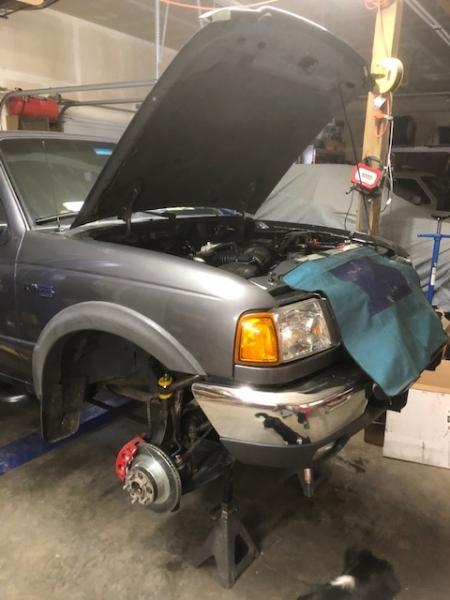
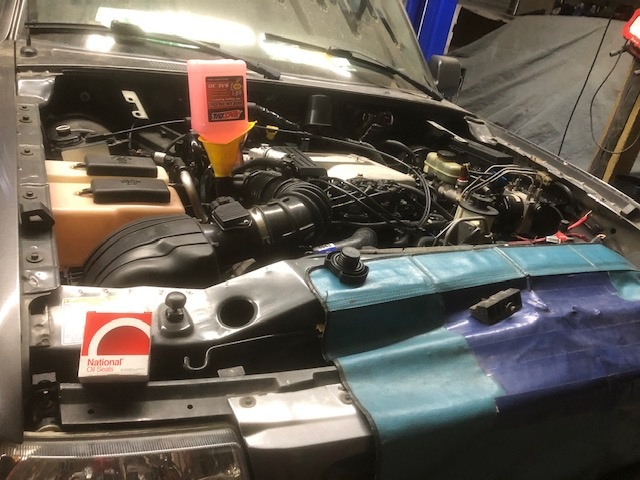
Now is when the heart starts pumping.........time for fluids and final checks

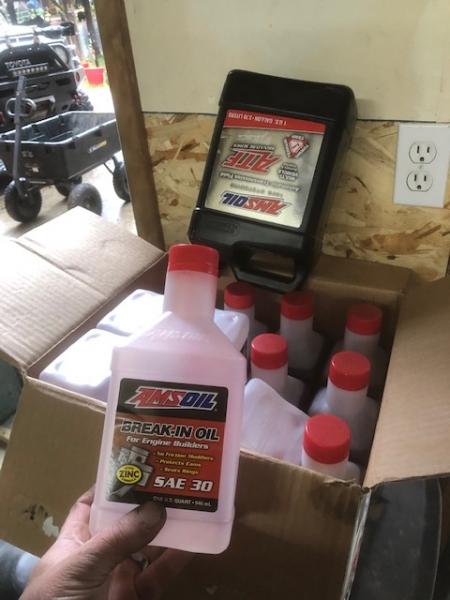
Added 5 quarts of Amsoil engine 30W break in oil to the crankcase


4 quarts of Amsoil ATF, Mercon V compatible, into the transmission. Do not put more then 4-5 quarts in now or it will spill out...... remember there is also 1 quart in the converter. The system will hold between 10-14 quarts depending on the size of your coolers and how much atf/test fluid is still in the 4r70w
The rest of the mercon V will go in once the truck is running and we have a chance to shift the trans through the gears

Jasper reman engines have been pre run there is no real need to prime the oil pump on a pre run engine.
Otherwise I would remove coil pack tripod and cam synchronizer, I then have a flexible drive for my drill motor that fits the oil pump shaft perfectly. Any time we do a fresh engine assembly we would need to prime the oil pump...not here


Added 4 gallons of Amsoil 50/50 ready to go coolant, the red stuff (makes me crave koolaid for some reason....)

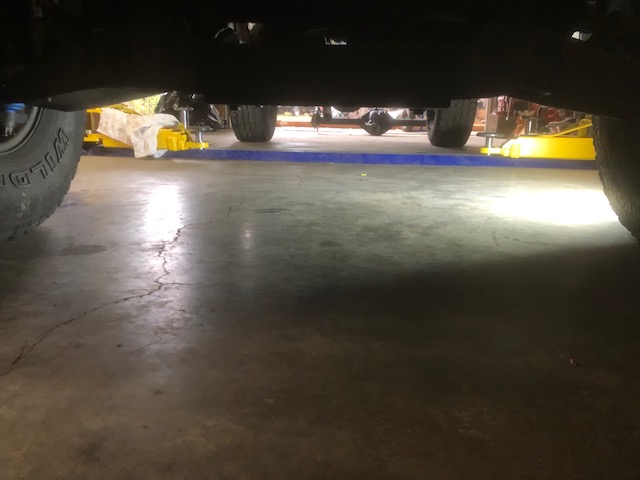
All the while checking the clean shop floor for any signs of leaks


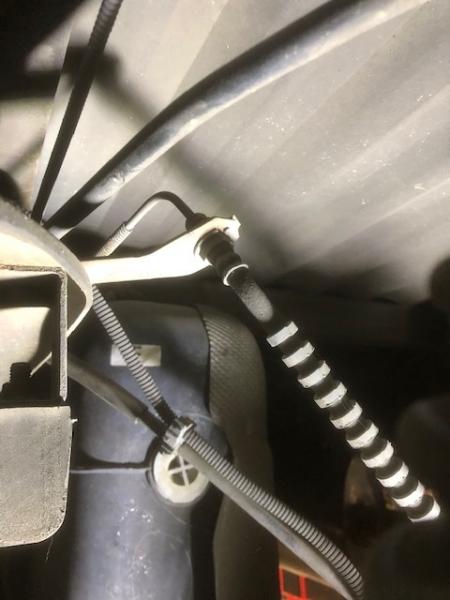
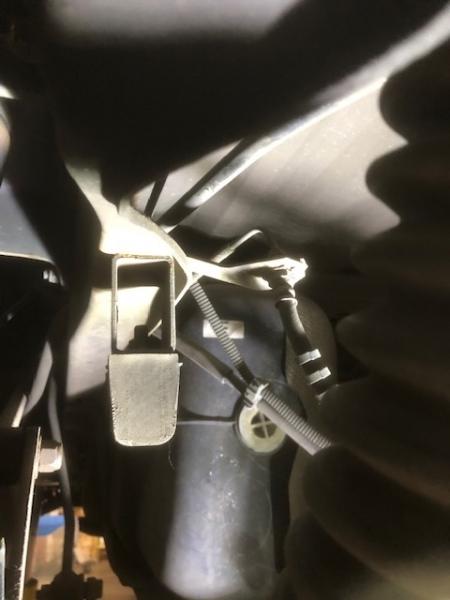
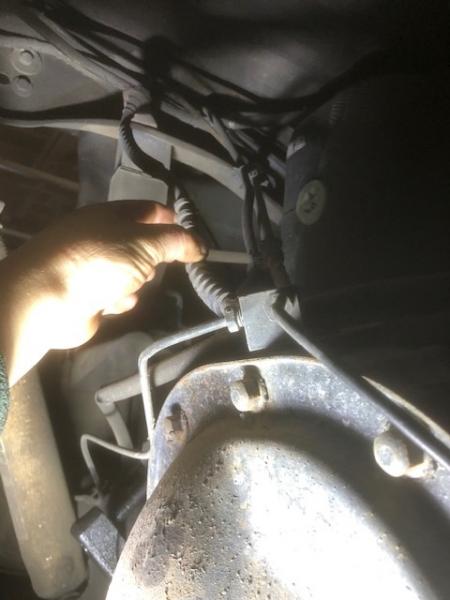
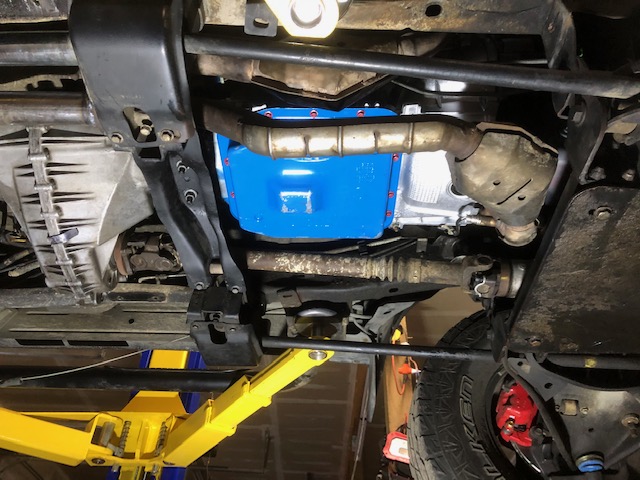
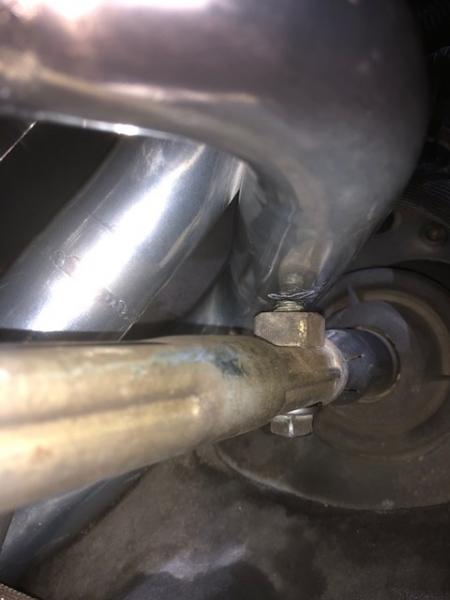
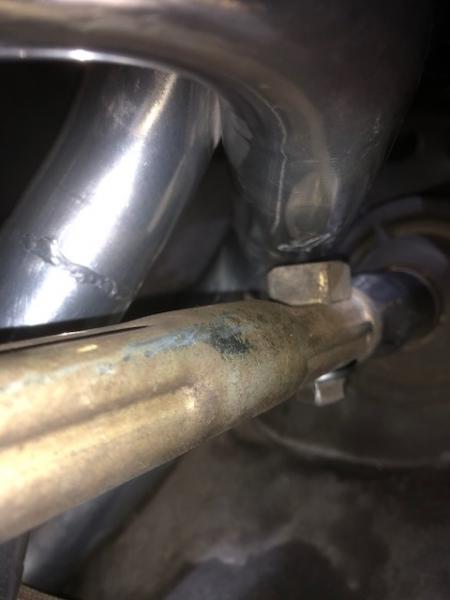
The 4406 transfer case was drained one more time (to get any residual) and then filled with regular Mercon III/Dexron ATF
These t cases use MERCON III do NOT fill with merc V or synthetic....too slippery. Ford says no Mercon V in t cases.


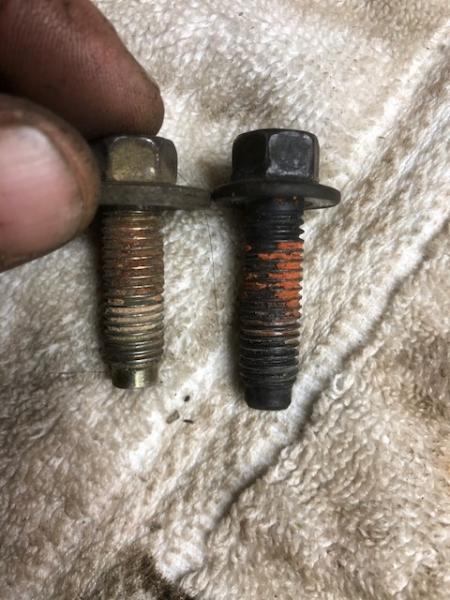
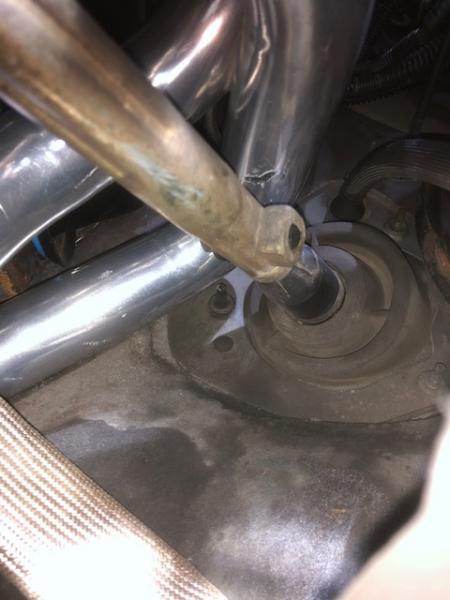
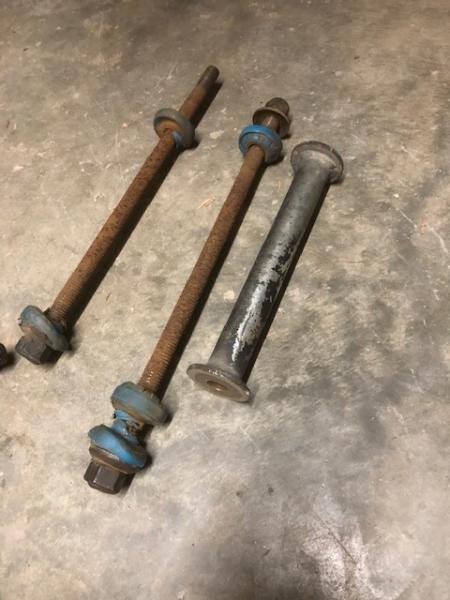
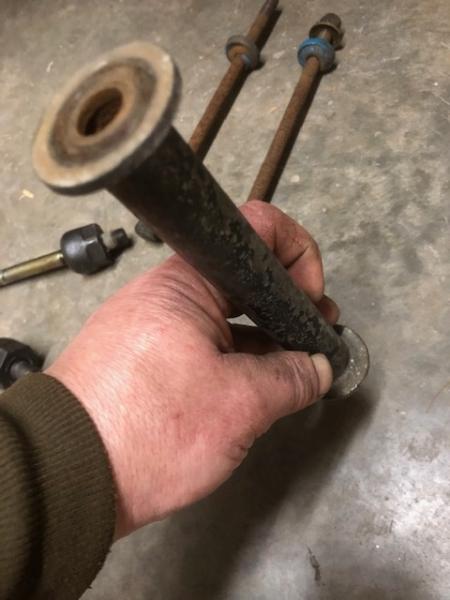
Had to replace one of the t case fill plugs, looks like this one was hit with a punch at some point


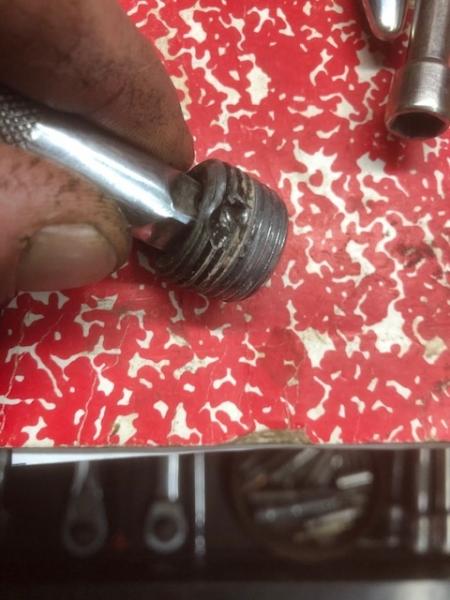
Fill plugs get thread sealant

After all of this we finally turned the key and she came to life

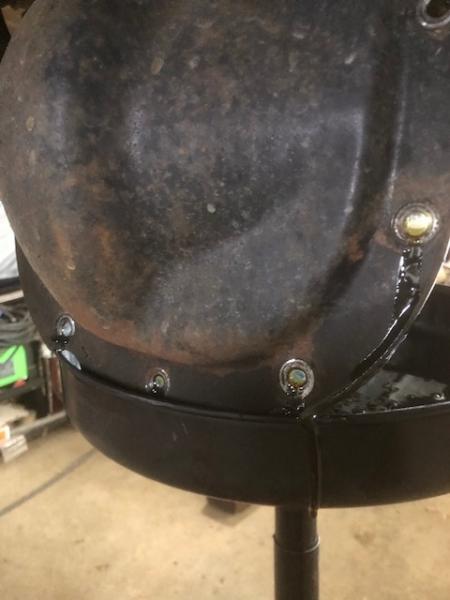
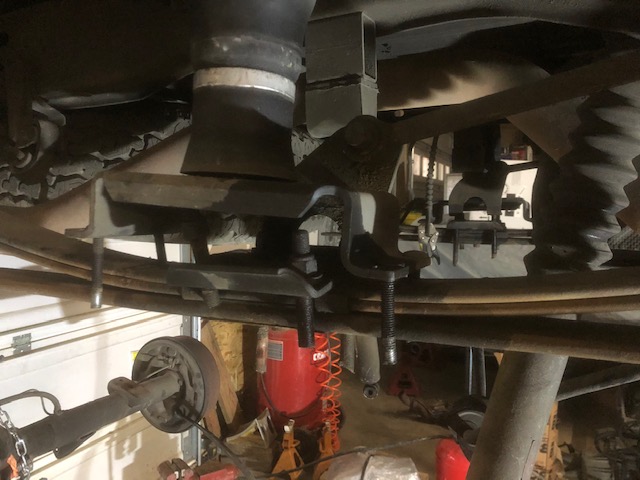
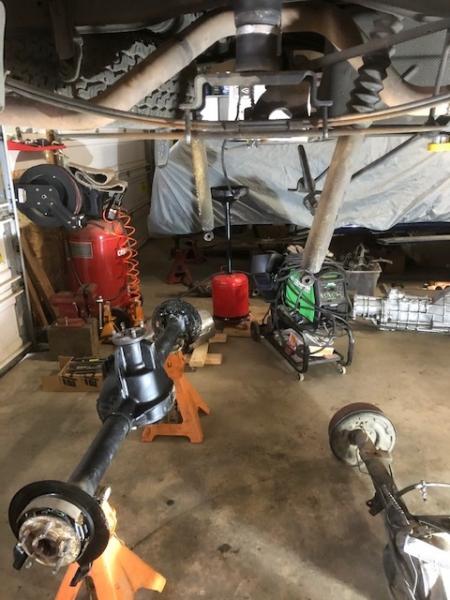
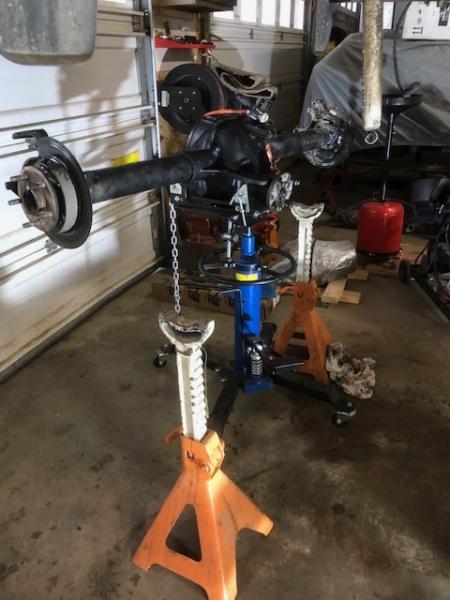
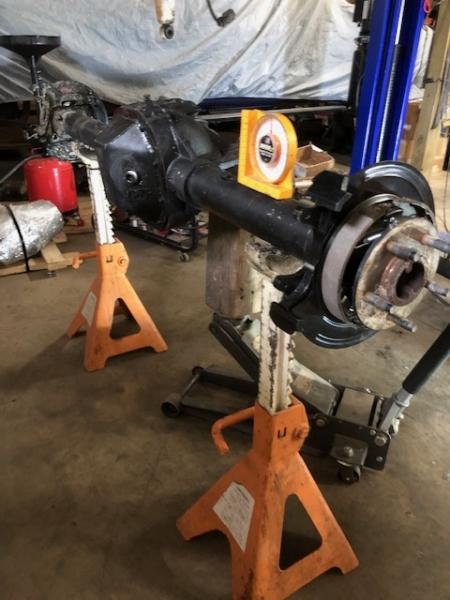
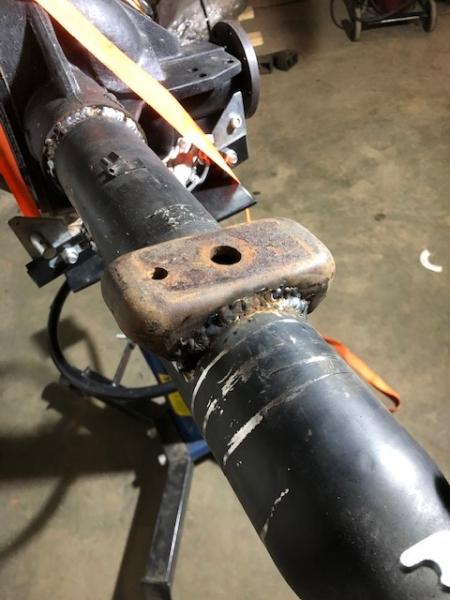
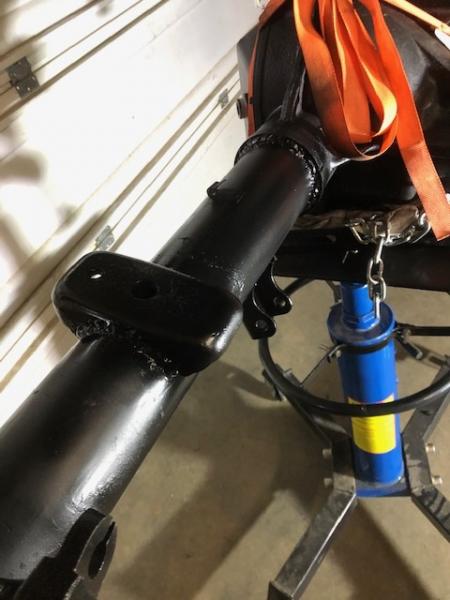
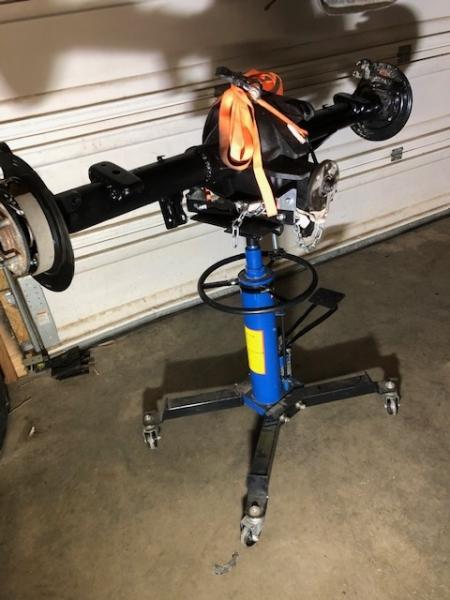
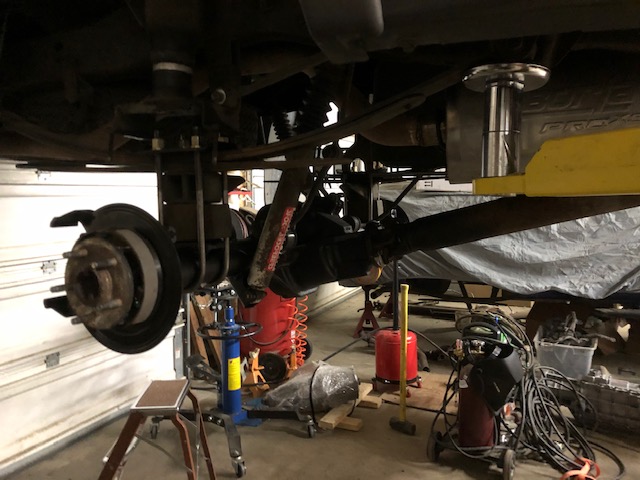
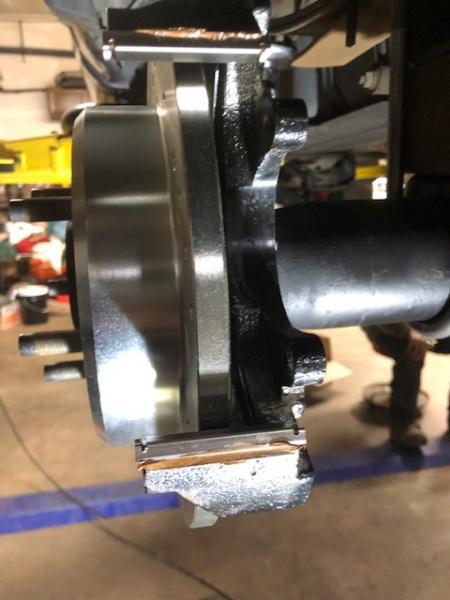
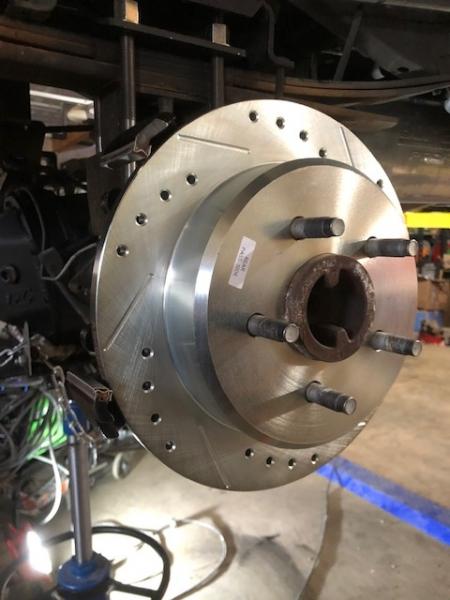
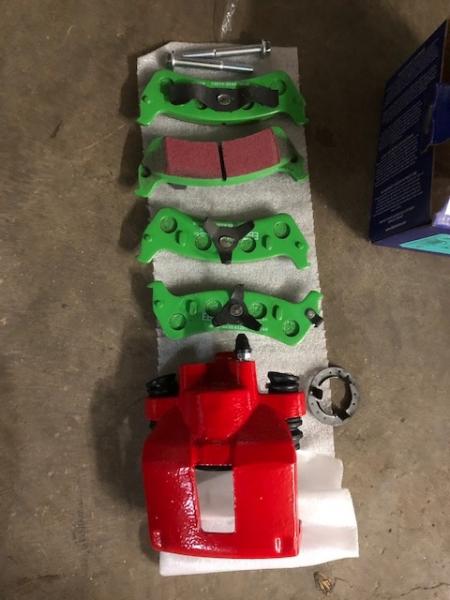
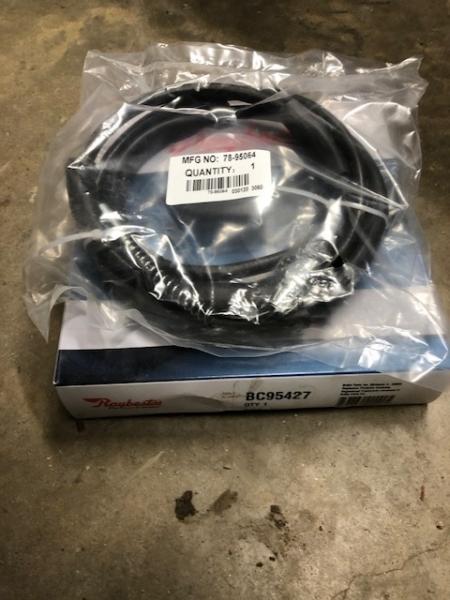
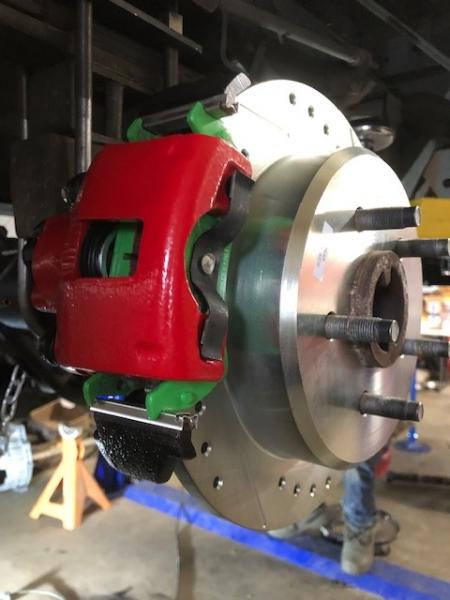
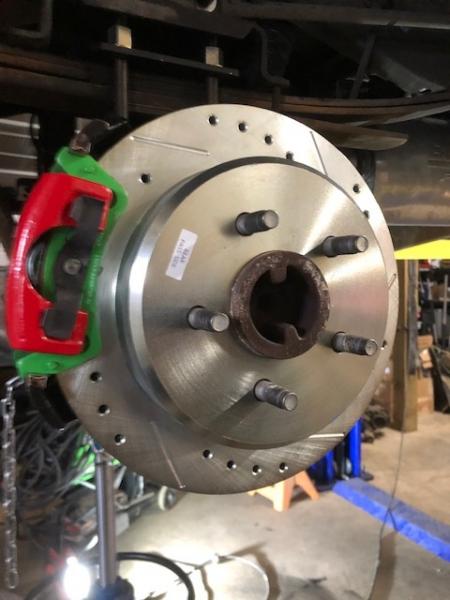
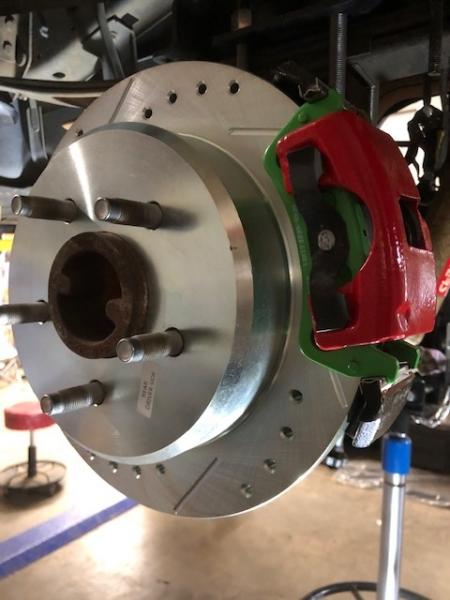
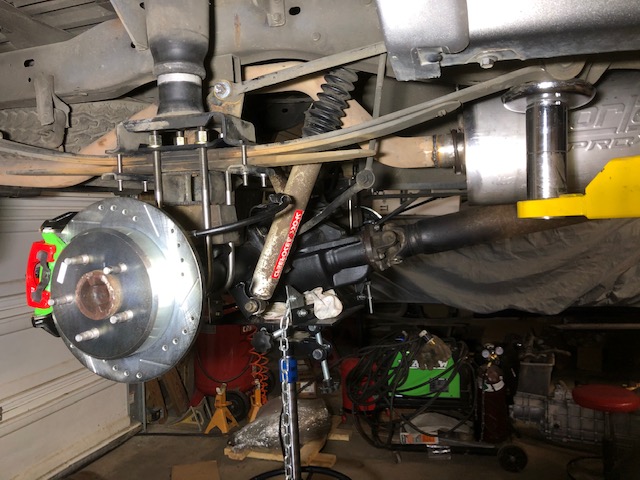
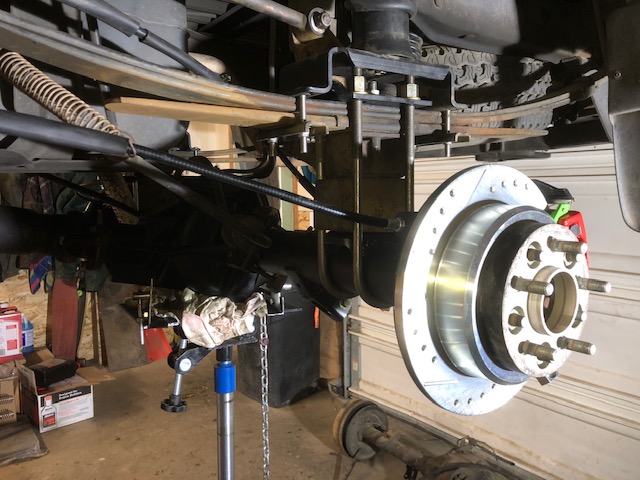
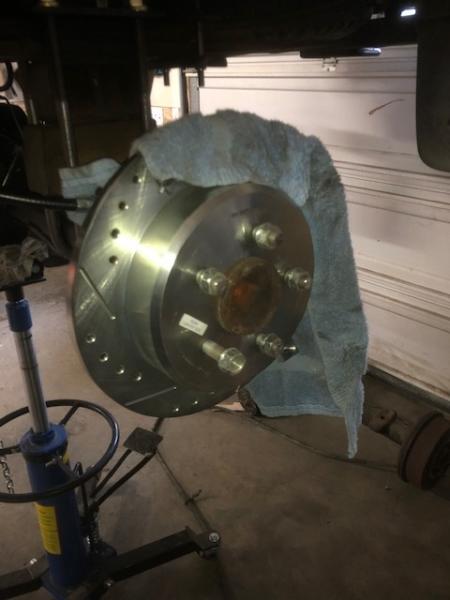
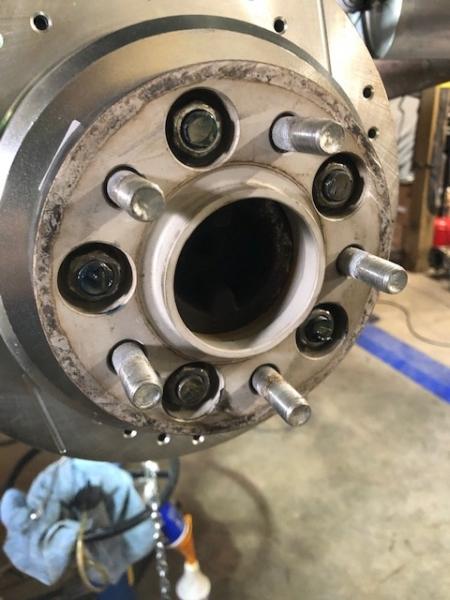
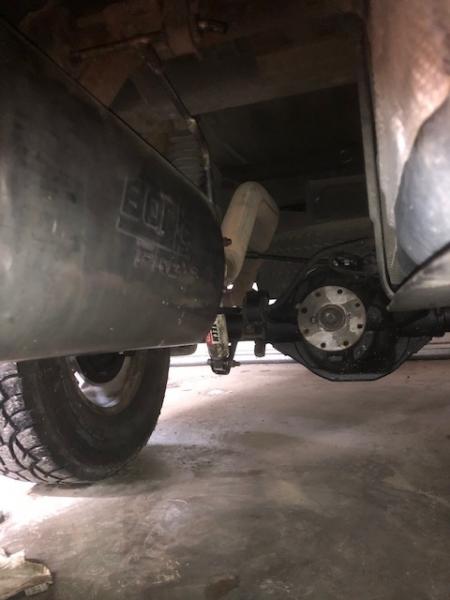
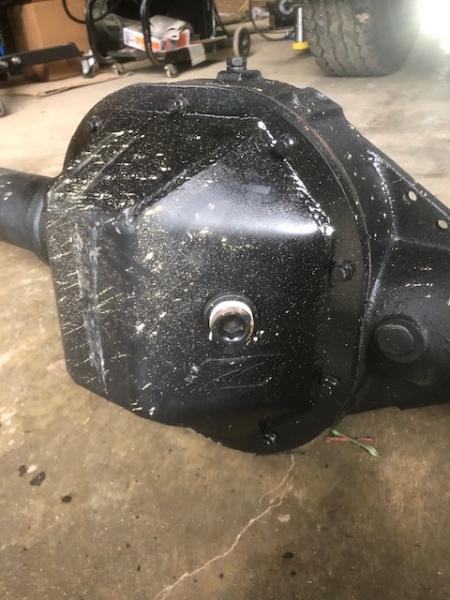
Next up is the rear axle swap, this truck is getting a 31 spline 8.8 from an Explorer. The axle just came back from a local gear shop getting its new Eaton posi trac, Ford racing 4.10 ring and pinion, and all new bearings and seals. A new HD diff cover was added as were brand new backing plates and E brake assemblies. These parts were purchased from East Coast Gear Supply, one of my fav shops to do business with!

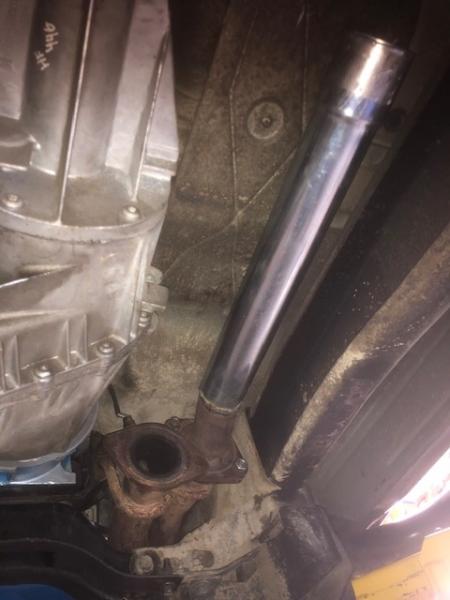
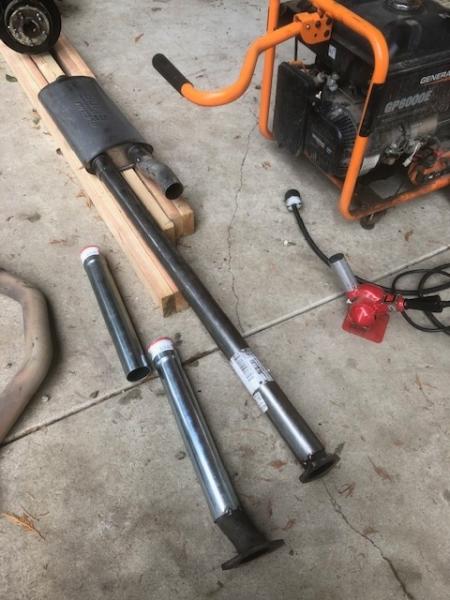
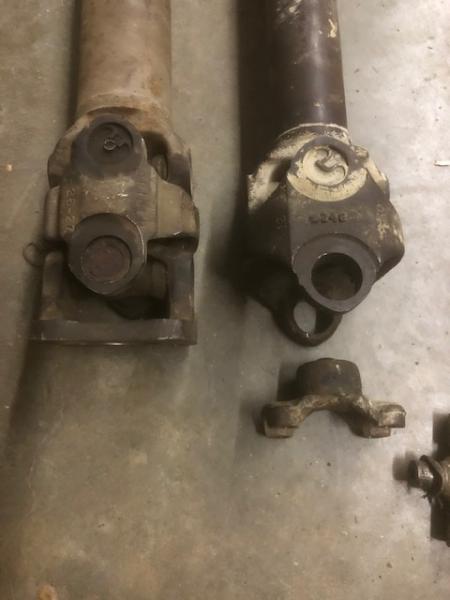
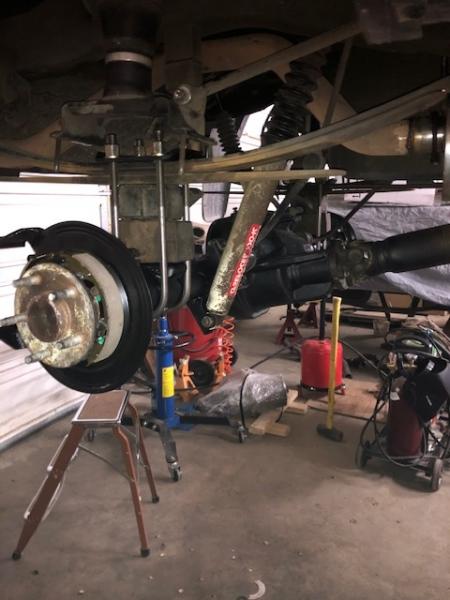
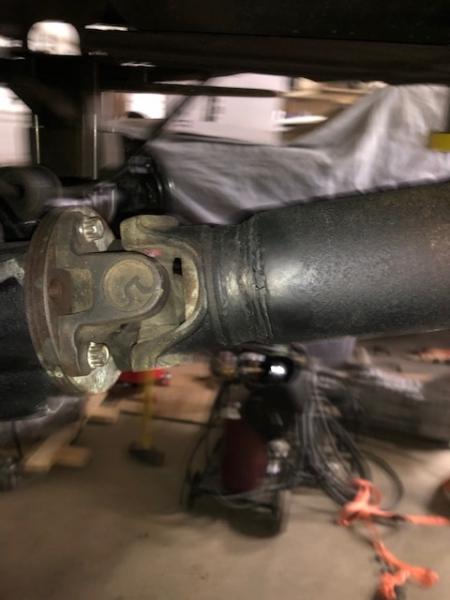
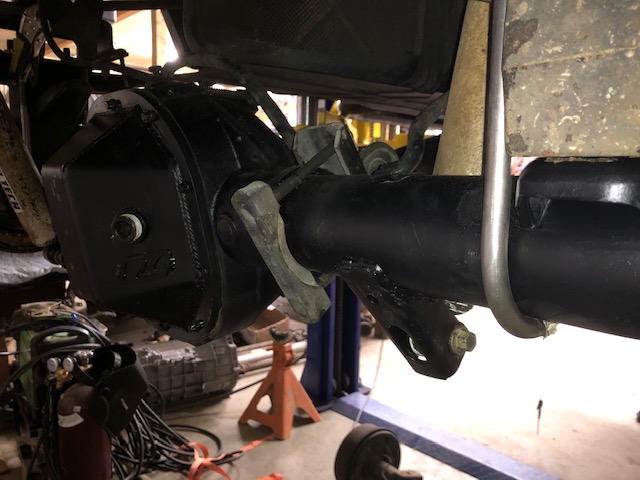
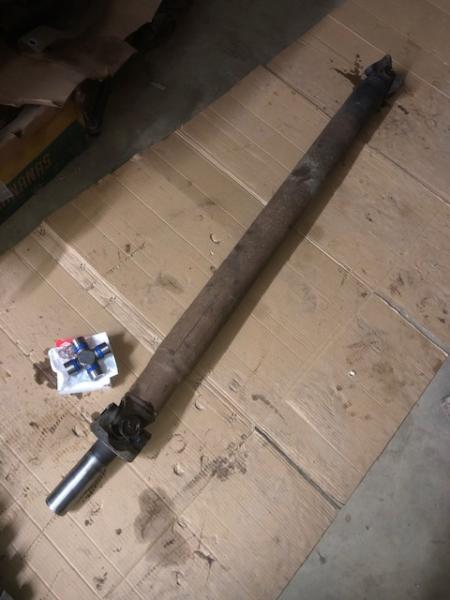
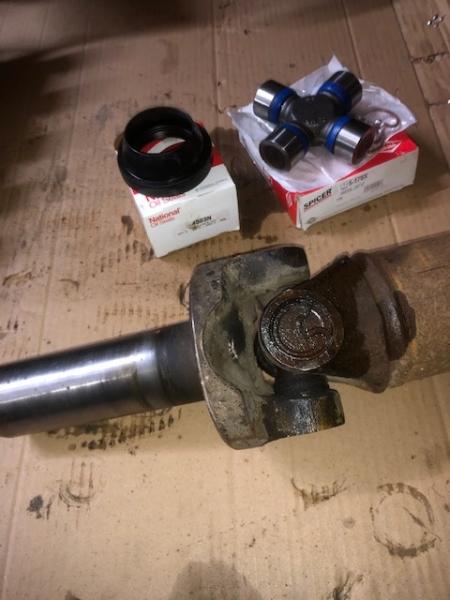
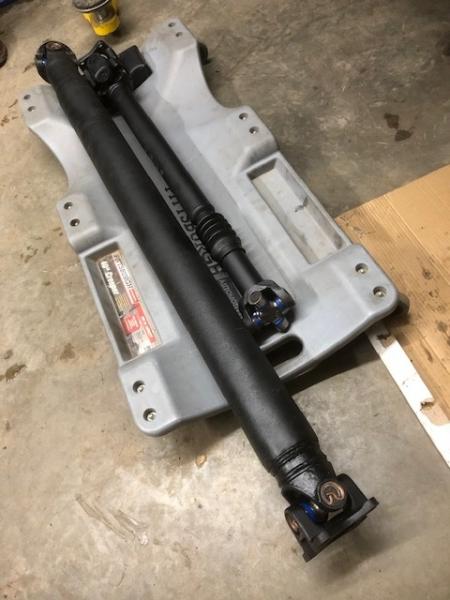
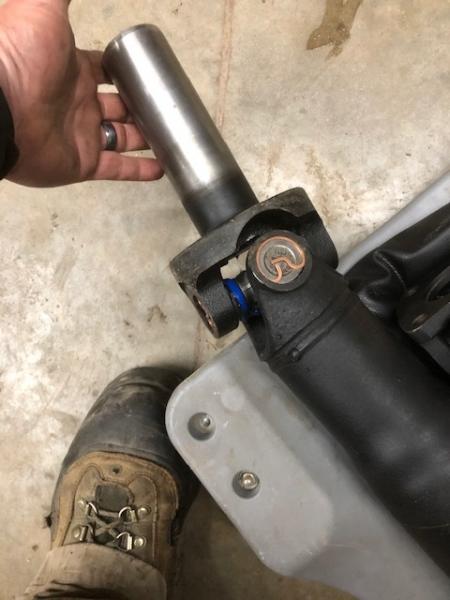
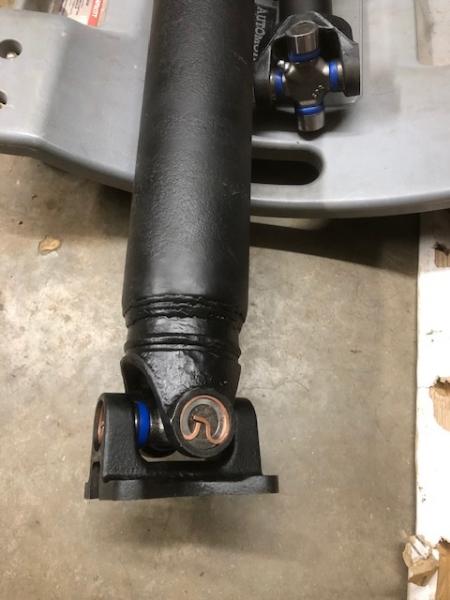
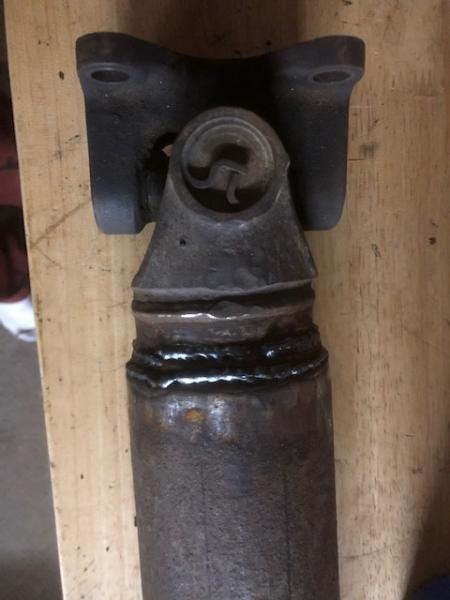
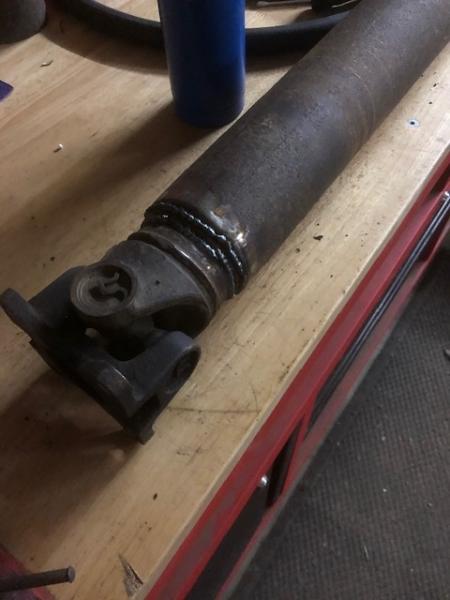
Driveshaft still needs cleaned up and paint, also new Spicer U joints. This is the 410Customs rear d shaft built from a shortened 5.4 F150 unit


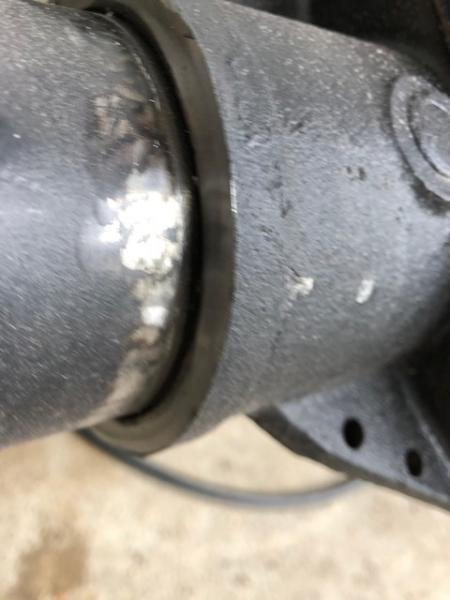
The axle got a little muddy coming home from the diff shop :) 
Don't worry it will get cleaned up. 
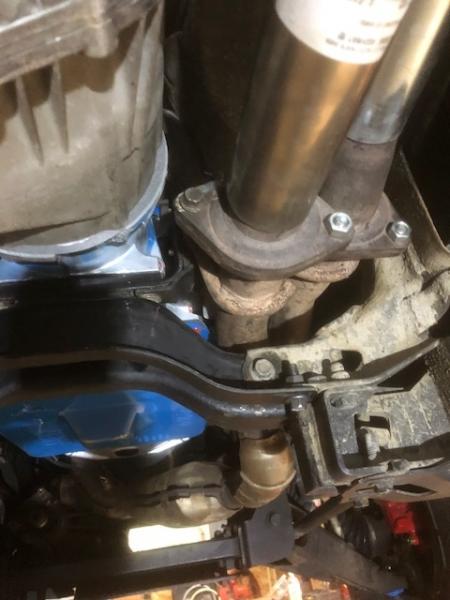
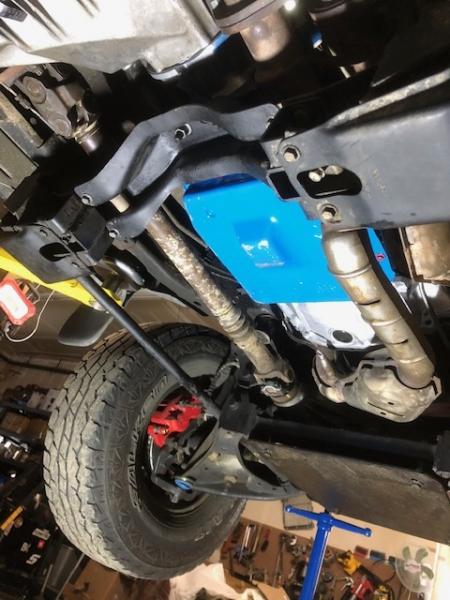
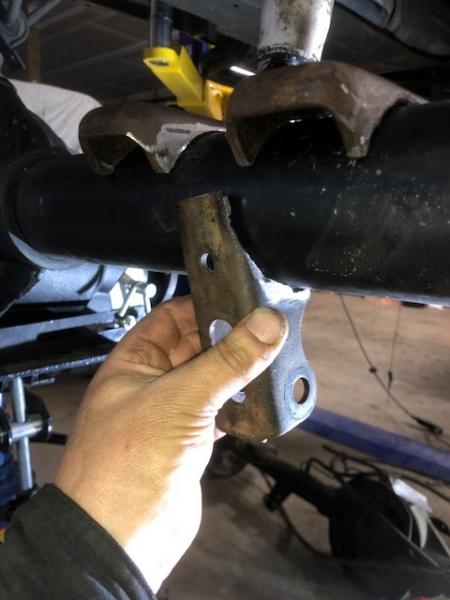
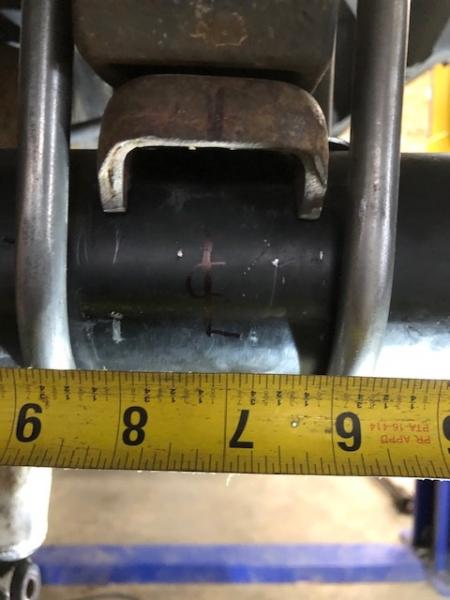
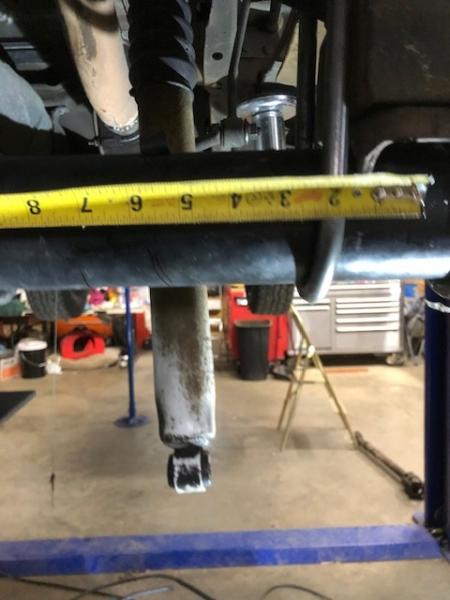
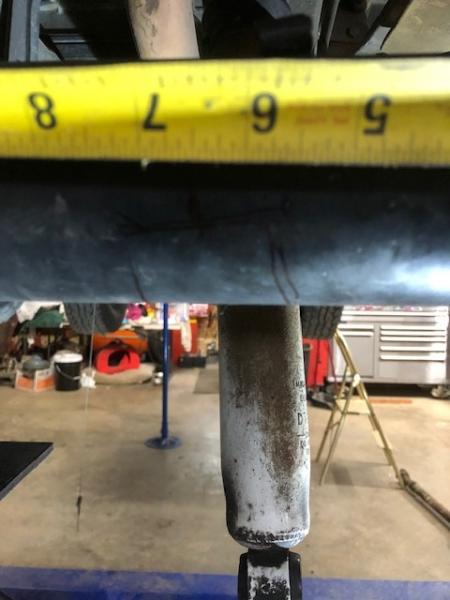
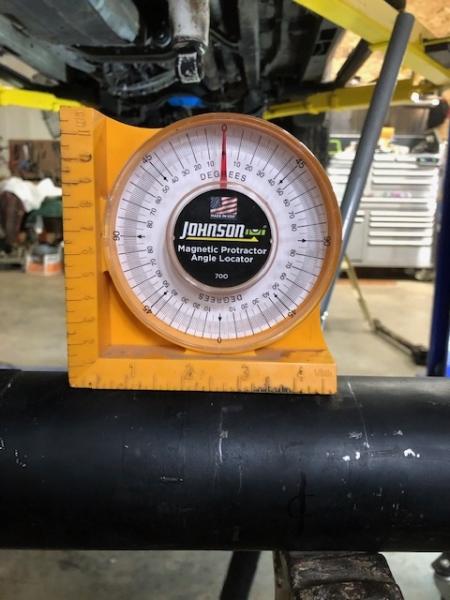
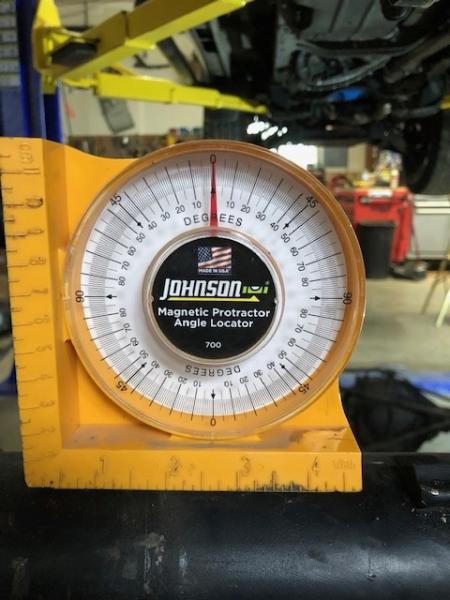
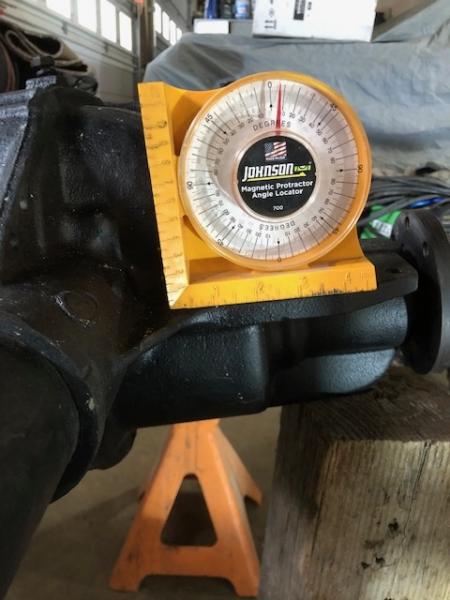
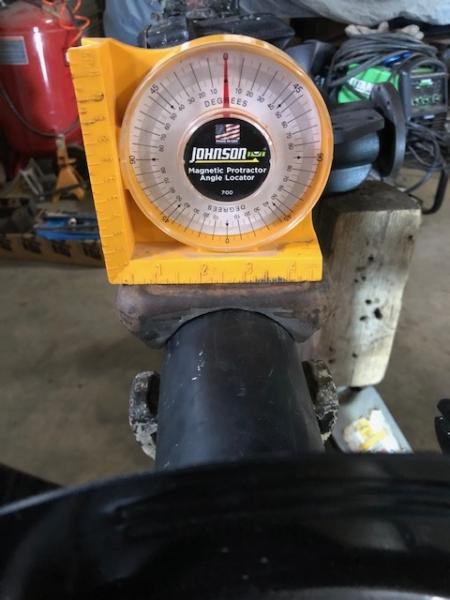
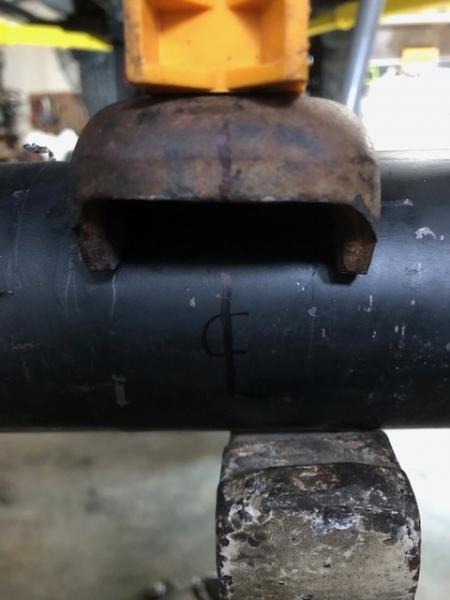
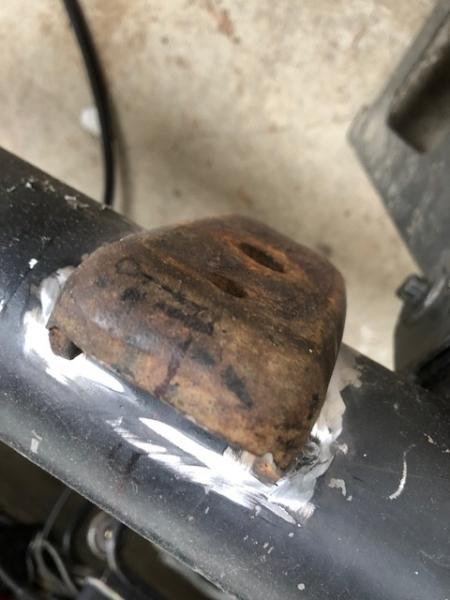
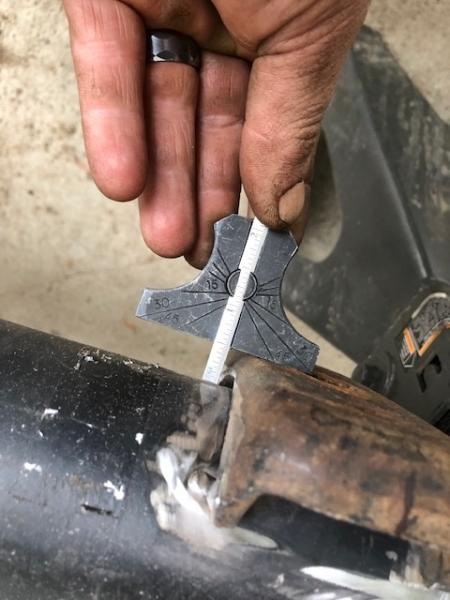
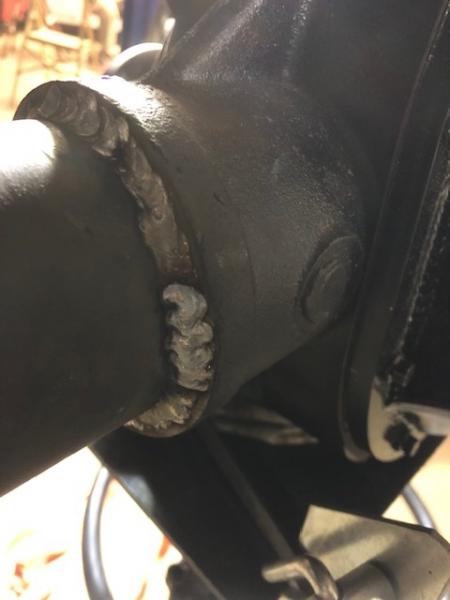
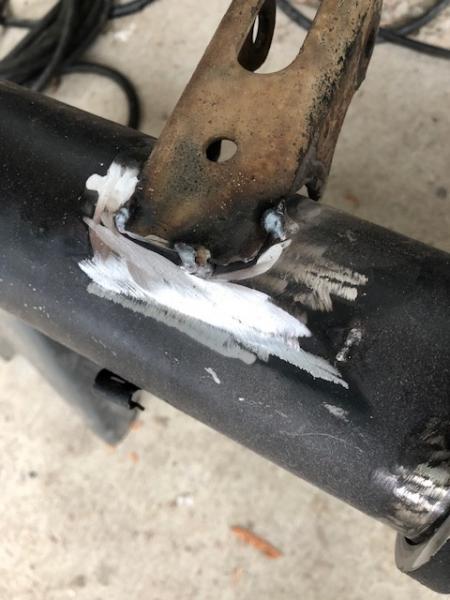
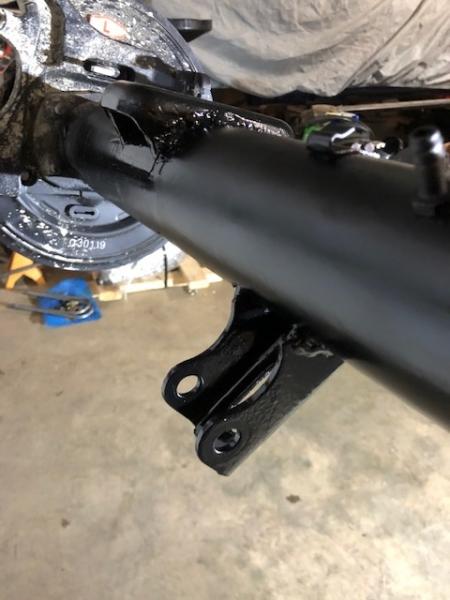
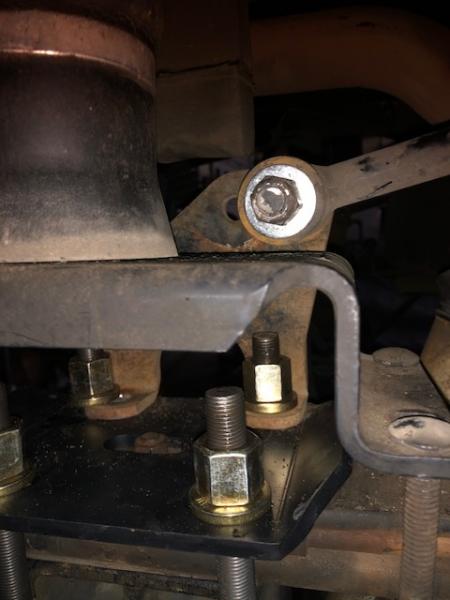
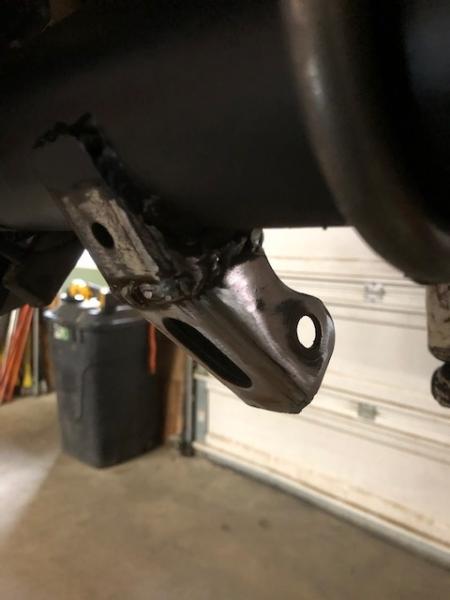
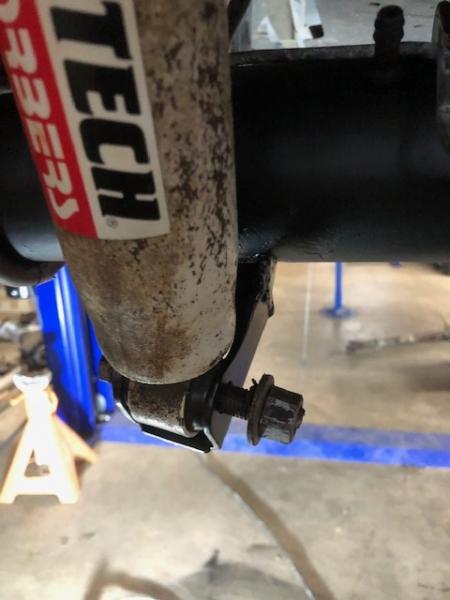
I am about to weld up the Ranger style spring perches and shock mounts so this sucker can go under our Ranger


Next video she will be driving :)


____________________
I build custom RBV, specializing in drivetrain conversions, wiring, suspension and complete custom trucks
Back To Top PM Quote Reply

 Posted: Sun Nov 8th, 2020 07:43 am
PM Quote Reply
110th Post
Junglejoe
Member


Joined: Tue Jun 30th, 2020
Location: Missouri USA
Posts: 293
Name: 
Occupation: 
Interests: 
Status: 
Offline
Reputation: 
Reputation Points: 293
Hmmm... I didnt know that the halo around the ignition switch  didn't have to be changed for the pats.  
Looking real damn good there J!!!


____________________
2000 EFI 302 Zspec T5 swap ranger
Back To Top PM Quote Reply

 Posted: Sun Nov 8th, 2020 10:42 am
PM Quote Reply
111th Post
410customs

Idahome


Joined: Wed May 2nd, 2018
Location: Panhandle, Idaho USA
Posts: 2165
Name: Jamie ...
Occupation: Elevator Design Worlds Tallest Buildings ...
Interests: Ranger Based Vehicles and OFFROAD ...
Status: 
Offline
Reputation: 
Reputation Points: 2165
thank you, a halo is a halo, if the truck has pats b or E the halo is 4 wire halo no need to change it out.
It is just an antenna  

Exhaust is sorted out came out so sick.... rear d shaft is ready for testing, this am I am swapping in the explorer axle. I have a Gen I explorer front driveshaft coming here today for testing also, if all goes well I will be test driving this truck later today!!!!!!!!!!

Very excited about the exhaust I put together it came out perfectly after messing with muffler and pipe placement for the majority of the afternoon yesterday


____________________
I build custom RBV, specializing in drivetrain conversions, wiring, suspension and complete custom trucks
Back To Top PM Quote Reply

 Posted: Mon Nov 9th, 2020 09:38 pm
PM Quote Reply
112th Post
410customs

Idahome


Joined: Wed May 2nd, 2018
Location: Panhandle, Idaho USA
Posts: 2165
Name: Jamie ...
Occupation: Elevator Design Worlds Tallest Buildings ...
Interests: Ranger Based Vehicles and OFFROAD ...
Status: 
Offline
Reputation: 
Reputation Points: 2165
exhaust is complete, rear axle is out


prepping to pull 28 spline 8.8, this is the only use I have ever found for the two "notches" in the bottom of the metal diff cover

now that the fluid is drained we can support the axle and truck, unbolt the shocks, sway bar, U bolts. cut the ranger E brake cables, and cut the brake line after pinching it with some vise grips
One thing I ALWAYS see on these lifted rangers is the rear soft brake line is way tight at full suspension droop.
Easy fix?
Simply bend the upper bracket carefully down, before:


After:

now plenty of slack

and she's out

Oh yeah I cut the U bolts also.... we are using new ones that fit the large 31 spline 8.8 tubes


Time to fab up the exhaust

Here we are using a Borla Pro Xs series stainless muffler with dual 2.5" inlets and a single out

So aft of the stock primary cat converters and downpipes  I used some small bits from the stock explorer exhaust to get things started.

Followed by two very long 2.5" tubes, the lower tube is perfectly straight no bends, the "upper" tube has slight bends in an effort to clear the gas tank support crossmember and for perfect muffler placement.

I made the system bolt in completely, the entire exhaust in this truck can be on the ground if you loose 8 bolts, one clamp and 3 hangers.

Much time was spent mocking it up, then it was removed and final welded.
I cannot WAIT to hear this Borla muffler with these long straight pipes


same height as gas tank skid, similar height as factory exhaust


two new gaskets at the flanges

think those welds are penetrating? :)

stickers were removed with "mr heat" gun, I love that thing


I HATE stickers on exhaust tubes, what a PITA!!!!! LOL
Heat gun and plastic scraper made short work of them

Next onto the front driveshaft
all I have to do is swap the centering yoke on this gen I front shaft to the 4406 style flange mount, replace some U joints and we have ourselves a bolt in DOUBLE CARDAN shaft!!!!!!!


back at it again tomorrow...this time with a test drive in mind, I wonder if I will be able to sleep


____________________
I build custom RBV, specializing in drivetrain conversions, wiring, suspension and complete custom trucks
Back To Top PM Quote Reply

 Posted: Tue Nov 10th, 2020 07:28 am
PM Quote Reply
113th Post
Junglejoe
Member


Joined: Tue Jun 30th, 2020
Location: Missouri USA
Posts: 293
Name: 
Occupation: 
Interests: 
Status: 
Offline
Reputation: 
Reputation Points: 293
Moving right along J. Curious as how that muffler is going to aound..


____________________
2000 EFI 302 Zspec T5 swap ranger
Back To Top PM Quote Reply

 Posted: Wed Nov 11th, 2020 09:48 am
PM Quote Reply
114th Post
410customs

Idahome


Joined: Wed May 2nd, 2018
Location: Panhandle, Idaho USA
Posts: 2165
Name: Jamie ...
Occupation: Elevator Design Worlds Tallest Buildings ...
Interests: Ranger Based Vehicles and OFFROAD ...
Status: 
Offline
Reputation: 
Reputation Points: 2165
front d shaft is sorted out, Cardan joint ball and U joints will be here today so I can build a complete all new shaft

rear axle is almost finished

Plan is to finish, test and deliver this truck this weekend............ crunch time! If all goes well.................... I don't see a problem :) 


So the front driveshaft that fits this truck is a first gen Ranger or Explorer shaft with the cardan joint centering yoke swapped out to one from a 97 F150 (you can also buy the centering yoke new, I just happened to have one in house) We are pretty excited about this, since this truck has a 4406 and a superlift, finding a junk yard solution is AWESOME
So first gen driveshaft with centering yoke removed and swapped to 97 F150 style centering yoke, this gives us the cardan joint at the t case, and the flange needed to bolt to the 4406

Oreillys carries the new Spicer "U joint ball kit" as they call it, basically a new center bearing/ball for the cardan joint and of course 3 new spicer U joints.
Mock up shots:


Now turning attention to the rear axle install

Some notes, Ranger spring perches are 38.5" apart centering pin to centering pin
Stock Ranger pinion angle is 6-8 degrees (call it 7)


When dealing with a 2 u joint rear driveshaft we need the transmission output shaft and the rear axle pinion to be parallel at RIDE HEIGHT

first up need to prep the new spring perches and shock mounts for welding, some time with a grinder and they are ready


Now to mock up the axle, one man crew here so have to get creative to get the axle up that high


with it up high on the big jack stands it was easy to get it on the trans jack so I could raise it into position. 

Now to place it under the leaf springs, install the blocks and hang the axle by the U bolts so it can be centered, pinion angle set and finally spring perches measured and shock mounts tack welded in place

Then axle is lowered, cleaned up (bare metal) and then final welded...

All new U bolts (3.25" wide, 12.5" long) were bent up in town


more on this in a little bit


____________________
I build custom RBV, specializing in drivetrain conversions, wiring, suspension and complete custom trucks
Back To Top PM Quote Reply

 Posted: Fri Nov 13th, 2020 12:34 pm
PM Quote Reply
115th Post
410customs

Idahome


Joined: Wed May 2nd, 2018
Location: Panhandle, Idaho USA
Posts: 2165
Name: Jamie ...
Occupation: Elevator Design Worlds Tallest Buildings ...
Interests: Ranger Based Vehicles and OFFROAD ...
Status: 
Offline
Reputation: 
Reputation Points: 2165
all right here we go rear axle install pics, hang in there folks we are almost done!
So first up the old ranger axle is on the floor, it has been leveled and the spring perches are set at 0 degrees


angle gage set on pinion flange

we can see the stock pinion angle is 7 degrees (on my gauge, its 6 degrees factory +/-)

So now we need to center the new axle under the truck and set the desired pinion angle. Now this truck has a superlift (3" tapered blocks) AND we have now converted to a slip yoke style transfer case and 2 u joint rear driveshaft
So I need pinion angle to match the transfer case output shaft angle, at ride height (+/- 2 degrees)
Turns out, the t case output flange is also at 6 degrees so 6-7 is perfect
remember the new axle is under the truck suspended by the U bolts, loosely. Now it can be centered and pinion angle set, tack welded spring perches and shock mounts

After a bunch of math we know this
Ranger leaf springs are 38.5" apart, centering pin to centering pin
Explorer axle is 53" between backing plates exactly
So 53" - 38.5 = 14.5
half of 14.5 = 7.25" in from backing plate on both sides = centerline of our new perches


Now measuring from the old axle I can tell you the shock mount tabs are 6.5" in from that point or 13.75" in from backing plate. This marks our STARTING point for the shock tabs


lower shock tabs are to be welded at 50 degrees from horizontal with the tops at our now marked starting point AND in line w the shock bolts
Its a fine line we walk here
Now the axle is set on stands and checked for level


pinion turned up to 7 degrees, spring perches on centerline set at 0 degrees
locations marked, surfaces prepped for welding w flapper disc

YEAH BUDDY we are gonna weld the tubes to the center section also. Did some research, the 8.8 center is cast steel......pfft I can mig weld cast steel without special wire

Found during my researcxh of welding the tubes, trusses, 8.8 builds, with welded tubes guys are running these 31 spine 8.8's loclked, welded with 38" and 40" tires in their buggies......... 8.8 large tube has strong kung fu
7 degrees

0 degrees

Spring perches were held in place with magnets, adjusted for height measured 1000 times and then finally tack welded


height adjusted! important

perches must be tall enough to must clear centering pins on the lift blocks and be height correct side to side
weld them up


all of this welding is done in 1" lengths, then the area is left to cool....we do not want to warp a tube


axle cleaned and final paint


let dry, bolt her back up!


check all angles and center.....bang on!
had to modify the ladder bar / airbag bracket to work with the larger tube 8.8


sway bar fits no mods needed


Guess what?


Nobody's perfect! Turns out the drivers shock tab moved before the tack welds and I missed. I had to chop it off, snag another one from another axle and change the angle just ever so slightly
All is well now....... plus chicks dig scars

Now it is in the exact correct spot.....phew lost sleep over that one


what is just a few pictures here, is a whole day of "what's the best way to fix this?" for me

Now time to plumb and mount the brakes, final torque the U bolts. Picked up all new hardware for the air bag mounts

Power stop rotors and calipers, EBC pads, new E brake cables and new brake hoses 


oh baby


I present to you, just in time for the holidays..............


Christmas brakes!!


____________________
I build custom RBV, specializing in drivetrain conversions, wiring, suspension and complete custom trucks
Back To Top PM Quote Reply

 Posted: Fri Nov 13th, 2020 12:58 pm
PM Quote Reply
116th Post
410customs

Idahome


Joined: Wed May 2nd, 2018
Location: Panhandle, Idaho USA
Posts: 2165
Name: Jamie ...
Occupation: Elevator Design Worlds Tallest Buildings ...
Interests: Ranger Based Vehicles and OFFROAD ...
Status: 
Offline
Reputation: 
Reputation Points: 2165
some plumbing to do, fill with gear lube and bleed the brakes, rear axle is done!
time to turn attention to the driveshafts


SWEET


31 spline disc brake 8.8 with 4.10 and Eton limited slip.....ready to rock and roll! 
I really like the firestone airbags and above spring traction bars, good for a lifted daily driven ranger that might go to work from time to time


____________________
I build custom RBV, specializing in drivetrain conversions, wiring, suspension and complete custom trucks
Back To Top PM Quote Reply

 Posted: Tue Nov 17th, 2020 11:37 am
PM Quote Reply
117th Post
Junglejoe
Member


Joined: Tue Jun 30th, 2020
Location: Missouri USA
Posts: 293
Name: 
Occupation: 
Interests: 
Status: 
Offline
Reputation: 
Reputation Points: 293
Looks awesome J!!!


____________________
2000 EFI 302 Zspec T5 swap ranger
Back To Top PM Quote Reply

 Posted: Wed Nov 18th, 2020 08:52 am
PM Quote Reply
118th Post
410customs

Idahome


Joined: Wed May 2nd, 2018
Location: Panhandle, Idaho USA
Posts: 2165
Name: Jamie ...
Occupation: Elevator Design Worlds Tallest Buildings ...
Interests: Ranger Based Vehicles and OFFROAD ...
Status: 
Offline
Reputation: 
Reputation Points: 2165
Thank you! The owner is pretty excited to be able to get his truck back after seeing some of these videos
I am pretty excited to get all the final touches completed

I ordered a Dakota digital speedometer interface last week, it should be here today.Once that is installed we have a complete conversion!!
You see in the 2000 Ranger the old v6 PCM was responsible for "smoothing" the speed sensor signal and sending that signal to the instrument cluster and a few other modules. In 2000 a second speed sensor was added to the transmission, the OSS (output shaft sensor). The 4.0 PCM uses this OSS sensor to calculate vehicle speed. Well our project here is using a 5.0 pcm and in an explorer the G force module and ABS controller do that function. So two choices:

1. Swap in the G force module and ABS controller from the donor explorer

2. Install a dakota digital

We will be doing option 2. The nice thing about the Dakota is that the trucks owner can adjust their speedometer from now on anytime they wish to accommodate tire size changes or gearing changes. The dakota is even a bluetooth device so you can use an app and adjust it while driving. For only $85 on amazon it was a no brainer.


Anyways it has been a crazy week back here! We got 12" of snow/slush in one night...that is normal for back here, but not this early in the season. So it caused some delays, and then driver error on my part caused some more. I broke the plow truck! Luckily it is just an axle shaft yoke and U joint which will actually be getting fixed today, phew

The truck has continued to get tested and worked on, she has been through a few heat cycles now. The cooling system is bled, the power steering is bled and the trans is up to proper level. It required a full 14 quarts of Mercon V, that is a completely new system a full 14 quarts.

Wanna see the engine running with the new exhaust and Borla Muffler? 


Next before we drive this thing wanted to test the smoothness/runout of the in house built driveshaft

smooth like glass!!


So now on to the test driving!!!

For this we need some tires, as the tires that were on this truck are half bald and I have snow outside so.... we borrowed the wheels and coopers from Eddie Moneys 2007 (its actually a 2006 I'm a moron) I know he won't care as he will be on 35's soon enough 

12" of snow

In North Idaho we have seasons, "Winter" and "getting ready for winter"

Fj to the rescue, but too late I already snapped an axle shaft


Because this truck will be running factory style wheels it has been fitted with these nice 1" wheel spacers. For the spacers to work with the new rear axle we had to cut the lugs so our wheels will sit flush


better now


The rear axle was filled with 3 bottle of Lucas 85w-140, the rear brakes were gravity bled and then a final bleed

Now install the tires, drop her down on all 4's  and go for testing!!


The front and rear driveshafts are coming out one more time, the rear is getting two new Spicer U joints and the front needs a boot over the slip yoke, both need paint. 
Also a new seal will be installed on the slip yoke of the transfer case, that the the last part to go on our drivetrain

ANOTHER v8 RANGER ON THE ROAD!!!!!!!!!!!!!!!

New engine, new trans, new drivelines, new new new new the only thing not new is the transfer case and that sucker came out of a 2008 F150 with under 100k..... I really really like this truck!! This thing will probably outlast me that is for sure.


____________________
I build custom RBV, specializing in drivetrain conversions, wiring, suspension and complete custom trucks
Back To Top PM Quote Reply

 Posted: Wed Nov 18th, 2020 09:38 am
PM Quote Reply
119th Post
Junglejoe
Member


Joined: Tue Jun 30th, 2020
Location: Missouri USA
Posts: 293
Name: 
Occupation: 
Interests: 
Status: 
Offline
Reputation: 
Reputation Points: 293
Man..  its clean!!! Looks factory! You'd think you're looking at an explorer. Which is just how they should be!
 I "may" slide my engine back to pull the fan out of the shroud a little. Well see how it cools being only a 1/4 inch out. 

 12 INCHS OF SNOW!!?  The pictures are beautiful! We get snow here in Missouri also..  butttt..... I think I'm moving back to Florida . Having to work in the snow kills me..lmao
   I'm still waiting on that 3rd cyl header tube from Bob over at TM.. get that done ,exahust put on.. then have it tuned finally.
 Speaking of J.. how much clearance is the between the vacume port on the driver valve cover and intake? I'm wondering if the porter shortened  my upper intake some..
 I got the hose on there.. but its very tight!!

 EDIT: How do feel about running  those spacers J? I need 3/4 or 1 inch for the front of my truck for thw 03 cobra wheels

Last edited on Wed Nov 18th, 2020 09:39 am by Junglejoe


____________________
2000 EFI 302 Zspec T5 swap ranger
Back To Top PM Quote Reply

 Posted: Wed Nov 18th, 2020 09:40 am
PM Quote Reply
120th Post
410customs

Idahome


Joined: Wed May 2nd, 2018
Location: Panhandle, Idaho USA
Posts: 2165
Name: Jamie ...
Occupation: Elevator Design Worlds Tallest Buildings ...
Interests: Ranger Based Vehicles and OFFROAD ...
Status: 
Offline
Reputation: 
Reputation Points: 2165
those hoses go on the intake before you install it! PITA to get installed with intake on the engine
Not much clearance, I can get a pic

Snow is gone now, green grass everywhere, we have had 5 days of rain??? Welcome to the PNW!
our road is just slush and dirt with lots of puddles.... I don't want to get this thing too dirty................... but a mans gotta do what a mans gotta do.


____________________
I build custom RBV, specializing in drivetrain conversions, wiring, suspension and complete custom trucks
Back To Top PM Quote Reply

 Posted: Tue Nov 24th, 2020 05:40 pm
PM Quote Reply
121st Post
Junglejoe
Member


Joined: Tue Jun 30th, 2020
Location: Missouri USA
Posts: 293
Name: 
Occupation: 
Interests: 
Status: 
Offline
Reputation: 
Reputation Points: 293
J.. IF you get a chance.. could you see how your engine is sitting with that leveler? I'd like to compare it to mine... front to back.and side to side if you dont mind..


____________________
2000 EFI 302 Zspec T5 swap ranger
Back To Top PM Quote Reply

 Posted: Wed Nov 25th, 2020 09:17 am
PM Quote Reply
122nd Post
410customs

Idahome


Joined: Wed May 2nd, 2018
Location: Panhandle, Idaho USA
Posts: 2165
Name: Jamie ...
Occupation: Elevator Design Worlds Tallest Buildings ...
Interests: Ranger Based Vehicles and OFFROAD ...
Status: 
Offline
Reputation: 
Reputation Points: 2165
sure thing that would be interesting to know I can do that!
truck is getting its final final final updates and checks


____________________
I build custom RBV, specializing in drivetrain conversions, wiring, suspension and complete custom trucks
Back To Top PM Quote Reply

 Posted: Wed Nov 25th, 2020 10:03 pm
PM Quote Reply
123rd Post
410customs

Idahome


Joined: Wed May 2nd, 2018
Location: Panhandle, Idaho USA
Posts: 2165
Name: Jamie ...
Occupation: Elevator Design Worlds Tallest Buildings ...
Interests: Ranger Based Vehicles and OFFROAD ...
Status: 
Offline
Reputation: 
Reputation Points: 2165
All right, finally!! I have a minute here to do update and post updated pics!!

Final checklist being checked off one by one

Truck first short test drives revealed a few issues that needed to be addressed before taking her out on the streets 
First up the bolt I used in the steering shaft was slightly too long, and was striking the drivers side header.
The solution = a shorter bolt, cut to length to clear the header

 2000 Ranger Bolt = slightly too long!


I found a slightly shorter version

cleaned it up, installed, marked length, cut and filed the end, blut loc tite, re-install and


Now it clears by 1/4" or so.....phew! Do not need the steering shaft striking the engine, that sucked! Glad it was an "easy" fix

Next up the driveshafts, now that they have been "bench" tested on the rack and driven around a few times (even 4x4!) it was time to do their final cleaning, U joint install and paint
The rear shaft still needed two new Spicer U joints
Front shaft needed slip yoke boot and paint


The transfer case 4406 output shaft is a slip yoke style, so we always want to install a new seal

Done and done


Then final install of both driveshafts!


Time to turn my attention to some light front end work. With the superlift on this truck, at full droop, the sway bar links were hitting the tie rod ends.


So we need to install new inner tie rod ends, and fabricate some extended sway bar links. These links were already home built and really well done! I am going to copy the design, except this time 1.5" longer


Ouch!


Found a ripped outer TRE boot and rack and pinion boot, sourced better parts for re install


Make sure you measure the old tie rod end assemblies and transfer the length to the new assembly

I will be checking and adjusting toe in the front end before this truck goes down the road.....
Sway bar links will be duplicated except made to be slightly longer


Now time to install the Dakota Digital speedometer interface. 4 total wires, all accessed from under the dash and at/near the gem module


____________________
I build custom RBV, specializing in drivetrain conversions, wiring, suspension and complete custom trucks
Back To Top PM Quote Reply

 Posted: Wed Nov 25th, 2020 10:22 pm
PM Quote Reply
124th Post
410customs

Idahome


Joined: Wed May 2nd, 2018
Location: Panhandle, Idaho USA
Posts: 2165
Name: Jamie ...
Occupation: Elevator Design Worlds Tallest Buildings ...
Interests: Ranger Based Vehicles and OFFROAD ...
Status: 
Offline
Reputation: 
Reputation Points: 2165
Dakota install, 2000 Ranger with 2000 Explorer PCM
Negative battery cable disconnected

We need to use the Dakota box in order to produce the now missing speedometer calculations for this Ranger
The old v6 transmission had a OSS (output shaft speed)  sensor in its tailhousing. 
The V6 engines computer received the signal from this old OSS sensor and performed some calculations, effectively "buffering" the signal into something the Ranger instrument cluster, cruise control, and electronic shift 4x4 can understand. Basically 8000 pulses per mile based on your tire size, is the goal here, that will make all systems happy.

The dakota box requires 4 wires:
1. Speed sensor input
2. Speed sensor output
3. Power in Run or Acc (12V+)
4. Ground (12V-)

Wire 1:
In a 2000 Ranger we can get the speed sensor input from under the dash. The rear axle speed sensor signal is sent to the 4wabs controller (under the hood) and then inside the cab as circuit 679 grey with black (GY/BK)
This wire can be found entering the cab through connector C135

Under the dash. Wire is CUT. Side from the 4WABS computer is sent to the Dakota box as speed sensor IN
Here I soldered and heat shrink a RED wire to act as wire 1, speed sensor in


Wire 2:
Speed sensor output, From the Dakota box back to the truck
This is the BLUE wire, taking our now "buffered" signal back to the truck


Red and blue wires are carefully routed under dash to reach behind the stereo bezel/ to the gem module

Wires 3 & 4:
Power and ground can be found at the GEM module
The Dakota box will be mounted near the gem module, so this is where the wires need to terminate


BK/PK will serve as wire 3, 12V+ in RUN or ACC
BK will serve as our ground
I ran a red and black wire, spliced and soldered into the factory wires


Dakota wiring


Dakota wired! Time to set it up, there are a few initial settings I will cover


Now this trucks speedometer can be adjusted via bluetooth (or manually) while driving. Now that the trucks GEM module is aware there is a speed sensor, the transfer case will also allow the LOW RANGE shift.


____________________
I build custom RBV, specializing in drivetrain conversions, wiring, suspension and complete custom trucks
Back To Top PM Quote Reply

 Posted: Thu Nov 26th, 2020 07:21 am
PM Quote Reply
125th Post
Junglejoe
Member


Joined: Tue Jun 30th, 2020
Location: Missouri USA
Posts: 293
Name: 
Occupation: 
Interests: 
Status: 
Offline
Reputation: 
Reputation Points: 293
Good catch on the steering  shaft bolt! That could have went bad real quick like! 

 I  love reading v8 builds.  I dont know why but it kinda relaxes me. Gives me ideas when I do a 4x4 version for my brother. And probably for my son.  May do a straight axel conversion. Just a thought at this point..

☕☕

Last edited on Thu Nov 26th, 2020 09:09 am by Junglejoe


____________________
2000 EFI 302 Zspec T5 swap ranger
Back To Top PM Quote Reply

Current time is 02:42 am Top Page:  First Page Previous Page  1  2  3  4  5  6  Next Page Last Page    

Ford-Rangers.com Ranger Forum > Ranger Engine Tech > 8 Cylinder Gasoline > 2000 Ranger 300K earned a v8

Users viewing this topic


PHP Version: 8.2.28
Server version: 10.6.21-MariaDB
UltraBB 2.01.01 Copyright © 2008-2025 Jim & Chris
Page processed in 0.0758 seconds (29% database + 71% PHP). 107 queries executed.