Ford-Rangers.com Ranger Forum HomeFord-Rangers.com Ranger Forum Home
Home Recent Topics New posts Search search Menu menu Not logged in - Login | Register

Ford-rangers.com is a discussion forum, a Ranger forum for people who have questions about fixing or modifying
their Ford Rangers or people who just admire their Ranger. Please join and enjoy sharing experiences!

2000 Ranger 300K earned a v8       #: 2221
 Moderated by: Mike69, MaDMaXX, Page:  First Page Previous Page  1  2  3  4  5  6  Next Page Last Page  
New Topic Reply
 Rate Topic 
 Posted: Sun Oct 4th, 2020 10:16 am
PM Quote Reply
51st Post
410customs

Idahome


Joined: Wed May 2nd, 2018
Location: Panhandle, Idaho USA
Posts: 2165
Name: Jamie ...
Occupation: Elevator Design Worlds Tallest Buildings ...
Interests: Ranger Based Vehicles and OFFROAD ...
Status: 
Offline
Reputation: 
Reputation Points: 2165
Now with the engine in place its time for some wiring
First up we need to install the starter harness metal bracket that holds the harness out of harms way, under the oil filter mount and away from the cooling stack
The explorer has a hole here for this bracket, ranger does not. So I drill a 11/16 hole and use a self tapper bolt


bracket in, just like if Ford made a 5.0 Ranger :)


Now this starter/battery ground wire loom runs along the front of the 5.0 oil pan and there are supposed to be two studs in the 5.0 timing cover to accept it. The Jasper reman 306 does not have these studs, so I had to swap out there bolt for one of my own....I only have one of these studs/double sided bolts in the shop! So I used it on the important side....where the main drivetrain to battery ground is:


The other side just uses the Jasper bolt


Oddly enough when I went searching my "spare" 302 engines that I have in the shop for these bolts I could only find one....why? Because the other engine I have is also a 306 Jasper reman with only 18,000 miles on it I have been holding onto to install in my own personal Sport trac build next year..............

Now time for the wiring harness!!
Our harness was cleaned and re wrapped by the truck owner....bitchin! Saves me more work...I did however add a bunch of zip ties, anywhere the electrical tape wrap ends I like to zip tie so it never un wraps


Wiring harness laid in place

DONT FORGET to use the factory plastic wire clips to keep this a stock like conversion


Wiring is in!


Small issue, the owner installed new coolant temp sensors, one of them is not the correct part, or at least it does not match our wiring harness. I shaved off the wiring pin so the harness will plug in, if the coolant temp does not read properly we will swap for the oem sensor


Time to install trans cooler lines, scatter shield, flexplate, torque converter and finally transmission 

Fish in trans cooler lines while there is still room


Now to stage the transmission parts
Holey moley pink lettering? This trans better work better then it looks! LMFAO!!!!!!


Scatter shield had to be drilled out slightly ti fit over Jasper locating dowels, rest in place and then flexplate was installed to engine with stock explorer bolts and plenty of red loc tite

Torque converter was filled with 1+ quart of Amsoil mercon V compatible ATF, hub was cleaned and lubed with vaseline so front pump seal never sees a dry surface


Truck was lifted, converter fully seated in trans and finally trans was stabbed.......I have done a few "how to's" on stabbing up an auto trans, if anyone needs to see this let me know. 
No need to clutter it up in here any further.

Trans is stabbed, bolted to engine with all 6 bellhousing bolts, the converter is bolted through flexplate with 4ea 9/16 nuts, engine is turned over clockwise with 15/16 socket to accomplish this.
Converter pulls forward 3/8" when you install the first nut, this is how you know you have properly seated the converter.

Next up is the trans dipstick, new Motocraft starter and the torque converter cover plate


____________________
I build custom RBV, specializing in drivetrain conversions, wiring, suspension and complete custom trucks
Back To Top PM Quote Reply

 Posted: Sun Oct 4th, 2020 10:59 am
PM Quote Reply
52nd Post
Junglejoe
Member


Joined: Tue Jun 30th, 2020
Location: Missouri USA
Posts: 293
Name: 
Occupation: 
Interests: 
Status: 
Offline
Reputation: 
Reputation Points: 293
Oops..double post

Last edited on Sun Oct 4th, 2020 11:05 am by Junglejoe


____________________
2000 EFI 302 Zspec T5 swap ranger
Back To Top PM Quote Reply

 Posted: Sun Oct 4th, 2020 11:05 am
PM Quote Reply
53rd Post
Junglejoe
Member


Joined: Tue Jun 30th, 2020
Location: Missouri USA
Posts: 293
Name: 
Occupation: 
Interests: 
Status: 
Offline
Reputation: 
Reputation Points: 293
Love thw progress!!!!
 Does Bob at TMH still put the  thing in the collector of the header.. the pointed tip.. forgot what it was called


____________________
2000 EFI 302 Zspec T5 swap ranger
Back To Top PM Quote Reply

 Posted: Sun Oct 4th, 2020 01:14 pm
PM Quote Reply
54th Post
410customs

Idahome


Joined: Wed May 2nd, 2018
Location: Panhandle, Idaho USA
Posts: 2165
Name: Jamie ...
Occupation: Elevator Design Worlds Tallest Buildings ...
Interests: Ranger Based Vehicles and OFFROAD ...
Status: 
Offline
Reputation: 
Reputation Points: 2165
yes sorry he does indeed, there is a 4 to 1 collector piece inside there


____________________
I build custom RBV, specializing in drivetrain conversions, wiring, suspension and complete custom trucks
Back To Top PM Quote Reply

 Posted: Sun Oct 4th, 2020 06:41 pm
PM Quote Reply
55th Post
Junglejoe
Member


Joined: Tue Jun 30th, 2020
Location: Missouri USA
Posts: 293
Name: 
Occupation: 
Interests: 
Status: 
Offline
Reputation: 
Reputation Points: 293
I actually read that that piece helps scaveging..


____________________
2000 EFI 302 Zspec T5 swap ranger
Back To Top PM Quote Reply

 Posted: Sat Oct 10th, 2020 11:03 am
PM Quote Reply
56th Post
410customs

Idahome


Joined: Wed May 2nd, 2018
Location: Panhandle, Idaho USA
Posts: 2165
Name: Jamie ...
Occupation: Elevator Design Worlds Tallest Buildings ...
Interests: Ranger Based Vehicles and OFFROAD ...
Status: 
Offline
Reputation: 
Reputation Points: 2165
I believe that! it looks like a piece of jewelry in there. I will get pics of it before I install down pipes

Much progress has been made and then life happens:
I had huge elevator drawing deadline, also had to finish up getting the addition to the house "dried in" before snow hits, oh and one other small thing happened...we closed on our third house up here in North Idaho!!!! WOOOO HOOOO!!. 

Now you are thinking, 3 houses? and to that I respond, "yes three mother Fn houses!!" 

Our life savings is wrapped up in the super hot real estate market up here in N Idaho... plus I come with built in renters, I have two stepsons whom both have families and I have a mother in law who wants to move up here from CO eventually...along with a few of my old CO neighbors.........everyone moving to Idaho if you didn't hear...........so when we sold our place in CO we wanted to come up here and invest...well we have done it!! Who knew? One house in Colorado worth 3 up here in rural North Idaho!!!!!!
So this 3rd house also happens to have a couple of HUGE SHOPS and its in town, on the grid, which will make some things related to trucks much much easier....like dealing with craigslist and Facebook people without having to deal with our 2 mile trail we call a driveway...................... anywho, life happens, deadlines have been met, addition is dried in just in time for rain, and I still make time to get this truck built....so onto the pics!! 


I'm hoping to turn the key next week :) shhhhhhhhhhhhhhhh Eddie Money is reading this and his truck is still waiting for me to finish all this other crap. To that I say "HEATED GARAGE IN TOWN" 07 will get built one way or the other, I have NO OTHER PROJECTS after this truck, everything else is DONE!!!!!!!!!! I have a guest room now if you want to move in and help, you can be my funny, encouraging camera dude and pick the shop music!!!


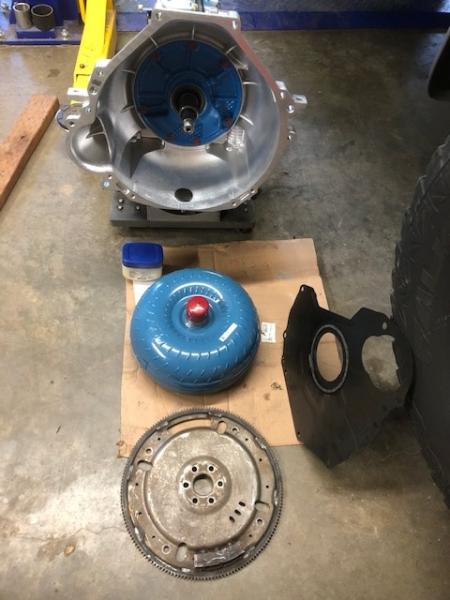
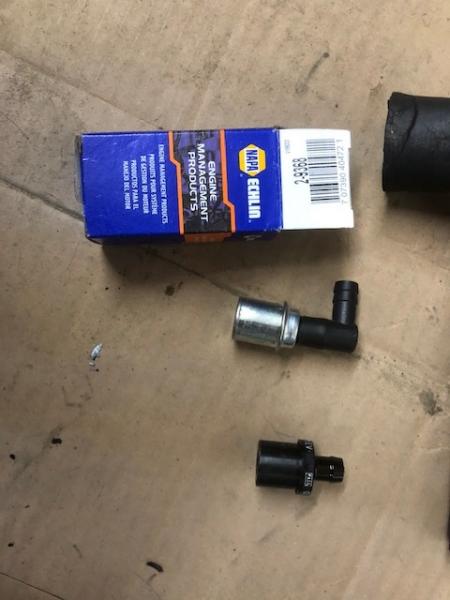
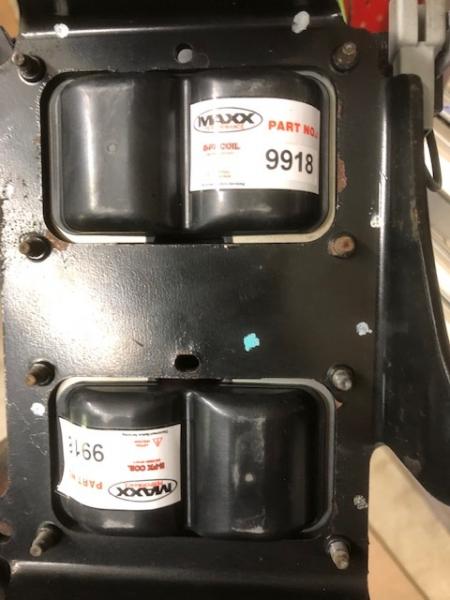
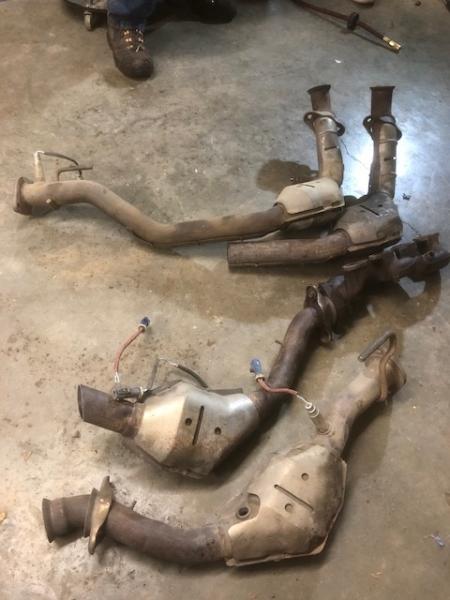
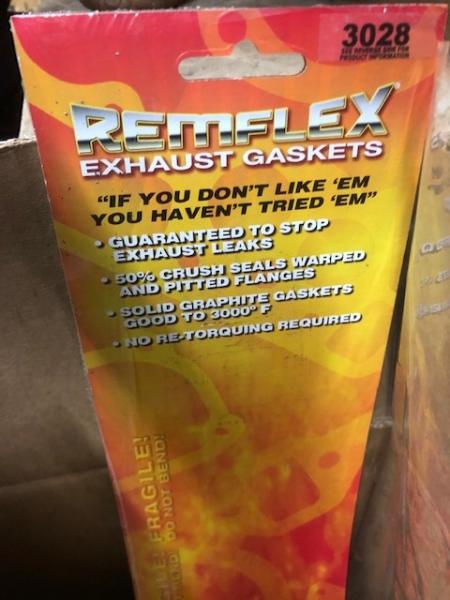
First up, here is the Remflex gasket package for part number reference

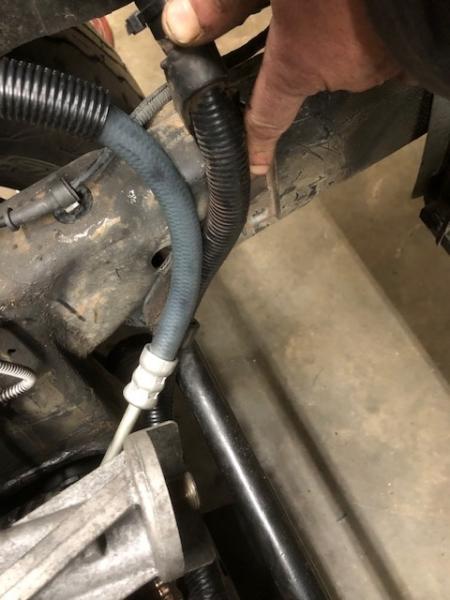
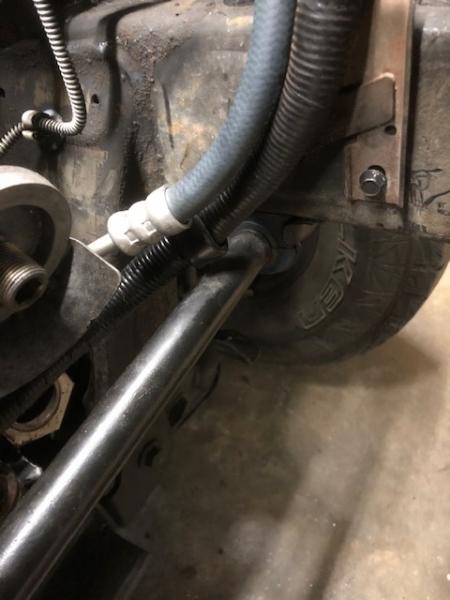
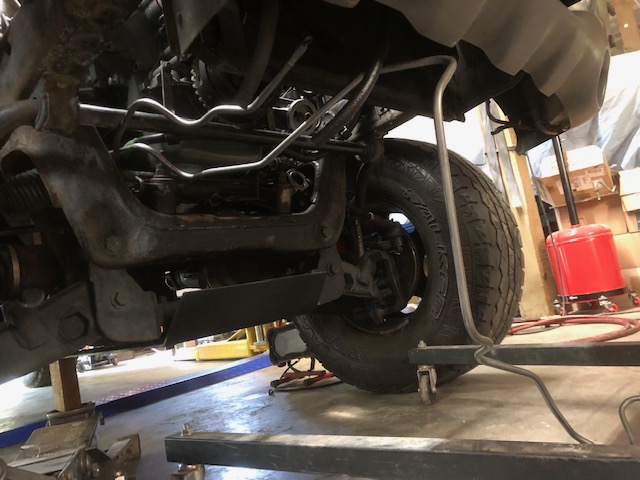
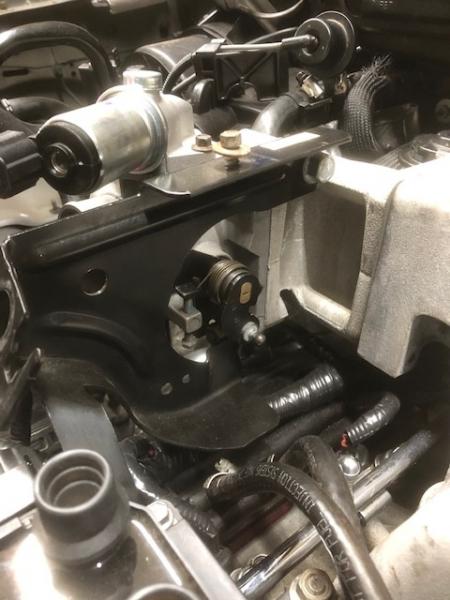
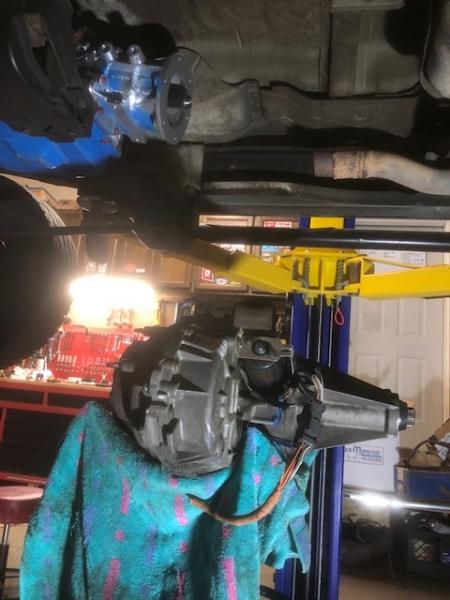
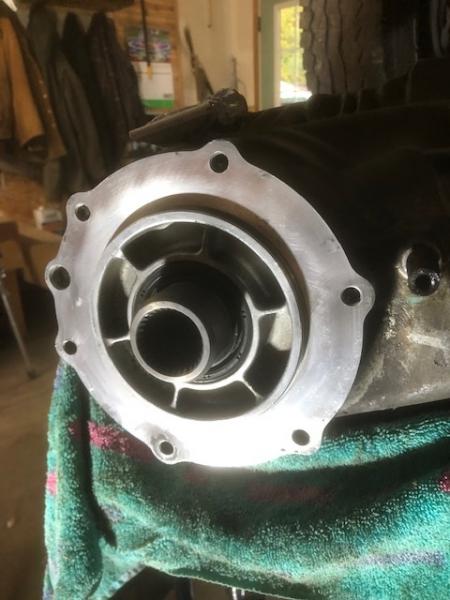
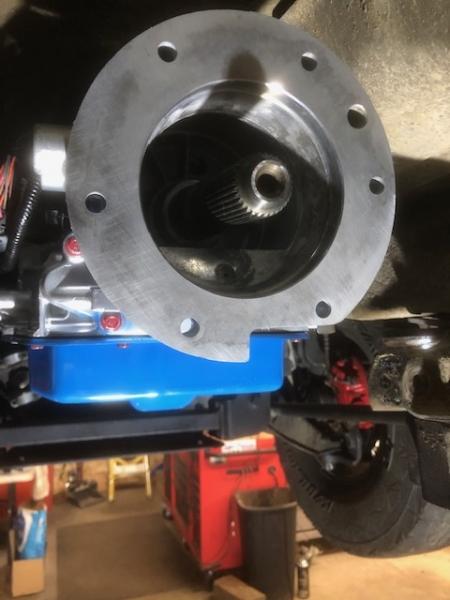
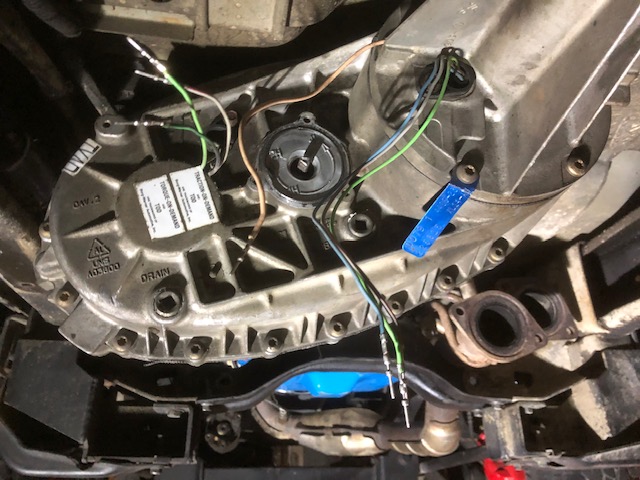
trans is stabbed to engine, so its time to install the cooler lines, starter, lower converter cover and trans dipstick

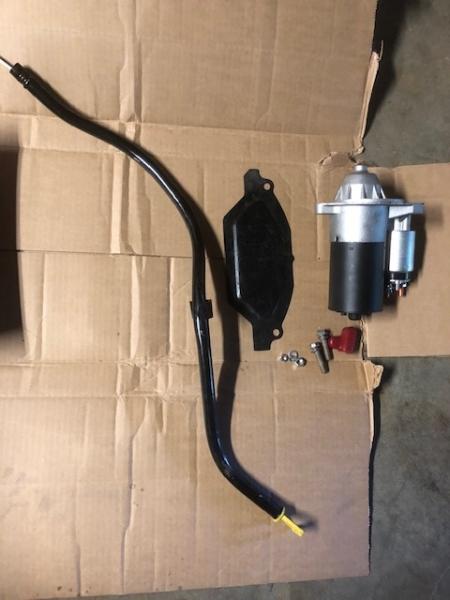
Trans dipstick is easier to install if you raise up the back of the transmission quite a bit, pull the actual dipstick out of the tube, and drop the tube in from the top, rotate it as it goes down. Then you can access the hold down bolt from behind the lower intake. I had to install the tube 2-3 times in order to bend the hold down tab into the correct position, this is pretty common, these tubes get bent up when the drivetrains are pulled.


trans cooler lines and dipstick tube cleaned one last time before install (compressed air)
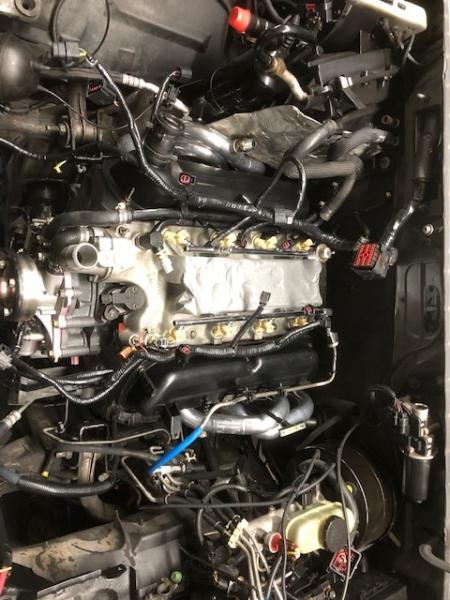
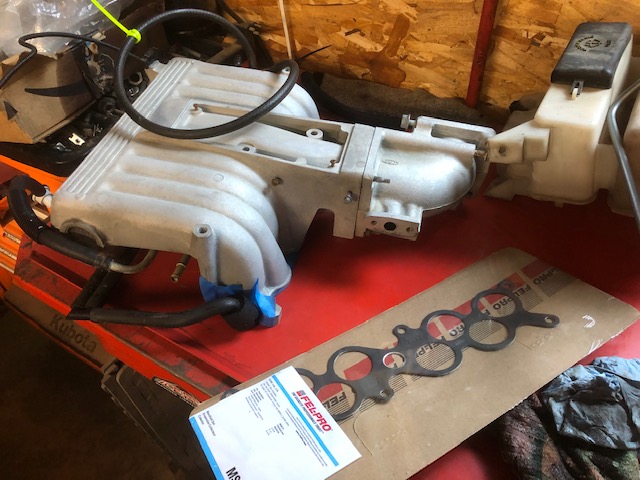
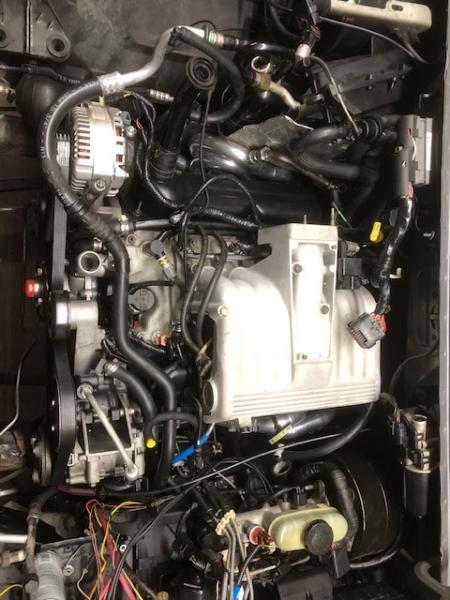
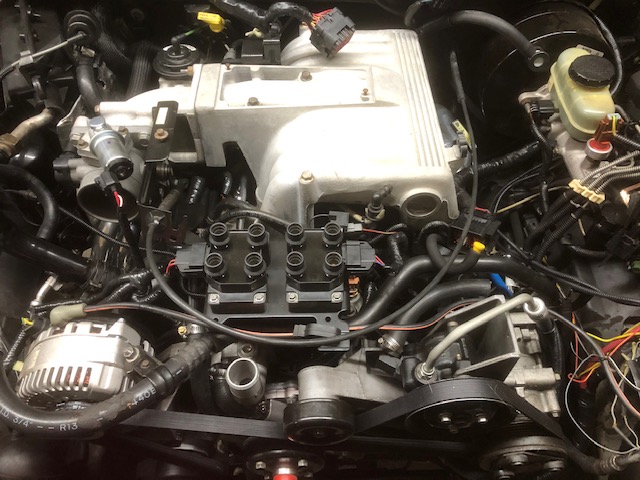
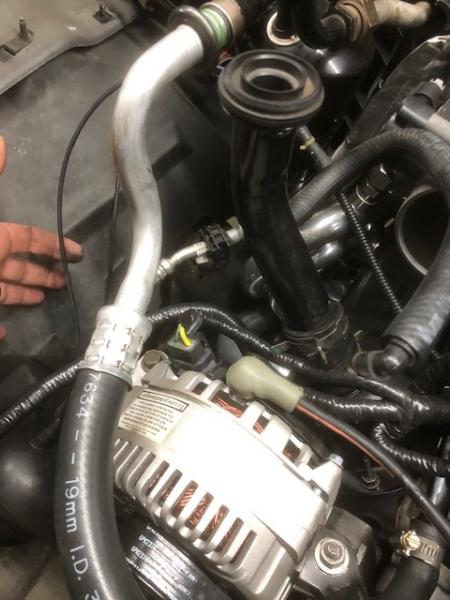
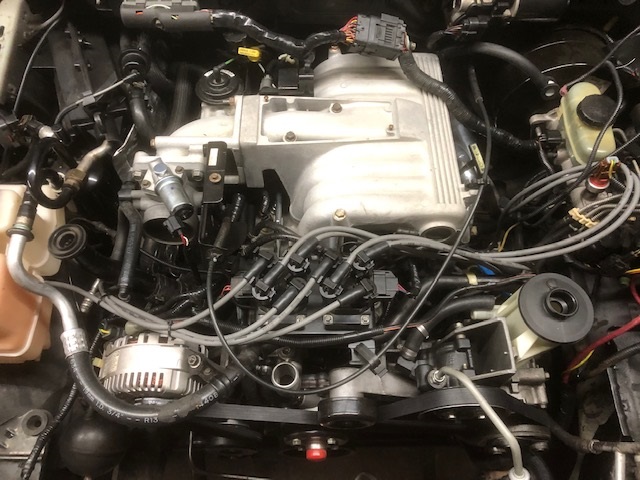
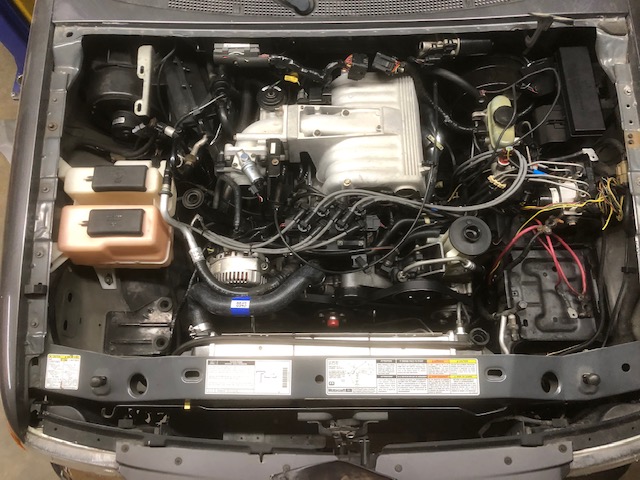
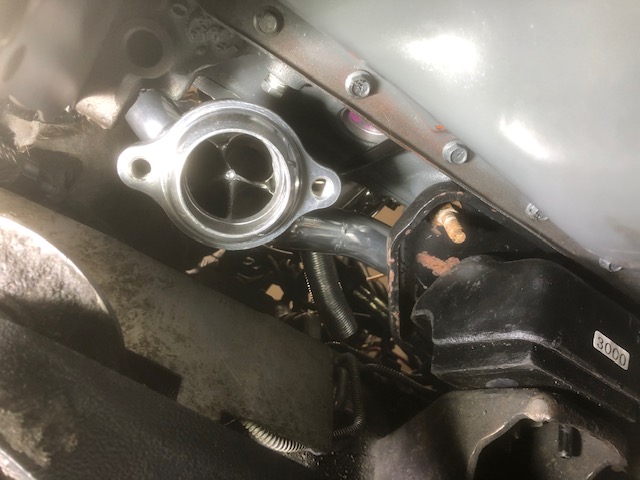
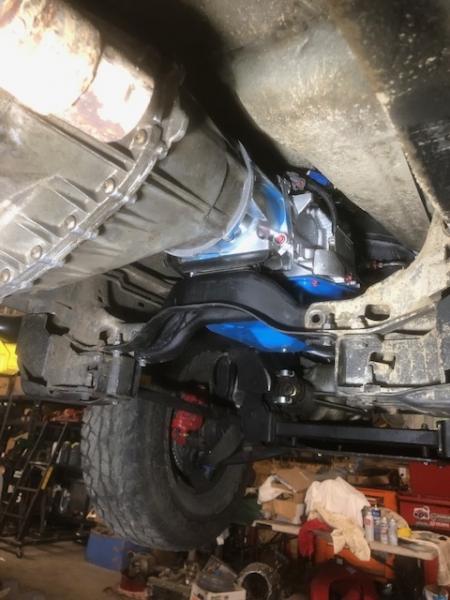
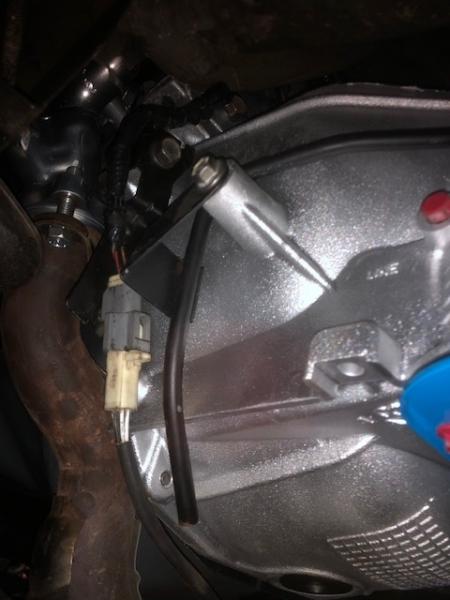
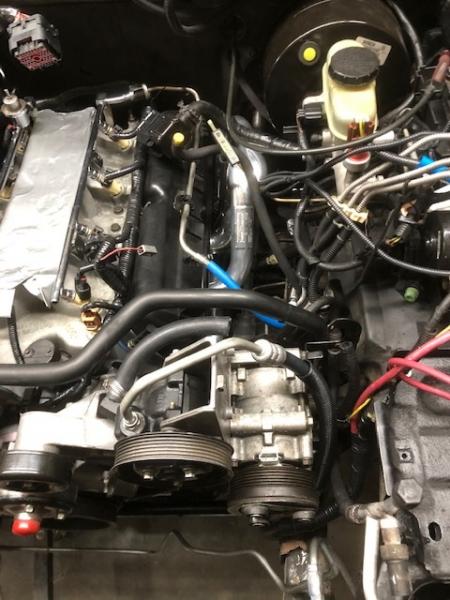
Shot of the engine bay thus far

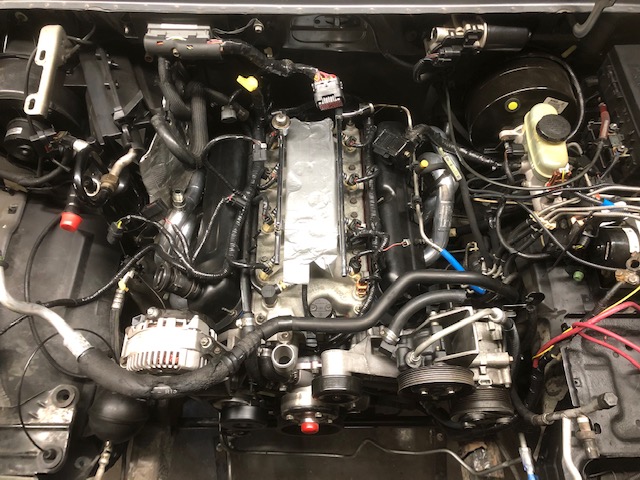
Yes yes there are more parts bolted on in this pic... I do not need to show you guys how to attach the drivers and pass side accessory brackets HAHAHAHA
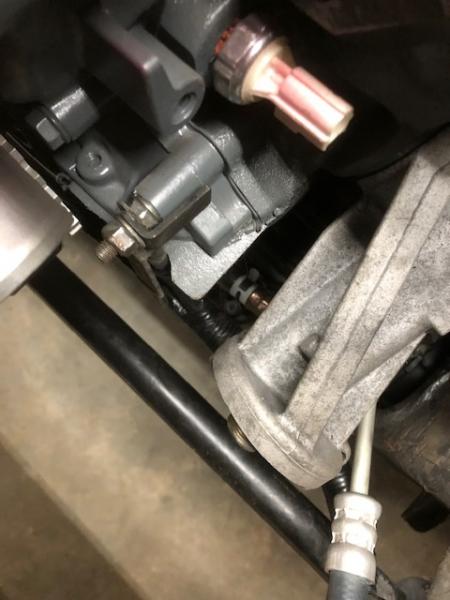
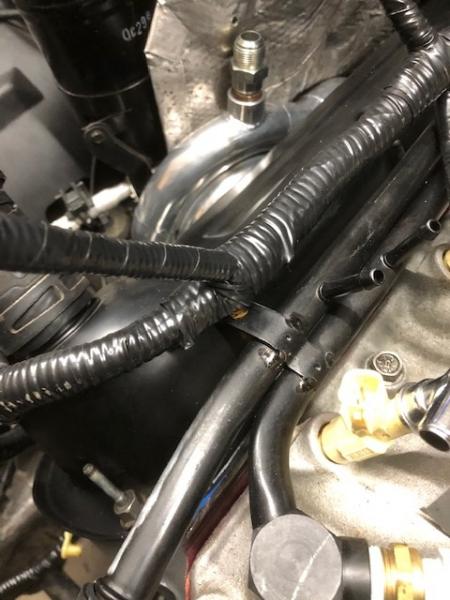
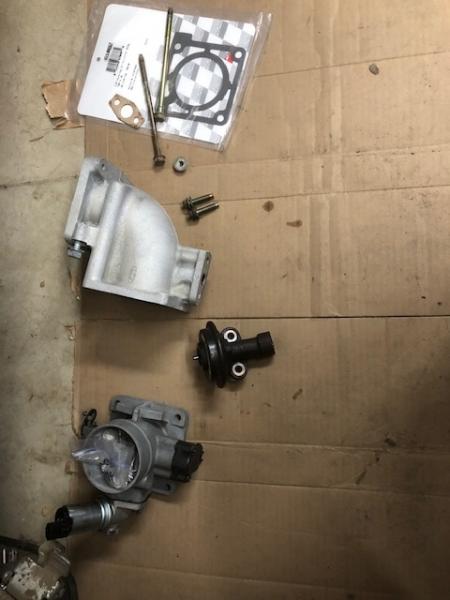
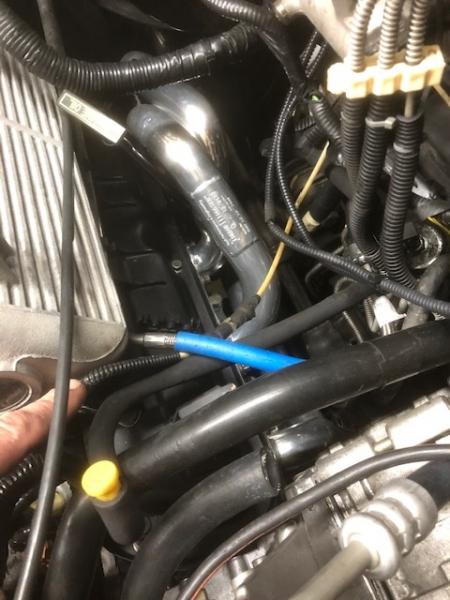
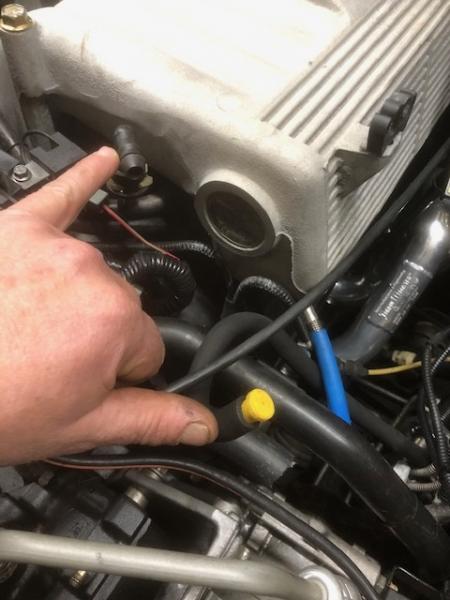
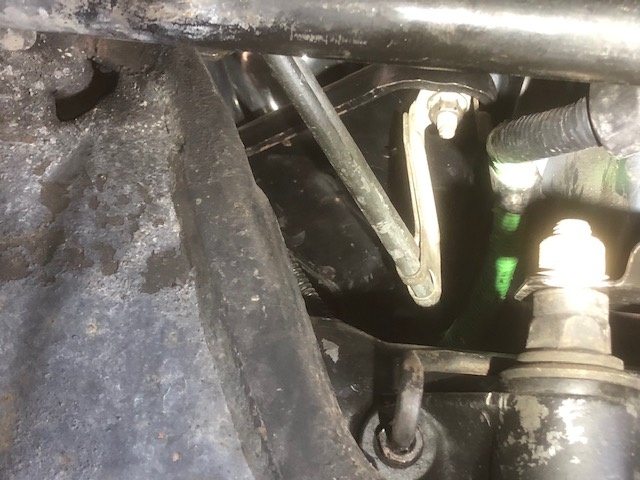
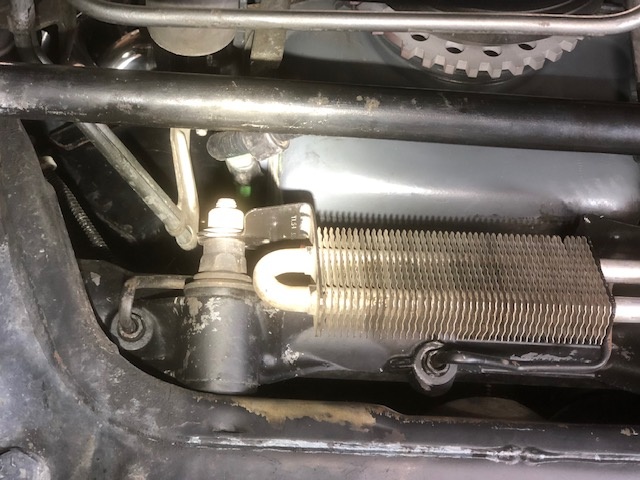
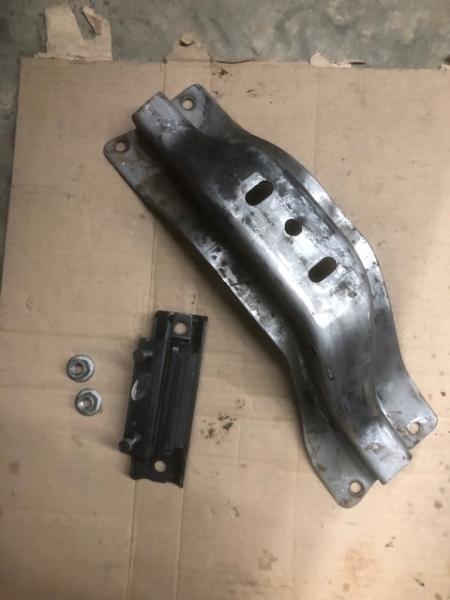
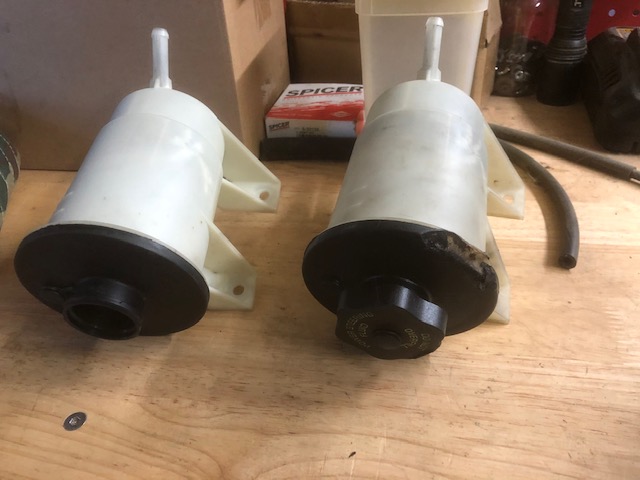
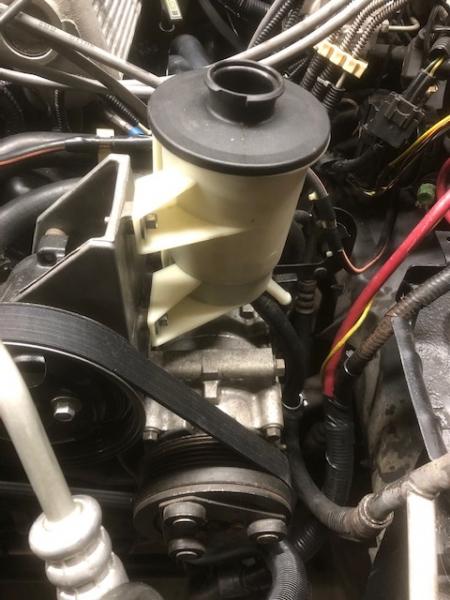
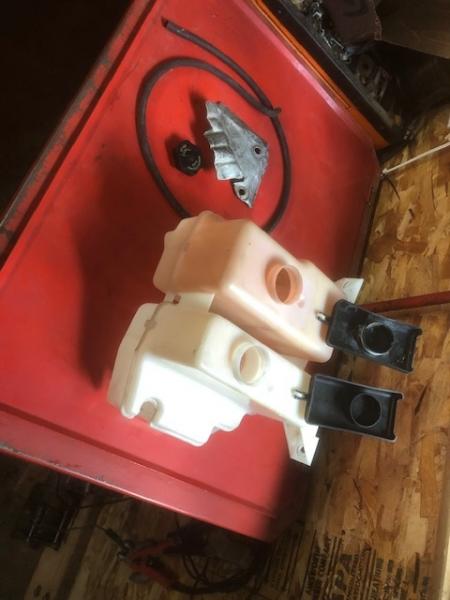
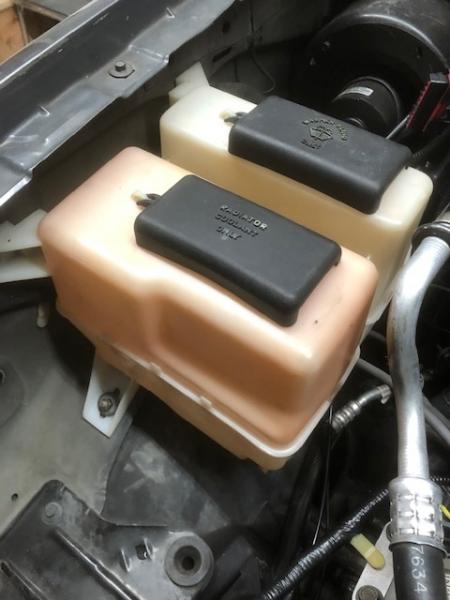
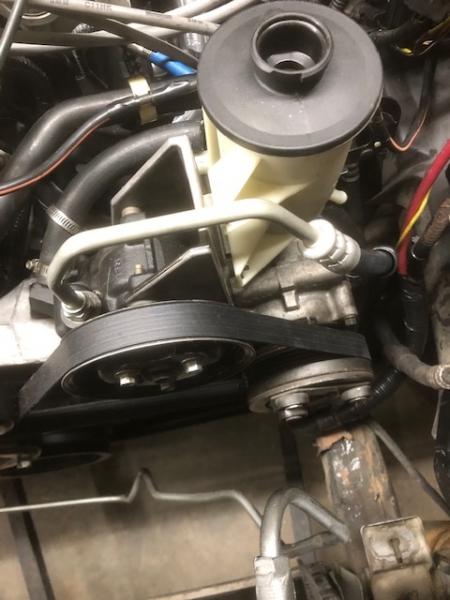
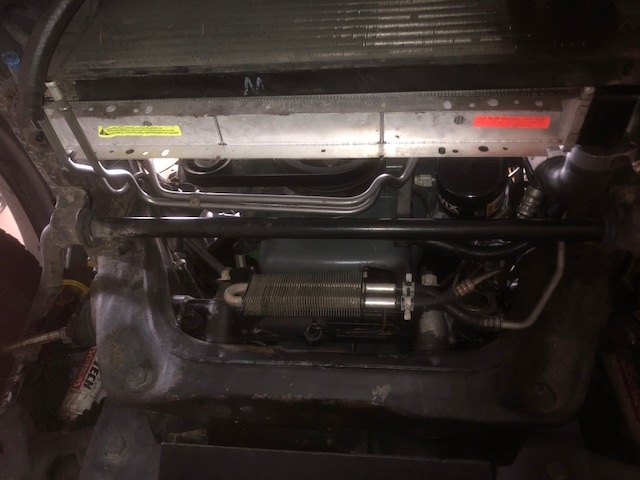
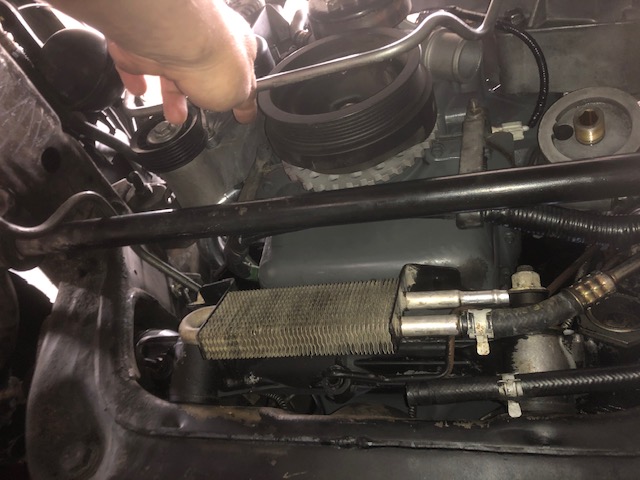
Now time for the power steering cooler and plumbing to and from it
This v6 cooler needed to have its tabs bent a bit so it would land where I want it for the v8

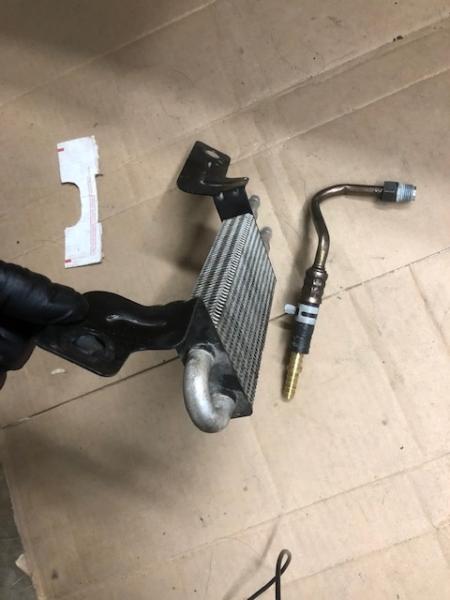
Also I found a v8 power steering to cooler line so ignore the v6 hose with brass splicer....that is how you do it if you do not have the v8 hose.

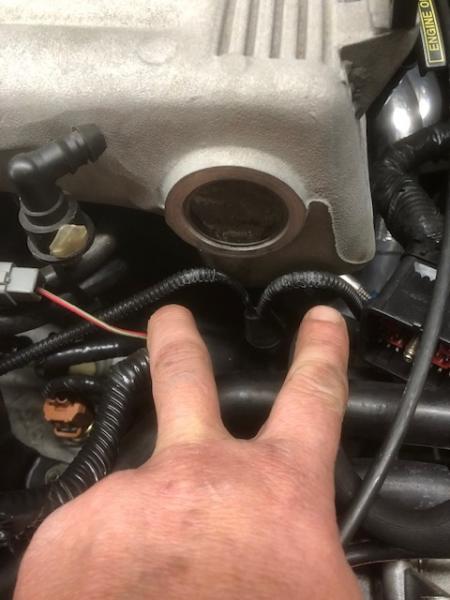
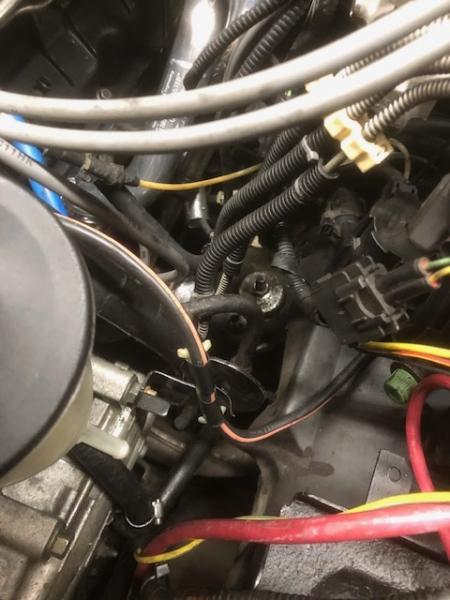
Accessory brackets installed, wiring and vacuum plumbed, egr hard line put in place loosely.....all in prep for the upper intake plenum install!

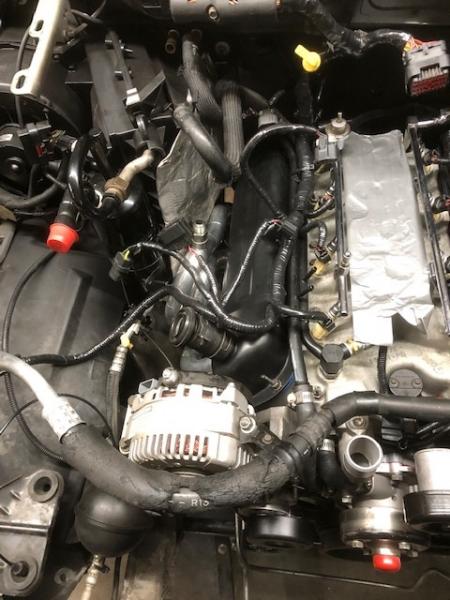
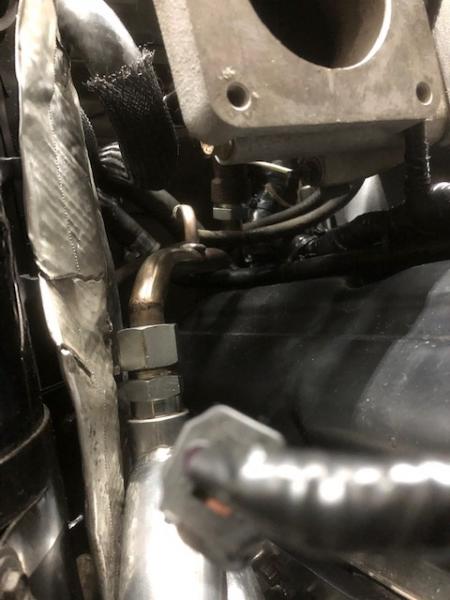
Driver side, power steering hoses, AC line installed, I use thread sealant on the power steering fitting threads to stop weepage


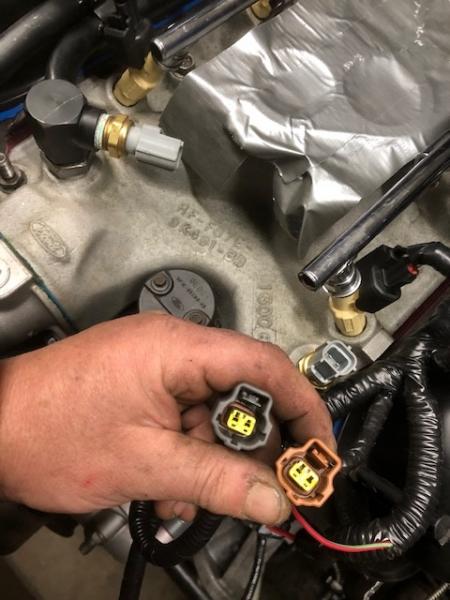
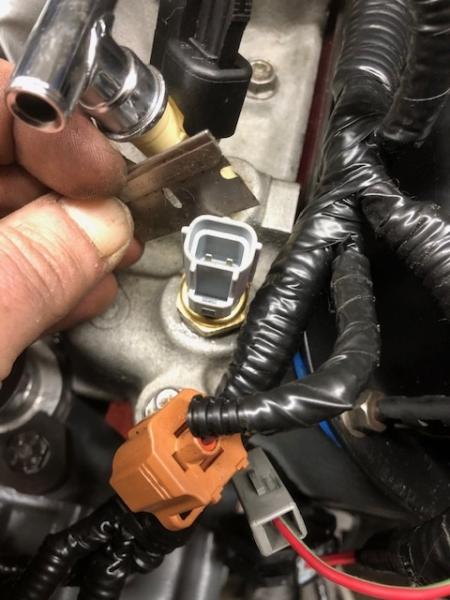
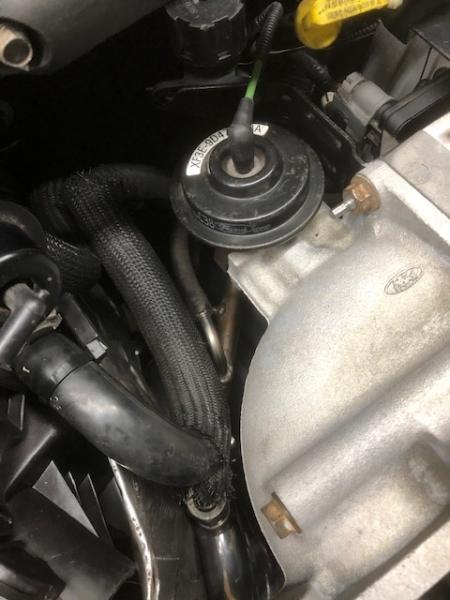
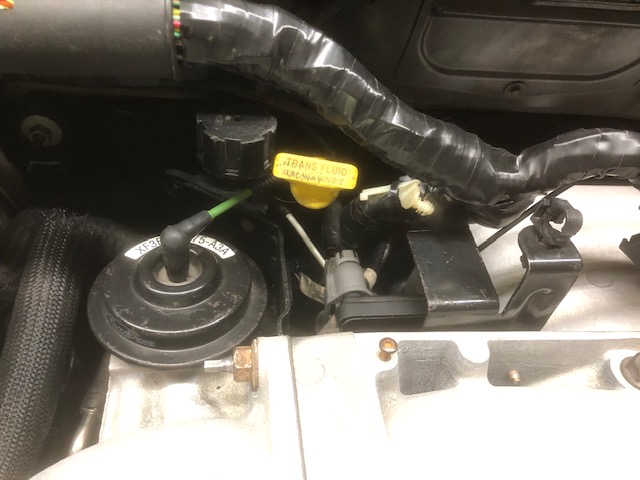
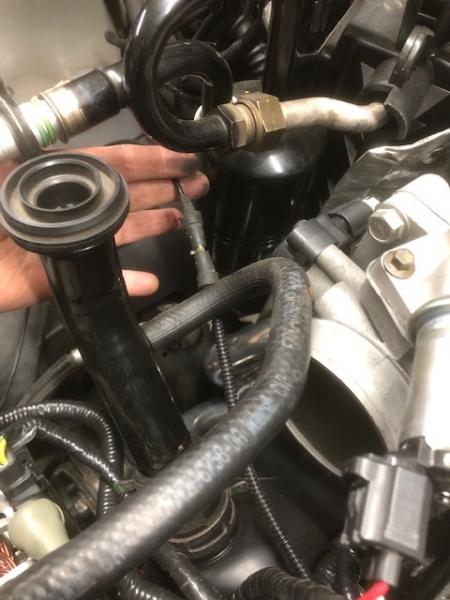
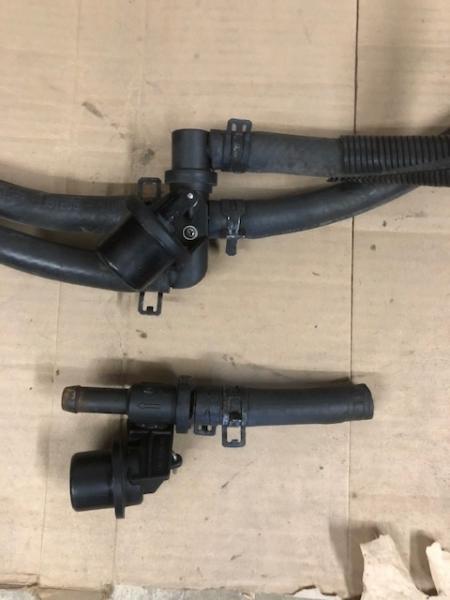
Here you can see the v6 style heater control valve vs the single line v8 style, I had to source the v8 one

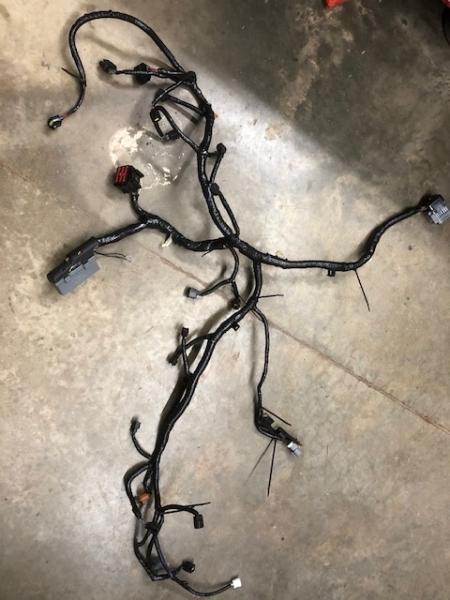
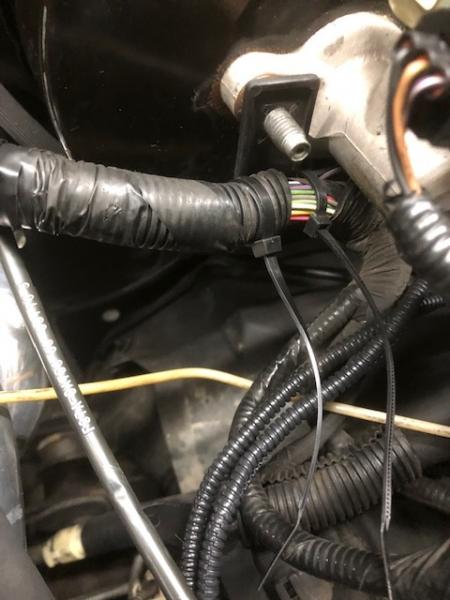
Now to show you guys another trick I have up my sleeve, how to make the ranger 42 pin plug reach the v8 42 pin plug. 

First you need to remove the retainer clip that holds the ranger wiring to the brake master cyl stud, pull the harness out as far as you can without putting too much stress on it and then re attach the plastic retainer....you just gained about 6" of length


Next you have to modify the rear plug cover like this
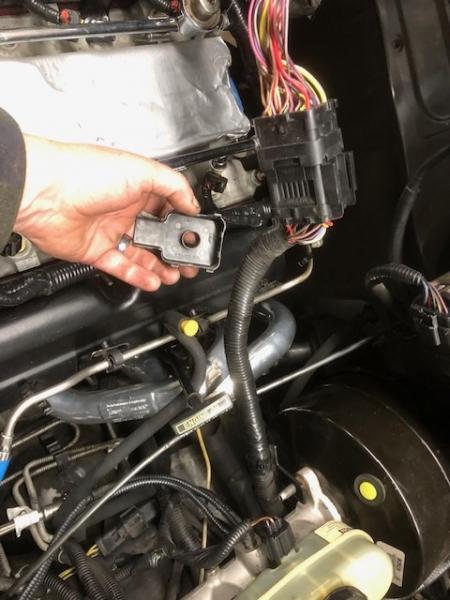
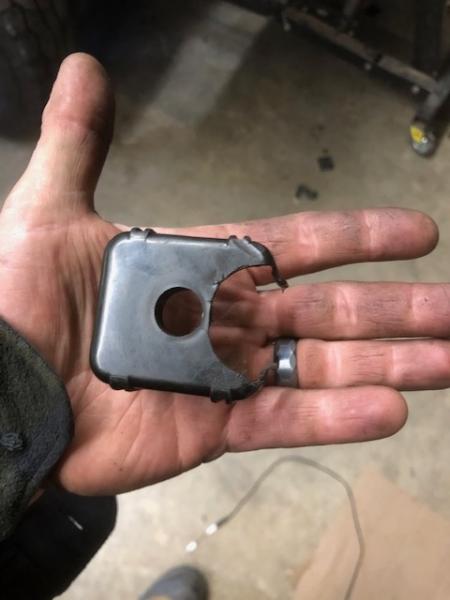

that goes here

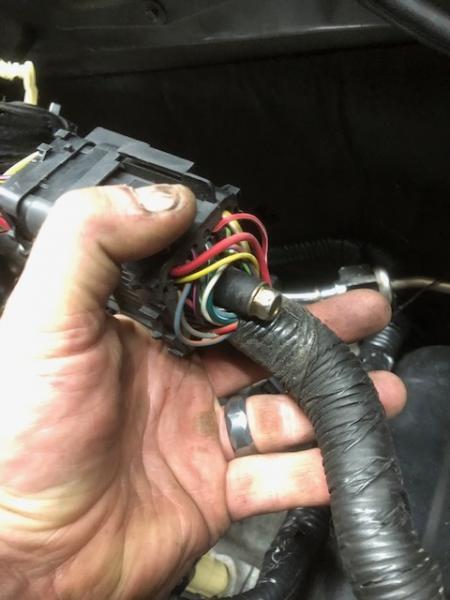
On the v8 side of things you must cut away the wire wrap and gain as much length as possible from engine harness to 42 pin plug
Now they reach each other, with some slack


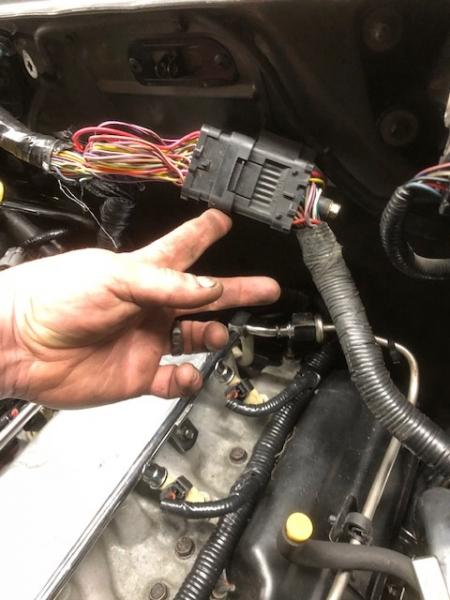
Yes all the wiring will get a final wrap before we run the truck


____________________
I build custom RBV, specializing in drivetrain conversions, wiring, suspension and complete custom trucks
Back To Top PM Quote Reply

 Posted: Sat Oct 10th, 2020 11:04 am
PM Quote Reply
57th Post
410customs

Idahome


Joined: Wed May 2nd, 2018
Location: Panhandle, Idaho USA
Posts: 2165
Name: Jamie ...
Occupation: Elevator Design Worlds Tallest Buildings ...
Interests: Ranger Based Vehicles and OFFROAD ...
Status: 
Offline
Reputation: 
Reputation Points: 2165
Time for the upper intake!!!!!!!!!!!!!!


Easier to install when stripped down plus I needed to install new elbow and throttle body gaskets so.....


prep parts for install


Place upper gasket and plenum on lower intake CAREFULLY
You must have the rear most long bolt in place before you can install/line up plenum.


Plenum in place and torqued down

Next up to plumb the PCV valve and EGR. Our PCV valve is gummed up and I was provided with a replacement seen here


I use some permatex on the PCV valve body to keep it inside the 5.0 rubber PCV holder

EGR parts are added to the back of the intake before the elbow goes on
I use a 1-16" wrench cut in half to access the EGR hard line fittings

That is the new EGR line provided by Robert with the Torque Monster Headers

DPFE and bracket installed to back of intake plenum with two 7mm bolts, EGR lines plumbed, EGR valve seated with new gasket and anti seize on the bolts


Now time for the elbow, gaskets and throttle body

Also a new Gates belt went on


Don't forget your AC line, its a BITCH to install later

Time for throttle cable bracket and coil pack tripod, also alternator to power dist box wire


Wicked performance coil packs! Need to look into these dudes


I sourced some tiny clamps for the small intake heater coolant hoses, and I started to clean the next engine bay parts...the coolant overflow tank, AC compressor heat guard, and more....

For now I leave you with this, a very clean, well organized and STOCK looking engine bay


Stay tuned!


____________________
I build custom RBV, specializing in drivetrain conversions, wiring, suspension and complete custom trucks
Back To Top PM Quote Reply

 Posted: Sat Oct 10th, 2020 02:51 pm
PM Quote Reply
58th Post
Junglejoe
Member


Joined: Tue Jun 30th, 2020
Location: Missouri USA
Posts: 293
Name: 
Occupation: 
Interests: 
Status: 
Offline
Reputation: 
Reputation Points: 293
Awwwww... now I see what's going on with the elbow and intake bolts.. there is long studs in there . The porter must have took mine out and forgot to sent them back with the intake.  Makes sense now why none of my bolts fit that.

 By the way.. using a lot of your info to reassemble mine J



____________________
2000 EFI 302 Zspec T5 swap ranger
Back To Top PM Quote Reply

 Posted: Sat Oct 10th, 2020 09:29 pm
PM Quote Reply
59th Post
Junglejoe
Member


Joined: Tue Jun 30th, 2020
Location: Missouri USA
Posts: 293
Name: 
Occupation: 
Interests: 
Status: 
Offline
Reputation: 
Reputation Points: 293
J, on those coolant sensors.. the one in the metal line  and the intake... are those both the same? Reason I ask..just put mine in today and just making sure it doesn't matter which hole they go in...

 I'll ask a  couple more questions on my build so I dont clog up your nice thread..


____________________
2000 EFI 302 Zspec T5 swap ranger
Back To Top PM Quote Reply

 Posted: Sat Oct 10th, 2020 09:41 pm
PM Quote Reply
60th Post
410customs

Idahome


Joined: Wed May 2nd, 2018
Location: Panhandle, Idaho USA
Posts: 2165
Name: Jamie ...
Occupation: Elevator Design Worlds Tallest Buildings ...
Interests: Ranger Based Vehicles and OFFROAD ...
Status: 
Offline
Reputation: 
Reputation Points: 2165
they are NOT the same
The one on the intake is for the instrument cluster, the one in the metal pipes is for the PCM and the sensors are not the same part or wiring pigtail
In my BII I removed the entire metal manifold, I cut the one pipe just after the temp sensor and added a flare, I run a coolant hose directly to the heater core and the other one comes directly from the water pump
The result is less hose clamps, no water lines going to the intake manifold (more leak points) and it has been working this way since 2005

http://www.fortuneelevatorconsultants.com/B2/overall.jpg

build thread
https://www.explorerforum.com/forums/threads/410-fortune-5-0l-efi-4r70w-drivertrain-conversion.124626/


____________________
I build custom RBV, specializing in drivetrain conversions, wiring, suspension and complete custom trucks
Back To Top PM Quote Reply

 Posted: Sun Oct 11th, 2020 12:08 am
PM Quote Reply
61st Post
Eddie Money
Member


Joined: Mon Nov 13th, 2017
Posts: 1587
Name: 
Occupation: 
Interests: Burt gummer life ...
Status: 
Offline
Reputation: 
Reputation Points: 1587
Plenty of practice for the 07!!!
After all the fab work is done on it you can probably do the rest blindfolded!!

Did you say what cam was going in this build? 

Man, I wanna hear these V8s with the Torque Monsters so bad!!!


____________________


I know my crazy! Do you?
2007 Sport 4door 4x4 4.0L SOHC V6 Ranger
Back To Top PM Quote Reply

 Posted: Sun Oct 11th, 2020 07:34 am
PM Quote Reply
62nd Post
Junglejoe
Member


Joined: Tue Jun 30th, 2020
Location: Missouri USA
Posts: 293
Name: 
Occupation: 
Interests: 
Status: 
Offline
Reputation: 
Reputation Points: 293
Oh chit! I haven't laid my harness across the engine , doing that today. Ill see I suppose which is which.  
Good idea about the heater hoses! I like that!
 On the heater hoses going  to the firewall, does it matter which hose that has the vacume control valve go on?

I'm going to the yard this week, you want me to.snatch you up.some.of the hold down bolts and bracets for the starter wire down there on the bottom of the timing cover..?

Last edited on Sun Oct 11th, 2020 07:46 am by Junglejoe


____________________
2000 EFI 302 Zspec T5 swap ranger
Back To Top PM Quote Reply

 Posted: Sun Oct 11th, 2020 09:09 am
PM Quote Reply
63rd Post
410customs

Idahome


Joined: Wed May 2nd, 2018
Location: Panhandle, Idaho USA
Posts: 2165
Name: Jamie ...
Occupation: Elevator Design Worlds Tallest Buildings ...
Interests: Ranger Based Vehicles and OFFROAD ...
Status: 
Offline
Reputation: 
Reputation Points: 2165
I am doing this blindfolded. Didn't I tell you guys that?
I do my best work using the force

This should be a stock explorer cam which is basically a mustang HO cam, this engine is a Jasper reman 306

I put the heater control valve on the same hose Ford does, the inlet to the heater core. 
I suppose it would still work on the other side, but I am sure Ford had a reason to put it here so that's what I do too.

Thank you for the offer, you do not need to gather up any bolts for me. I have a few 302 explorer drivetrains sitting here and two complete 302 explorers out back just for parts...I keep buying them and always will. Must have cores!! Also we frequent the junk yards as well.....

You must put your drivetrain together in order!!!!!!!!!!!!!!!!!!!!!
 follow the order I am showing you here, it will make your life so much easier. Don't miss a step! It will bite you

Make sure you have the trans cooler lines in place before you set the engine, that is if you plan to use the stock metal lines. My BII I simply cut the stock lines, flare them, and run trans cooler hose from radiator to trans, double clamp each fitting

We crushed 19 of these things in one summer. When you take apart that many explorers you learn a thing or two about them....what changes year to year, why Ford did this, did that.
That was just the ones that got crushed, not to mention the fleet of RBV I maintain for friends, the flip trucks we built, the long term projects, or my own trucks, ATV's, and other projects...
I have had 21 explorers at my house at one time :)


____________________
I build custom RBV, specializing in drivetrain conversions, wiring, suspension and complete custom trucks
Back To Top PM Quote Reply

 Posted: Sun Oct 11th, 2020 10:45 am
PM Quote Reply
64th Post
Junglejoe
Member


Joined: Tue Jun 30th, 2020
Location: Missouri USA
Posts: 293
Name: 
Occupation: 
Interests: 
Status: 
Offline
Reputation: 
Reputation Points: 293
I'm following your build very closely  J.  That heater hoses control valve, is it on the left or right out let on the firewall?

 I'm 5 speed, so no transmission lines.


____________________
2000 EFI 302 Zspec T5 swap ranger
Back To Top PM Quote Reply

 Posted: Sun Oct 11th, 2020 10:50 am
PM Quote Reply
65th Post
410customs

Idahome


Joined: Wed May 2nd, 2018
Location: Panhandle, Idaho USA
Posts: 2165
Name: Jamie ...
Occupation: Elevator Design Worlds Tallest Buildings ...
Interests: Ranger Based Vehicles and OFFROAD ...
Status: 
Offline
Reputation: 
Reputation Points: 2165
pass side
Dang I keep forgetting you are 5 speed, so cool!


____________________
I build custom RBV, specializing in drivetrain conversions, wiring, suspension and complete custom trucks
Back To Top PM Quote Reply

 Posted: Sun Oct 11th, 2020 07:53 pm
PM Quote Reply
66th Post
Junglejoe
Member


Joined: Tue Jun 30th, 2020
Location: Missouri USA
Posts: 293
Name: 
Occupation: 
Interests: 
Status: 
Offline
Reputation: 
Reputation Points: 293
J.. man you do good work!


____________________
2000 EFI 302 Zspec T5 swap ranger
Back To Top PM Quote Reply

 Posted: Fri Oct 16th, 2020 09:58 am
PM Quote Reply
67th Post
410customs

Idahome


Joined: Wed May 2nd, 2018
Location: Panhandle, Idaho USA
Posts: 2165
Name: Jamie ...
Occupation: Elevator Design Worlds Tallest Buildings ...
Interests: Ranger Based Vehicles and OFFROAD ...
Status: 
Offline
Reputation: 
Reputation Points: 2165
Thank you! My dad always says
"there is only one way to do a job"
Before we go too much further with this engine bay it was time to swap out the throttle cable, remove the old v6 and replace with v8. v8 cable is much longer

and mount the throttle cable bracket to the throttle body

The bottom right bolt on the throttle body is a double sided stud, for mounting this bracket
Next we mount the coil pack tripod


Proper placement of the EGR wiring and vacuum, the main wire harness and trans dipstick

Lets begin the vacuum routing and plumbing
Here is where the two main truck vacuum feeds come from

The drivers side connects here

Pass side connects here


The EVAP (fuel vapor management system) hose will get plumbed to here, that happens later I haver to cut a custom hose


Now time for the starter, there is a bracket that goes on drivers side engine mount double stud, it retains the starter wiring harness and the trans cooler lines


here


Next round of parts


cleanup and paint x member


Had to source a PS reservoir, as this one has been melted!

A good soak in purple power = clean!


Notice the power steering return hose is mounted on its 10mm stud, bottom of the ac compressor bracket

Now this was filthy, 301K miles on a coolant reservoir will do that. This one has been slightly stained with the Amsoil red coolant.
Much time was spent getting this clean. Soak in purple power and water, scrubbed with a brush and then the final trick up my sleeve....put pea gravel inside and shake like a washing machine


Next up


Before the plug wires go on, the alternator charge wire needs to be routed like factory, this involves putting all 4 of the factory plastic clips in place


Then the plug wires are carefully laced. We cannot use factory routing with the TMH, have to take the factory wires away from the hot header tubes


Now ready to install cooling system, airbox and then do final wiring
Now I turn my attention back to underneath the truck. Time for downpipes, transfer case and transmission crossmember
No that is not the final spark plug wire routing....its close, but they will be carefully tied into position along the fender skirts

Although the factory Motorcraft wire set is nice, and can work with these headers I would prefer to use something with a little more "meat on the bones" like a Taylor 8.8 wire set along with some fiberglass heat protective "socks"


____________________
I build custom RBV, specializing in drivetrain conversions, wiring, suspension and complete custom trucks
Back To Top PM Quote Reply

 Posted: Fri Oct 16th, 2020 12:03 pm
PM Quote Reply
68th Post
410customs

Idahome


Joined: Wed May 2nd, 2018
Location: Panhandle, Idaho USA
Posts: 2165
Name: Jamie ...
Occupation: Elevator Design Worlds Tallest Buildings ...
Interests: Ranger Based Vehicles and OFFROAD ...
Status: 
Offline
Reputation: 
Reputation Points: 2165
final power steering routing, hose mounted to ac stud


more alternator wire routing and clips


time for the radiator, trans lines and cooling hoses


____________________
I build custom RBV, specializing in drivetrain conversions, wiring, suspension and complete custom trucks
Back To Top PM Quote Reply

 Posted: Fri Oct 16th, 2020 05:51 pm
PM Quote Reply
69th Post
Eddie Money
Member


Joined: Mon Nov 13th, 2017
Posts: 1587
Name: 
Occupation: 
Interests: Burt gummer life ...
Status: 
Offline
Reputation: 
Reputation Points: 1587


I love this shot!!! Looks so good!!!


____________________


I know my crazy! Do you?
2007 Sport 4door 4x4 4.0L SOHC V6 Ranger
Back To Top PM Quote Reply

 Posted: Mon Oct 19th, 2020 10:31 am
PM Quote Reply
70th Post
Junglejoe
Member


Joined: Tue Jun 30th, 2020
Location: Missouri USA
Posts: 293
Name: 
Occupation: 
Interests: 
Status: 
Offline
Reputation: 
Reputation Points: 293
Hey J... if tou dont mind.. can you post a picture  of the fan and shroud location when you get to it..
 Man, looks PERFECT!!!!


____________________
2000 EFI 302 Zspec T5 swap ranger
Back To Top PM Quote Reply

 Posted: Wed Oct 21st, 2020 09:23 am
PM Quote Reply
71st Post
410customs

Idahome


Joined: Wed May 2nd, 2018
Location: Panhandle, Idaho USA
Posts: 2165
Name: Jamie ...
Occupation: Elevator Design Worlds Tallest Buildings ...
Interests: Ranger Based Vehicles and OFFROAD ...
Status: 
Offline
Reputation: 
Reputation Points: 2165
thanks! Sure Ill post up pics when the fan goes on

First things first, we had a transfer case debacle, now back on track:

Long story short the 4406 transfer case that came with this truck was sourced from a wrecker, they sold him the wrong case. 
This unit is Torque on demand (control trac awd) and I did not notice until after it was hung......... I was working on changing the shift motor when I saw the extra sensors in the case. My heart sank a little....then I did a few days of reading about the control trac TOD 4406. Discovered I could build a stand alone AWD control box using either 6 automotive relays or better yet a home made printed circuit board control box dealio...some guys on the explorer forum have sorted out how to make the control trac AWD work in a non control trac truck using stock expedition parts!! Build a control trac ranger?? Seemed like a cool option....but also very custom, so we decided to skip it and use a real 4406 e shift case without the control trac
So last night I dropped the case back out and began to prep the non control trac 4406 I have.... this one is now on a shelf to be used as a boat anchor or possibly a AWD project down the road! would be cool for ice racing, or just plain icy roads....and now we are smarter for it, knowing what is possible with control trac sheesh


Now for the progress:

truck was put on the lift so I can tackle the 4x4, exhaust, and driveshafts
First up the stock 5.0 downpipes needed to go in. The parts I was given (came with truck) were cut tooooooo short so I had to source some stock downpipes

here you can see the pipes I was gives vs what is needed

I like to use full length stock pipes because they give you bolt up flanges so the exhaust can still be unbolted like stock. Also they utilize the stock 5.0 exhaust mount at the trans crossmember, this is needed for strength. The stock downpipes also include the primary cat converters and all 4 02 sensor bungs.....plug in like stock.

Here is a shot of the inside of the TMH collector Junglejoe was talking about earlier..... its so nice it looks like jewelry.. 


The stock downpipes were wiggled into place and hung using the super sweet locking head bolts Robert provided with the TMH. Anti seize was used and one bolt needed to have its head shaved down a bit to more easily clear the trans dipstick

the bolt before


bench grinder


Now it clears, yes I need new gloves


pass pipe put in place first then drivers, like playing tetris


Now with the downpipes in place its time to prep and hang the 4406 t case
First there are 2 "ears" on the 4406 that can be shaved off to help clear the ranger frame rails, sawzall or grinder makes quick work of these


Nice and smooth so we do not cut our skin later

T case was cleaned and gasket surface prepped, t case put on trans jack for easy install


tailhousing cleaned


one gasket and 6 bolts later the t case is in!!


Now time to swap shift motors, the stock 2000 Ranger motor will work perfectly. So we removed the motor from the ranger case and the 4406


Here's where I realized we had a TOD case!! SOB!!!!!!


stock downpipes in place

I will be cutting the needed exhaust flanges out of a 5.0 donor truck today as well as grabbing the 5.0 trans/ exhaust mount

all factory brackets are used here to hold the wiring, just like stock


So this transfer case is now on the ground and a true 4406e (no TOD!) is almost ready to go in
New tailhousing seal is on order....Im working on modifying a f1560 front driveshaft to fit and finding the correct rear driveshaft for this build. 


While that is happening the remaining exhaust was cut out of the truck, a nice Gibson muffler. 
The truck came with a Borla dual 2.5" inlet single 3" outlet muffler we will be using. I will build the pipes to connect this to the stock 5.0 downpipes

Time to focus on the rear axle........we are ditching the stock ranger unit for a freshly built explorer 8.8 with goodies......


____________________
I build custom RBV, specializing in drivetrain conversions, wiring, suspension and complete custom trucks
Back To Top PM Quote Reply

 Posted: Thu Oct 22nd, 2020 06:28 pm
PM Quote Reply
72nd Post
Junglejoe
Member


Joined: Tue Jun 30th, 2020
Location: Missouri USA
Posts: 293
Name: 
Occupation: 
Interests: 
Status: 
Offline
Reputation: 
Reputation Points: 293
J.. first thanks for the pics.  I am using them to  assemble my truck. My lesson learned here..
 Next time, take better pics, be a little more patient and be a little more organized!
Don't just rip chit apart..it has to go back together.. VERY CAREFULLY!
â˜•

Last edited on Thu Oct 22nd, 2020 06:28 pm by Junglejoe


____________________
2000 EFI 302 Zspec T5 swap ranger
Back To Top PM Quote Reply

 Posted: Fri Oct 23rd, 2020 09:38 am
PM Quote Reply
73rd Post
410customs

Idahome


Joined: Wed May 2nd, 2018
Location: Panhandle, Idaho USA
Posts: 2165
Name: Jamie ...
Occupation: Elevator Design Worlds Tallest Buildings ...
Interests: Ranger Based Vehicles and OFFROAD ...
Status: 
Offline
Reputation: 
Reputation Points: 2165
Exhaust hanger/support sourced from another v8 truck, this little sucker is so much fun to remove let me tell you! But it is needed for strength, without this center support exhaust manifolds have been known to snap in pieces......
So into the parts washer and then to paint it goes


Also sourced some F150 driveshafts from a private seller yesterday to use as our "cores"
Ordered some 2.5" exhaust tubing so we can mount the borla muffler

6" of snow expected today, no biggie the first storm of the season always drops trees and then melts away quickly. 
But the pressure is on! need to get this sucker built so it can go home before the real winter arrives. Should be turnign the key this weekend and begin testing. The rear axle will be back from getting re geared early next week, then install and BLAMO truck ready for road tests


____________________
I build custom RBV, specializing in drivetrain conversions, wiring, suspension and complete custom trucks
Back To Top PM Quote Reply

 Posted: Fri Oct 23rd, 2020 09:41 am
PM Quote Reply
74th Post
Junglejoe
Member


Joined: Tue Jun 30th, 2020
Location: Missouri USA
Posts: 293
Name: 
Occupation: 
Interests: 
Status: 
Offline
Reputation: 
Reputation Points: 293
S N O W..ughhhh... its to early for all that


____________________
2000 EFI 302 Zspec T5 swap ranger
Back To Top PM Quote Reply

 Posted: Fri Oct 23rd, 2020 08:35 pm
PM Quote Reply
75th Post
VelociRanger
I’ll probably do it tomorrow


Joined: Mon Jun 25th, 2018
Location: Dallas, Texas USA
Posts: 721
Name: Justin ...
Occupation: 
Interests: 
Status: 
Offline
Reputation: 
Reputation Points: 721
What is snow? Lol just kidding, but it's been a while since it's snowed here


____________________
knowing when to quit is wisdom, being able to quit is courage.

1983 Ranger, reluctantly taking apart. Donor/project vehicle.

1997 Ranger Ex Cab Manual 4.0 2wd, dead on arrival. Hopefully reviving for a daily driver.

1984 Ranger, currently in ≈861 pieces. She’s donating what’s salvageable.
Back To Top PM Quote Reply

Current time is 02:43 am Top Page:  First Page Previous Page  1  2  3  4  5  6  Next Page Last Page    

Ford-Rangers.com Ranger Forum > Ranger Engine Tech > 8 Cylinder Gasoline > 2000 Ranger 300K earned a v8

Users viewing this topic


PHP Version: 8.2.28
Server version: 10.6.21-MariaDB
UltraBB 2.01.01 Copyright © 2008-2025 Jim & Chris
Page processed in 0.0873 seconds (44% database + 56% PHP). 107 queries executed.