Ford-Rangers.com Ranger Forum HomeFord-Rangers.com Ranger Forum Home
Home Recent Topics New posts Search search Menu menu Not logged in - Login | Register
Ford-Rangers.com Ranger Forum > Tech Section > Member's Projects Showcase > 410Custom's builds a 2007 Ranger V8 - cu

Ford-rangers.com is a discussion forum, a Ranger forum for people who have questions about fixing or modifying
their Ford Rangers or people who just admire their Ranger. Please join and enjoy sharing experiences!

410Custom's builds a 2007 Ranger V8 - cu       #: 1712
 Moderated by: NoPower, Mike69, MaDMaXX, Page:  First Page Previous Page  ...  6  7  8  9  10  11  12  13  14  15  Next Page Last Page  
New Topic Reply
 Rating:  Rating
 Posted: Mon Nov 21st, 2022 04:21 pm
PM Quote Reply
251st Post
Eddie Money
Member


Joined: Mon Nov 13th, 2017
Posts: 1587
Name: 
Occupation: 
Interests: Burt gummer life ...
Status: 
Offline
Reputation: 
Reputation Points: 1587
"Added by eddie, posted by 410custom"

check this out


GitHub - thomastech/CAN2Cluster: CAN-Bus Emulator for Controlling Automotive Dashboard Instrument Clusters
CAN-Bus Emulator for Controlling Automotive Dashboard Instrument Clusters - GitHub - thomastech/CAN2Cluster: CAN-Bus Emulator for Controlling Automotive Dashboard Instrument Clusters


hacking in and controlling a 07-09 mustang can bus instrument cluster
Hmmmmmmm


I am looking for any can bus interface modules or anything that will allow us to control/input to the stock cluster

Last edited on Mon Nov 21st, 2022 04:23 pm by Eddie Money


____________________


I know my crazy! Do you?
2007 Sport 4door 4x4 4.0L SOHC V6 Ranger
Back To Top PM Quote Reply

 Posted: Mon Nov 21st, 2022 04:31 pm
PM Quote Reply
252nd Post
Eddie Money
Member


Joined: Mon Nov 13th, 2017
Posts: 1587
Name: 
Occupation: 
Interests: Burt gummer life ...
Status: 
Offline
Reputation: 
Reputation Points: 1587
"Added by eddie, posted by 410custom "

Started taking an 07 instrument cluster apart, there is little hope of modifying the fixture
However it is possible to hack the cluster, it is happening more and more in the world of can bus clusters
I did some researching and reading yesterday, this is something I am looking into

In other news the truck is running! But I am still out of time with the cam synchro
I made a chart to show where the cam synchro should be stabbed
My new friend over at classicbroncos has taken the time to school me 100% in this issue and now I fully get it!
The synchro must be stabbed at 185 degrees before top dead center occurs
Like this


I am going back and fixing the original post on the crank balancer to show this. (Basically I needed to go around one more time)
I will be Re stabbing the synchro today

Also the Hall effect crank sensor came in from lowdollar motors. So I fabricated a simple mount using stock parts (dirty parts!)


Parts needed cleaned they came off a low mile engine I have in. The shop, but a nasty messy engine at that! I also used same engine for mock up


Had no idea the factory guard said “time” on the pointer learn something everyday


Now to make a simple jig, this ensures the new sensor lands in exact location as stock sensor


Sensors location in 
relation to the mounting screws is what I was interested in


Cut simple piece of metal and welded in proper
Location


____________________


I know my crazy! Do you?
2007 Sport 4door 4x4 4.0L SOHC V6 Ranger
Back To Top PM Quote Reply

 Posted: Mon Nov 21st, 2022 04:34 pm
PM Quote Reply
253rd Post
Eddie Money
Member


Joined: Mon Nov 13th, 2017
Posts: 1587
Name: 
Occupation: 
Interests: Burt gummer life ...
Status: 
Offline
Reputation: 
Reputation Points: 1587
"Added by eddie, posted by 410custom"


Perfect!!
Now to install I will have to tap into the power feed for the cam synchro and run to this sensor as well
Old sensor two wires ground from pcm and signal to pcm
New wires pcm ground, pcm signal and clean power
Holley software make simple change for new hall effect crank sensor and we are rolling

Last edited on Mon Nov 21st, 2022 04:35 pm by Eddie Money


____________________


I know my crazy! Do you?
2007 Sport 4door 4x4 4.0L SOHC V6 Ranger
Back To Top PM Quote Reply

 Posted: Mon Nov 21st, 2022 04:37 pm
PM Quote Reply
254th Post
Eddie Money
Member


Joined: Mon Nov 13th, 2017
Posts: 1587
Name: 
Occupation: 
Interests: Burt gummer life ...
Status: 
Offline
Reputation: 
Reputation Points: 1587
"Added by eddie, posted by 410custom"

I then took a 07 cluster apart to see about potential hacking ( and I mean hacking with soldering iron and hot knife)
Looks difficult w these clusters
So looking into hacking the software side of things


The needles won't even come off with a fork like the old ones did shoot


This will be an on going project as I finish the rest of the truck


Last edited on Mon Nov 21st, 2022 04:38 pm by Eddie Money


____________________


I know my crazy! Do you?
2007 Sport 4door 4x4 4.0L SOHC V6 Ranger
Back To Top PM Quote Reply

 Posted: Mon Nov 21st, 2022 04:41 pm
PM Quote Reply
255th Post
Eddie Money
Member


Joined: Mon Nov 13th, 2017
Posts: 1587
Name: 
Occupation: 
Interests: Burt gummer life ...
Status: 
Offline
Reputation: 
Reputation Points: 1587
"Added by eddie  posted by 410custom"

Crank sensor is easy to adjust! I am able to fit a wrench on the front and backside


I adjusted it on a spare engine though so I won't have to in the truck


____________________


I know my crazy! Do you?
2007 Sport 4door 4x4 4.0L SOHC V6 Ranger
Back To Top PM Quote Reply

 Posted: Mon Nov 21st, 2022 04:42 pm
PM Quote Reply
256th Post
Eddie Money
Member


Joined: Mon Nov 13th, 2017
Posts: 1587
Name: 
Occupation: 
Interests: Burt gummer life ...
Status: 
Offline
Reputation: 
Reputation Points: 1587
"Added by eddie, posted by 410custom"

I am not interested in a piggyback! (If we can help it)
Already too late I have been busy
As cool as hacking can bus clusters is wicked potential for resto mods and drivetrain conversions I already have a factory based solution  I will have to run some wires
We are keeping a factory cluster and adding to it!
I will likely need a Dakota box for the speedo signal
I need to locate a tach signal from the Holley


____________________


I know my crazy! Do you?
2007 Sport 4door 4x4 4.0L SOHC V6 Ranger
Back To Top PM Quote Reply

 Posted: Mon Nov 21st, 2022 04:47 pm
PM Quote Reply
257th Post
Eddie Money
Member


Joined: Mon Nov 13th, 2017
Posts: 1587
Name: 
Occupation: 
Interests: Burt gummer life ...
Status: 
Offline
Reputation: 
Reputation Points: 1587
"Added by eddie, posted by 410custom"

So as you guys know I have several dashboards in the shop for this project
While messing with the 07 cluster and the wiring to it I had a question pop into my head, do any of these other late model clusters have additional wires for the indicator lights? Sure enough the 05 dash I have has a cluster that looks similar, but guess what about 30 wires instead of 15!

05 cluster


07 cluster wiring


So out come the wiring books to confirm. Sure enough the 05 cluster still has Can Bus connections BUT it also has all the wires for the gauges and indicator lights! So my plan is to use the guts from an 05 cluster and the face of the 07 cluster that came with the truck
I will likely need a Dakota digital interface to get the signal needed for the speedometer, otherwise this should be fairly straight forward. I will have to run some wires as the 07 truck does not have them.
Wires for the tach, coolant gauge, and all lights will be run and testing has begun! I feel good about this solution


As you can see most of the 05 and 07 wiring is very similar for the cluster aside from the indicator lights


In other news I need to install the newly created hall effect type crank sensor
Removing and installing a crank sensor in a 5.0 truck with the radiator, fan, shroud, and belt in the way can be next to impossible. Not feeling well last week and not really in the mood to remove the fan and shroud and the belt I spent some time looking for another solution
FOUND IT!


This little 90 degree impact adapter from Dewalt came as a bonus with some other tools. I put it on the pegboard knowing someday I might need it. It worked like a charm!


I was able to fully remove the Holley ignition adapter harness (cam and crank sensors) from the truck quite easily!
I then reversed the crank sensor wires back to their original positions since with the hall effect sensor I no longer need them reversed
Then I cut the stock 5.0 crank sensor off and wired up the new hall effect. The power wire was already in the harness since it was designed to use a hall effect sensor.


installation was simplified using the dewalt tool I am able to get to the top crank sensor bolt.
Everything lined up, wires were carefully run and re installed into the truck


Lowdollar motors hall effect crank sensor installed


Same clearances/alignment as stocks setup

UP next now that we have a running truck and a plan for the cluster it is time for some seats!


2014 edge 10 way drivers seat with memory and heat vs stock ranger bucket. This got a little tricky
I am in the process of fabricating the mounts now
This required much trial and error ensuring I get the seats in the correct spot for a comfortable fit.
The Edge seats have much electronics inside them, the metal mounting rails are spaced further apart then a ranger seat.
I have the 14 edge wiring book so I was able to "hack" the power and the heat elements
I did a similar upgrade to my 97 F350 using heated and cooled power leather buckets from a Lincoln navigator so this is not my first rodeo. My BII has also had 01 Explorer leather with heat for 15+ years now.

This seat install has gotten very tricky, but so far I am winning.
More on that soon

Last edited on Mon Nov 21st, 2022 04:51 pm by Eddie Money


____________________


I know my crazy! Do you?
2007 Sport 4door 4x4 4.0L SOHC V6 Ranger
Back To Top PM Quote Reply

 Posted: Mon Nov 21st, 2022 04:55 pm
PM Quote Reply
258th Post
Eddie Money
Member


Joined: Mon Nov 13th, 2017
Posts: 1587
Name: 
Occupation: 
Interests: Burt gummer life ...
Status: 
Offline
Reputation: 
Reputation Points: 1587
"Added by eddie, posted by 410custom"

my wife says my "brain works differently" lol

she has been around hot rods and hot rod builders her whole life, although they can build an entire custom car, it takes a certain type of person to be able to complete the wiring.
My response is "those dudes are weak sauce, I mean how many wires are under the hood of a old hot rod? like 7?" LMAO

I credit my brilliant father for my wiring skills, he had me working with electrics and a soldering iron at like 11 years old

It helps me a great deal that there are no inner fender liners in this truck yet AND it is on a lifted suspension.

Last edited on Mon Nov 21st, 2022 04:55 pm by Eddie Money


____________________


I know my crazy! Do you?
2007 Sport 4door 4x4 4.0L SOHC V6 Ranger
Back To Top PM Quote Reply

 Posted: Mon Nov 21st, 2022 04:59 pm
PM Quote Reply
259th Post
Eddie Money
Member


Joined: Mon Nov 13th, 2017
Posts: 1587
Name: 
Occupation: 
Interests: Burt gummer life ...
Status: 
Offline
Reputation: 
Reputation Points: 1587
"Added by eddie, posted by 410custom"

Seat install pretty dang tricky that is for sure, after many hours of measuring and trial and error I have the drivers seat in position
I use a spare battery and alligator clips to power it until I can make the connections. I will run one of my fused power leads from the stock PJB/SJB to the two seats for the heater elements which will need switches, since the edge has the controller in the dash

This is not a modification for the impatient!!
The edge seats although a good size for the ranger, they sit up about 1-1.5"higher off the floor then a stock seat even AFTER I hacked all the mounts and lowered the seat as much as possible. If you are 6'-2" then your bald spot will be on the headliner
Lucky for me I am 5'-10" and so is the truck owner, so we are good.
I have similar situation in my F350, took some getting used to but in a truck sitting up high is ok
My stepsons 98 Ranger is here, 5.0, 6" lift, 2005 FX4 seats so I have something to compare it to. At the end of the day I am sitting up about 1" higher then stock, with the full power seat all the way back and all the way down
Plenty of movement in the seat forward back, tilt and recline, plus the heat will be nice. There is just no physical way to get it any lower to the ranger floor pan.


Factory ranger slider mounts bolted in place after being removed from factory seat slider


Carefully measure and decided I can remove 1.5” of material max!


Heavily modified front inside mount during mock up, you can see the edge seat has been stripped
Clean down to the power rails they ride on and slammed all the way to the floor allowing just enough room for movement


First look at the bucket in its final location


What I have removed from one seat so far


Mock up just tack welded here which is good I had to move the rear mount back 1/4” to line up w stock mounting bolts


Final fab and re enforcement as well as the two outer mounts will happen today
Then run power and sort out seat belt receiver then we will have a driver seat!

Still pass side to go


____________________


I know my crazy! Do you?
2007 Sport 4door 4x4 4.0L SOHC V6 Ranger
Back To Top PM Quote Reply

 Posted: Sun Mar 12th, 2023 06:23 pm
PM Quote Reply
260th Post
Eddie Money
Member


Joined: Mon Nov 13th, 2017
Posts: 1587
Name: 
Occupation: 
Interests: Burt gummer life ...
Status: 
Offline
Reputation: 
Reputation Points: 1587
Continuing where we left off....

"Added by eddie, posted by 410custom"

Speaking of seats guess who is finally back working on the blue ranger!!


Been a crazy winter
However schedule is cleared blue truck is now front and center in shop, shop is clean (clean enough considering how many projects/ repairs are going) I washed the truck by hand again and started working on her.

Drivers seat fabrication is now done!! Fully
Bolted in this picture
It took a lot of fabrication / trial and error, this is as good as it gets with these power seats. I cannot space them any lower to the floor!!

Had to get a seat in the beast so I can test the drivetrain, cluster and begin the next phase
I plan to have this truck done by the end of this month! Yea February 2023!! Hoping it makes Moab in May


The inner rail on the drivers side is as low to the floor as I can go


All 4 “feet” fabricated from stock parts made to fit the factory seat hold down bolts.

Was getting final paint here


Now back to the drivetrain!!


____________________


I know my crazy! Do you?
2007 Sport 4door 4x4 4.0L SOHC V6 Ranger
Back To Top PM Quote Reply

 Posted: Sun Mar 12th, 2023 06:25 pm
PM Quote Reply
261st Post
Eddie Money
Member


Joined: Mon Nov 13th, 2017
Posts: 1587
Name: 
Occupation: 
Interests: Burt gummer life ...
Status: 
Offline
Reputation: 
Reputation Points: 1587
"Added by eddie, posted by 410custom"

Very minor differences w ranger and explorer seats they are easy to swap back and forth
My favorite would be sport trac seats in extended cab ranger
St seats are comfy

These “brackets” Made from
Ranger slider base parts and 14 edge seat mounts. I have installed lots of weird “restomod” seats. each time it is custom fabricate mounts.. make sure it's centered, straight, and as far back and down as you can get it. Use the feet from the oem seats and make them attach to the new seat. Have to
Make it strong and safe consider location of seat belt mount etc.
Then there is all the wiring these smart seats have many wires

I still need to do the passenger

Last edited on Sun Mar 12th, 2023 06:27 pm by Eddie Money


____________________


I know my crazy! Do you?
2007 Sport 4door 4x4 4.0L SOHC V6 Ranger
Back To Top PM Quote Reply

 Posted: Sun Mar 12th, 2023 06:30 pm
PM Quote Reply
262nd Post
Eddie Money
Member


Joined: Mon Nov 13th, 2017
Posts: 1587
Name: 
Occupation: 
Interests: Burt gummer life ...
Status: 
Offline
Reputation: 
Reputation Points: 1587
"Added by eddie, posted by 410custom"


During the fab process


Some
Shop / truck pics

Today I am re visit the cam synchronizer then some more testing. Need to bring trans fluid up to level and get some brakes

Rear king shocks are on order have been since before Christmas
We can run some cheapo rs3000 or something g if we have to
Built to order they said 4-6 months


____________________


I know my crazy! Do you?
2007 Sport 4door 4x4 4.0L SOHC V6 Ranger
Back To Top PM Quote Reply

 Posted: Sun Mar 12th, 2023 06:34 pm
PM Quote Reply
263rd Post
Eddie Money
Member


Joined: Mon Nov 13th, 2017
Posts: 1587
Name: 
Occupation: 
Interests: Burt gummer life ...
Status: 
Offline
Reputation: 
Reputation Points: 1587
"Added by eddie, posted by 410custom"


I had to re visits the cam synchronizer because I was right in the middle of re timing the engine when winter hit and I got distracted two months ago!
I needed to bring the engine around one more time so the cam sensor signal occurs before top dead center
Previously it ran yes but it was not 100% correct (engine needed to come around one more time)


I did this yesterday


Remove #1 plug
W 15/16” socket on crank bring engine around to tdc compression stroke
Then bring around to 185 degree mark
Then bring around one more time to 185 mark
Finally stab synchronizer which is now 185 degrees before top dead center occurs


Correct flag position for digital falling


All back together


Next I went into the software and setup the new Hall effect type crank sensor
Truck is again ready to run! I may fire it up later today!!


Drivers seat final Re enforcement on feet and paint, now bolted fully in and with side plastics
Seat sits 1-1.5” taller then factory at the front bolster
A little large for a ranger but do able
I am still looking at ways to shrink it closer to the floor. I may try to use manual slider tracks on the passenger side which could lower it another 1” by removing the power forward and back tracks from the 2014 edge seats

Started looking at the console shifter yesterday
Also started on the front grill/lights and off road bumper install


____________________


I know my crazy! Do you?
2007 Sport 4door 4x4 4.0L SOHC V6 Ranger
Back To Top PM Quote Reply

 Posted: Sun Mar 12th, 2023 06:40 pm
PM Quote Reply
264th Post
Eddie Money
Member


Joined: Mon Nov 13th, 2017
Posts: 1587
Name: 
Occupation: 
Interests: Burt gummer life ...
Status: 
Offline
Reputation: 
Reputation Points: 1587
"Added by eddie, posted by 410custom"

daily progress

Now that she is running I have been tying up some loose ends

first up I finally installed the "warranty claim" drivers side CV axle. Glad to have that done!


Finally the differential end was machined to actually fit!


Un hooked the upper pinch bolt and uniball also removed the tie rod and forward shock then the cv went right in. Parts were cleaned and lubed of course


Had to remove the “emergency cv stub” that I built. This thing will keep the wheel bearing together if you snap a cv axle on the trail, nice to have around.


next I finally built the drivers side suspension support/brace! After my buddy screwed up and cut the old t bar too short I had to wait to build this thing because I had to pull another t bar.


Got that fabricated, welded and painted, now installed, Glad to have that done as well!


This is how the parts fit together


This is where they go


Welded almost ready for paint


Done and installed!!

Next Its time to strap the front suspension


____________________


I know my crazy! Do you?
2007 Sport 4door 4x4 4.0L SOHC V6 Ranger
Back To Top PM Quote Reply

 Posted: Sun Mar 12th, 2023 06:56 pm
PM Quote Reply
265th Post
Eddie Money
Member


Joined: Mon Nov 13th, 2017
Posts: 1587
Name: 
Occupation: 
Interests: Burt gummer life ...
Status: 
Offline
Reputation: 
Reputation Points: 1587
"Added by eddie, posted by 410custom"


I spent a lot of time getting the proper location and bracket made for the front limiting straps. Suspension is strapped before any uniballs or tie rod ends reach their travel limits, also before the uca striked the coilover spring. This should keep the cv axle operating well within its limits


Front bumper being prepped for paint and install, first I wanted to dry fit it make sure no in forseen issues. This is the third affordable off-road bumper I have installed. I like these very much!


I spent some time exploring aux lighting options 


Time to dig back into the conversion and its wiring. I'm working on:
Functional cluster
Center console and shifter
ARB compressor mounting location
and more


____________________


I know my crazy! Do you?
2007 Sport 4door 4x4 4.0L SOHC V6 Ranger
Back To Top PM Quote Reply

 Posted: Sun Mar 12th, 2023 07:07 pm
PM Quote Reply
266th Post
Eddie Money
Member


Joined: Mon Nov 13th, 2017
Posts: 1587
Name: 
Occupation: 
Interests: Burt gummer life ...
Status: 
Offline
Reputation: 
Reputation Points: 1587
"Added by eddie, posted by 410custom"


okay working on instrument cluster and its wiring
After deciding on a solid path forward I pulled the trigger and started hacking into the trucks wiring.
Basically I am using a 2005 instrument cluster and its wiring pigtails
In 2005 the cluster was similar to an 07 cluster in appearance and wires, however it also still had 14 additional wires for inputs from the truck
As a result I ended up cutting off the 2007 wiring connectors and replacing them with the 2005 connectors. The 75% of wires that match up got spliced together. The other "new" 14 wires I will have to wire each circuit on the truck side of things.
Basically I am in control of things like the ABS light, OD off indicator, tachometer and coolant temp signals, and more........

2005 ranger pigtails with each wire identified


05 and 06 clusters labeled


No going back getting ready to cut the 07 connectors off


Splices done now to wire the truck side

Here is some eye candy for you guys while I work through this
There maybe weeks and weeks of wiring here on this truck now to get everything working and sorted, while this is happening I will be putting the rest of the truck together

Suspension with its new limit straps, and adjusted all cleaned up ready for wheels and tires

Drivers limit strap installed


Here is a shot showing both suspension braces now installed

Reason behind the TBars
- I always have t bars around the shop

- I needed some strong steel

- Inspired by other drop bracket kits on the market, I see they often have a lateral brace like this and often it is round bar

- Round sheds snow and dirt

- Parts were free, aside from the small steel plates I provided (Using the existing t bars and the t bar skid plates I made them bolt on made 90% of parts that came off the truck)

- Conversation starter "why does your ranger still have t bars and coilovers" I can hear it now

- I'm part crazy
- Just like anything "freeform fabrication" lots of thought (time fiddling around) was put into the production of these suckers

Because we are using a drop bracket lift along with a coilover conversion I wanted to add a lateral brace to support the superlift drop brackets. You see some who have gone before me now think that with a mid travel kit and drop brackets it's now a trophy truck and one trip to the desert results in bent drop brackets.

I know this truck will not be beat on as hard as some of those but I figured a little support cannot hurt. Many Chevy ford and Toyota drop bracket kits often include bars like these.
I was happy to be able to fab them with metal we already had and make them 100% bolt on using factory holes and fasteners

Last edited on Sun Mar 12th, 2023 07:14 pm by Eddie Money


____________________


I know my crazy! Do you?
2007 Sport 4door 4x4 4.0L SOHC V6 Ranger
Back To Top PM Quote Reply

 Posted: Sun Mar 12th, 2023 07:21 pm
PM Quote Reply
267th Post
Eddie Money
Member


Joined: Mon Nov 13th, 2017
Posts: 1587
Name: 
Occupation: 
Interests: Burt gummer life ...
Status: 
Offline
Reputation: 
Reputation Points: 1587
"Added by eddie, posted by 410custom"


More progress and more hurdles overcome


So we are at the point in this build where the truck is now running with the turn of the key
I was all set to get some video of the first
Official “truck is actually ready to run” phase however the smell of gas stopped me cold
So I had to shut it down and troubleshoot


Raw fuel on the ground!


Only from Bank 2


Sure enough raw fuel in the exhaust, only on one bank. So I spent a few days troubleshooting. First I checked all the Holley software settings for the injectors, then I checked all the wiring for the injectors as much as I could. With everything in
Order Brett suggested I pull the spark plugs. Talk about a “oh dua” moment.
So I ran over there pulled the plugs on cyl 5-8 and sure enough only 8 is wet. That changes things one sticking injector. So the intake had to come off. Carefully.


Cyl 8 washed clean


Sure enough put the #8 in my bench tester and it is stuck open, the carb cleaner/fuel Just poured right through.
These are “reman” injectors from eBay.
Well now they are trash, I don't trust them, since all 8 came from the same “rebuilder”

Lucky I had another set here set aside for my own build. Complete set of 8 reman injectors 19# for a 98-01 5.0 w returnless fuel


So I removed the intake, spacer and gaskets and replaced all 8 injectors with a new set.


New set installed. All Holley wiring final wrapped

This time I tested each new injector before install.

Intake back on

Now the truck starts and runs with the bump of the key and no more raw fuel in the exhaust

So this morning I am going to change the oil in case any fuel made it into the crankcase and then I can get the video we have all been wanting.

She sounds so wicked!! Nasty sounding v8 ranger I'm happy. Rollercoaster ride building these things I am sure these trucks have removed some years off my life

I now have a working tachometer, working coolant gauge, working od button and light and now I am wiring up the brake/park interlock

Floor shifter is mocked up and shifting the transmission more on this later


After a long heat cycle I then re torqued the headers and all exhaust she is ready to run!!


A hole injector


New taylor wires arrived! Ordered
Last october


Now Building the instrument cluster today ....

So far I have this tach working with the 5.0 and Holley I am sure this 05 cluster could be used in an older truck build some driveshafts day! Stay tuned!!!


____________________


I know my crazy! Do you?
2007 Sport 4door 4x4 4.0L SOHC V6 Ranger
Back To Top PM Quote Reply

 Posted: Sun Mar 12th, 2023 07:23 pm
PM Quote Reply
268th Post
Eddie Money
Member


Joined: Mon Nov 13th, 2017
Posts: 1587
Name: 
Occupation: 
Interests: Burt gummer life ...
Status: 
Offline
Reputation: 
Reputation Points: 1587
"Added by eddie,posted by 410custom"

You would think I would learn over all these years DO NOT USE THE $$$$$ OIL RIGHT AWAY hahahahaha always get it running first! (couple of heat cycles at least)

Then comes the Mobil one full synth.........

$50+ right down the tubes

Hang tight dudes
Video of truck running is coming
I found a dude lives 30 minutes from me parts out F150....guess who now owns a bunch of clean F150 driveshafts and t cases
NO DENTS in the rear d shafts
Finding cores to build the shafts from is always a challenge where I live.....not anymore!!

I am building the driveshafts for this truck
I will finally be able to move her under her own power this weekend!!


____________________


I know my crazy! Do you?
2007 Sport 4door 4x4 4.0L SOHC V6 Ranger
Back To Top PM Quote Reply

 Posted: Sun Mar 12th, 2023 07:28 pm
PM Quote Reply
269th Post
Eddie Money
Member


Joined: Mon Nov 13th, 2017
Posts: 1587
Name: 
Occupation: 
Interests: Burt gummer life ...
Status: 
Offline
Reputation: 
Reputation Points: 1587
"Added by eddie, posted by 410custom"

410custom mic drop!!!

I will let the video speak for itself...
Build Thread updates are coming...


Last edited on Sun Mar 12th, 2023 07:29 pm by Eddie Money


____________________


I know my crazy! Do you?
2007 Sport 4door 4x4 4.0L SOHC V6 Ranger
Back To Top PM Quote Reply

 Posted: Sat Apr 1st, 2023 07:02 pm
PM Quote Reply
270th Post
Eddie Money
Member


Joined: Mon Nov 13th, 2017
Posts: 1587
Name: 
Occupation: 
Interests: Burt gummer life ...
Status: 
Offline
Reputation: 
Reputation Points: 1587
We will complete this truck build here so keep coming back😉

"Added by eddie, posted by 410custom"

All right so the last time we saw the truck it was running, shifting and had brakes!
Instrument cluster mostly working as well.
Nobody in the videos pointed out that the cruise control had been re located, and the arb pump was in place,
lights in the bumper, .... and the truck obviously has driveshafts and more

you guys maybe slippin!
HAHAHAHA
Anyways it has been a long hard few weeks, most of the time was spent on the seats and console install........
Lets check it out

I will start with the instrument cluster:

In order to get a working speedometer I needed to install the Dakota Digital speedometer interface.
Really easy to wire up after you have done a few of these.

Basically Dakota Digital (DD) gets its input speed signal from the VSS in the rear axle. The VSS sensor in the rear end is a reliable place to take a reading.
The VSS wires from the rear axle speed sensor head directly to the 4WABS control module under the hood. This is true for most 98-11 Rangers, Explorers, etc
The ABS module then processes this signal and sends it on to many systems in the truck.
However the speedometer and cruise control use a different signal
The old 2007 PCM from the SOHC engine would have done the speed signal "buffering" for the speedometer and cruise.
Traditionally ford speedometers need to see 8000 pulses per mile, this 05 cluster is no different.

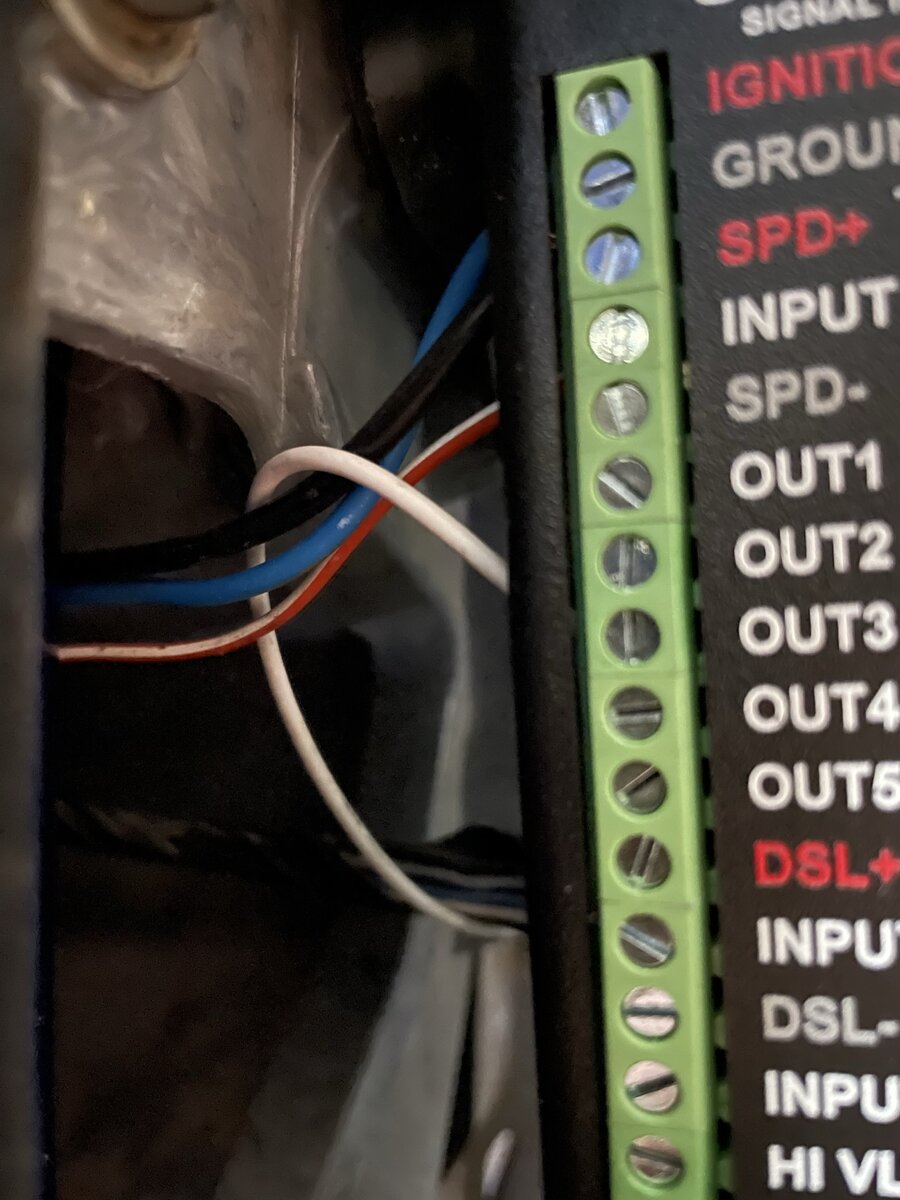
Wiring the Dakota SGI 100BT

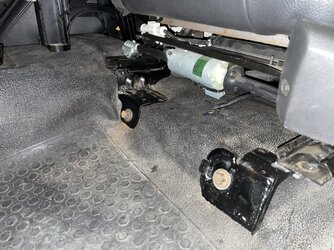
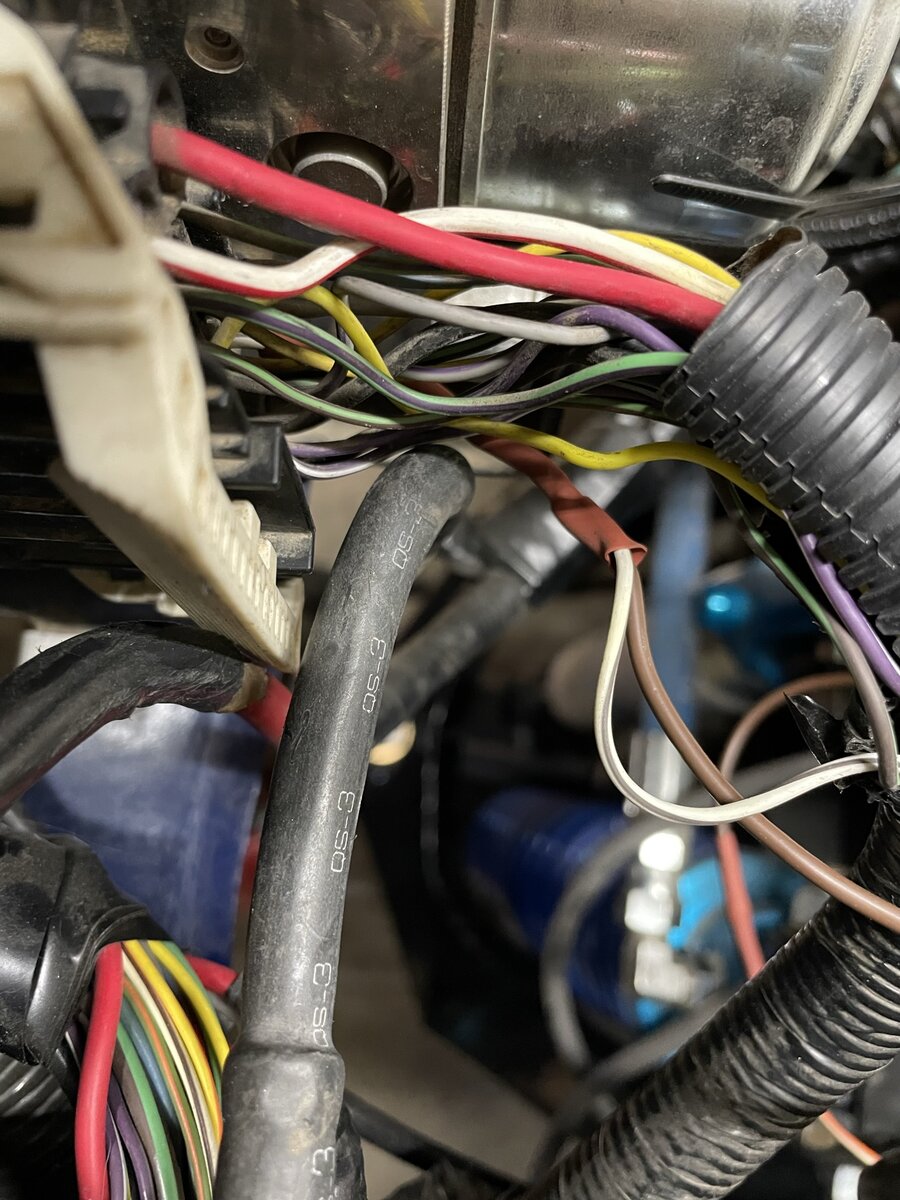
I get my rear axle VSS signal + wire at the ABS pump. I only need to run this one wire into the dash
07 ranger the wire is white/black
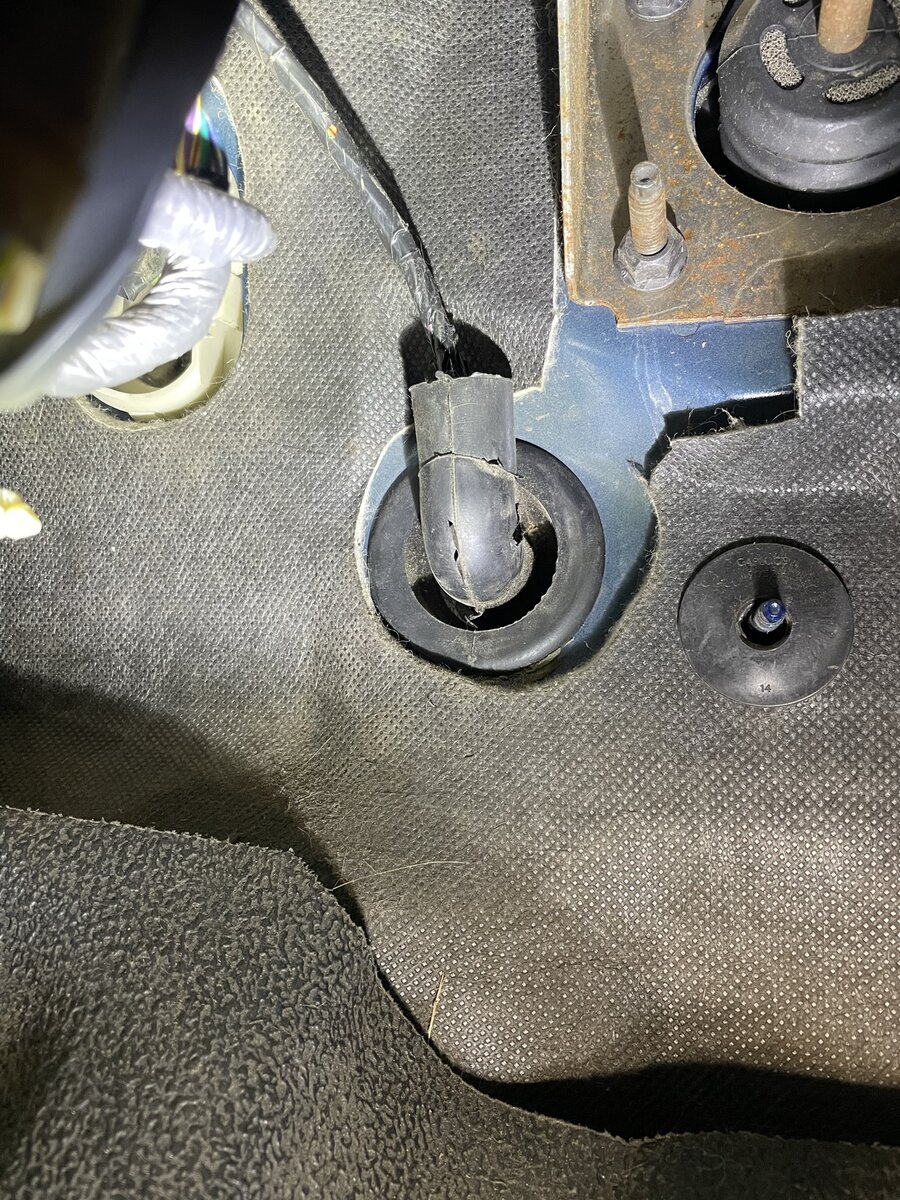
I soldered a brown wire to the rear axle VSS + and used a pass through from a 05 Ranger to get some wires through the dash cleanly
I needed to run tachometer signal from Holley to the cluster, reverse light feed into the interior and a few others


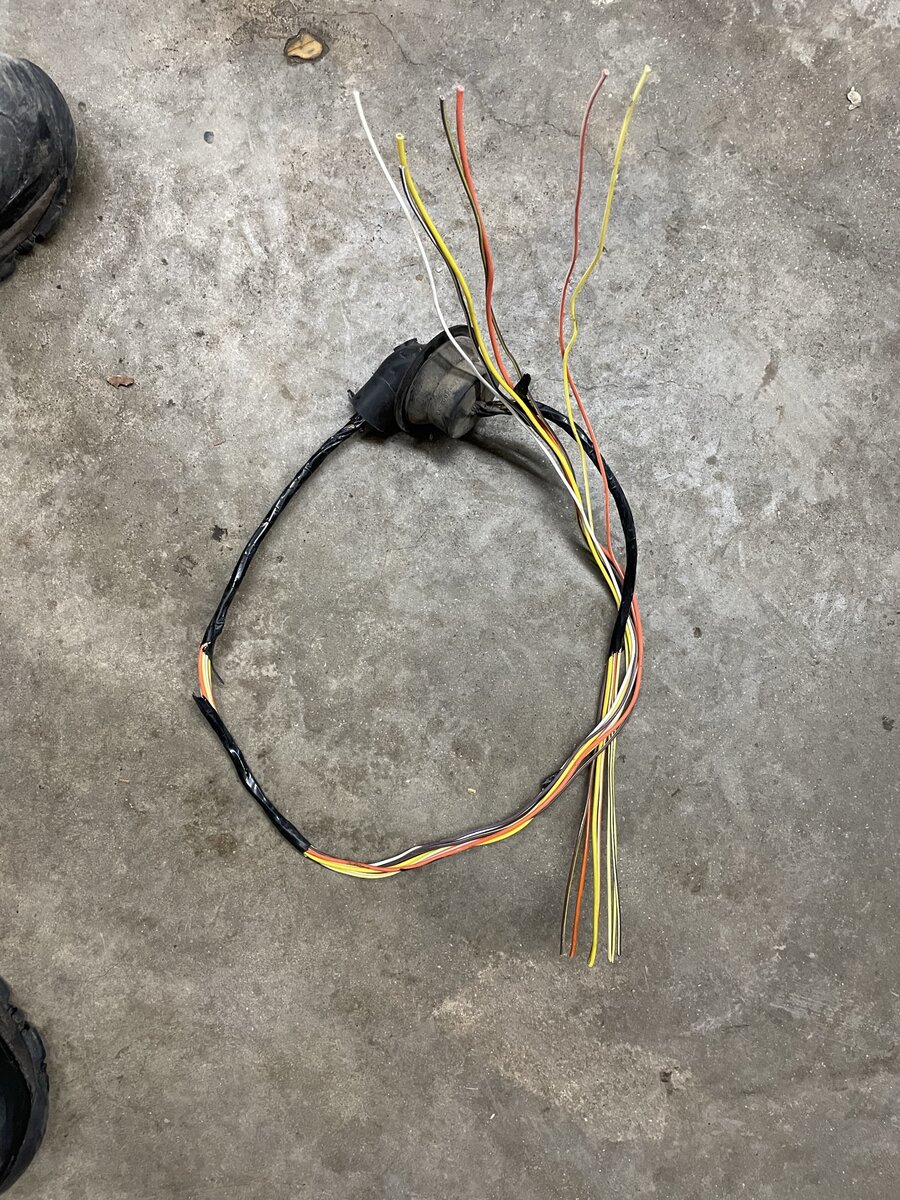
The Dakota box gets 4 wires total on this truck
1. ACC power on (BLUE hot in start and run) taken from ignition switch
2. Ground BLACK chassis ground right near e brake pedal
3. VSS + in (BROWN from our ABS motor turns to red/white inside near cluster)
4. Buffered VSS signal out (WHITE direct to 05 cluster, speedometer in and cruise control) This wire is hooked to OUTPUT 3 for our use, explained below


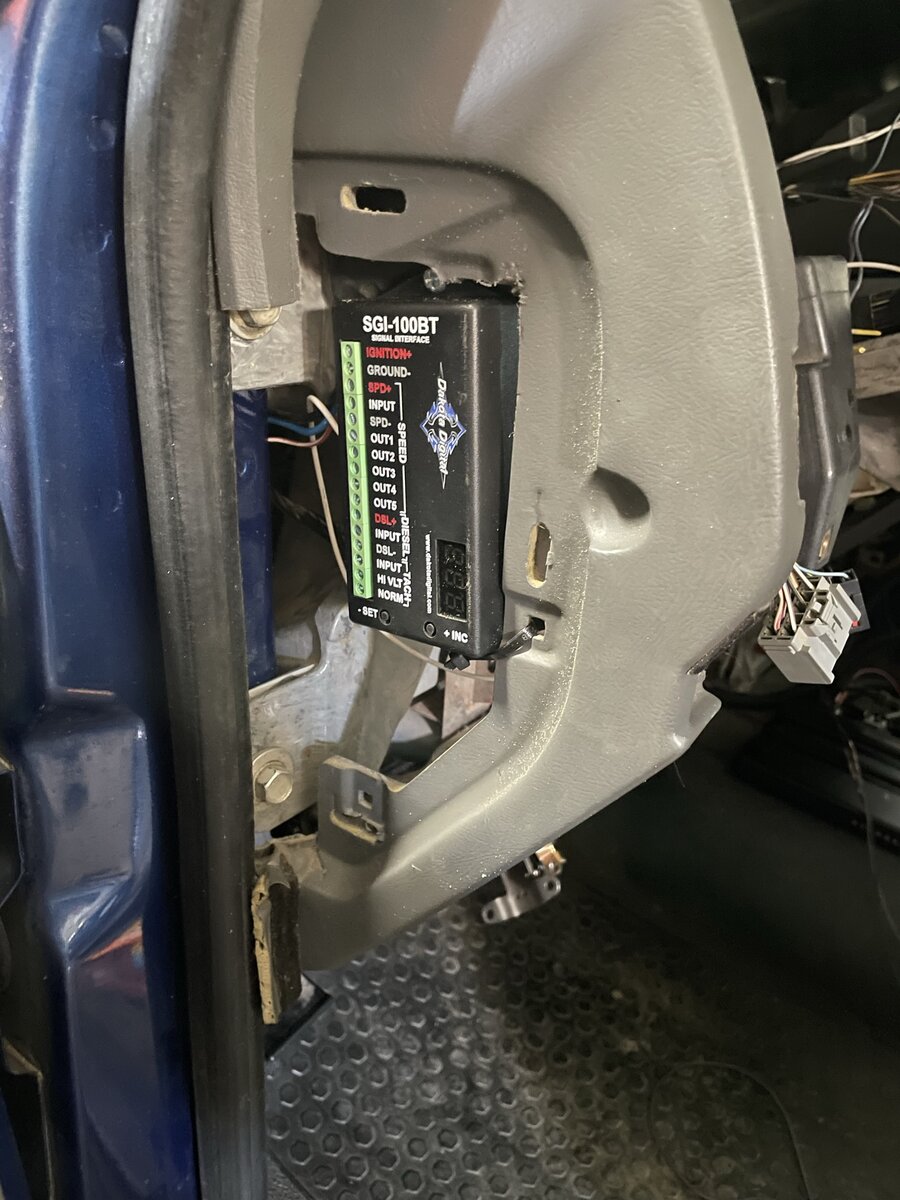
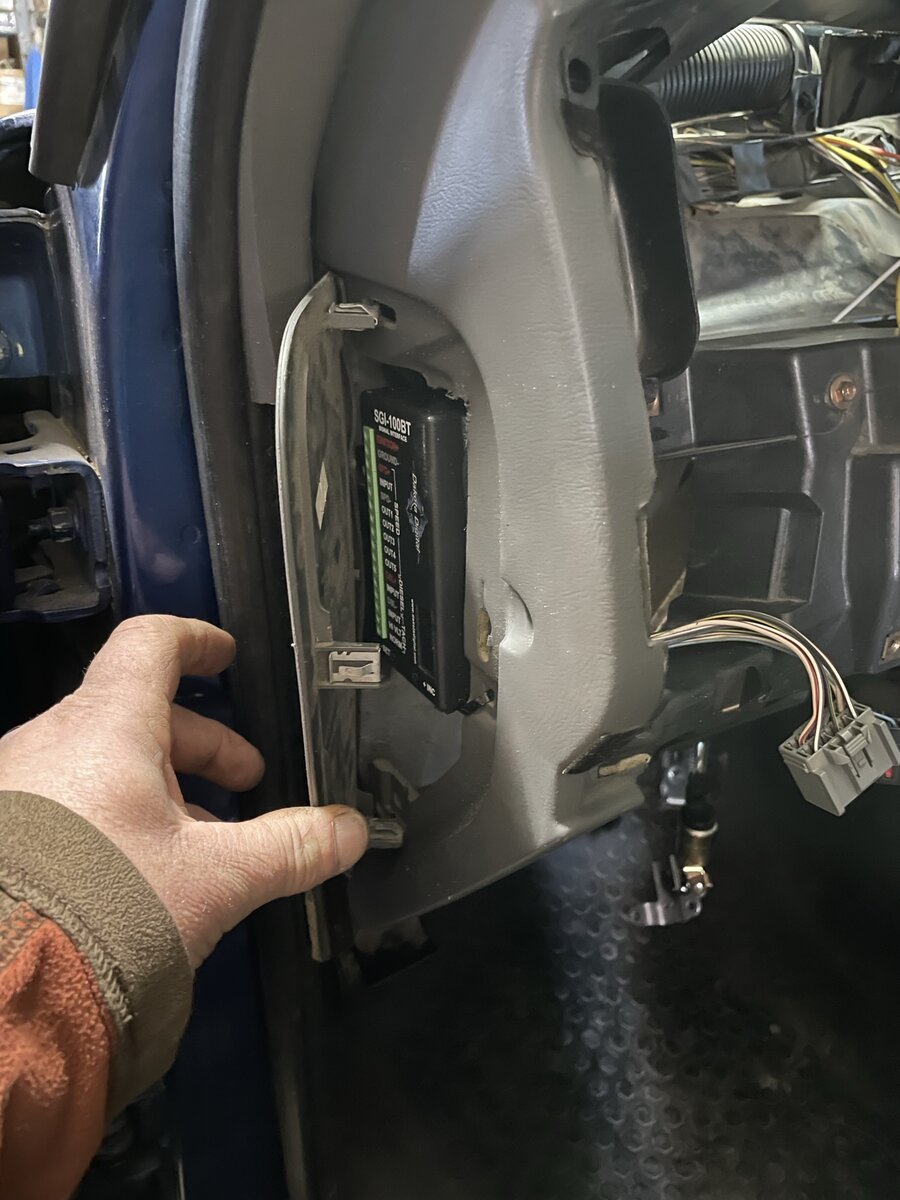
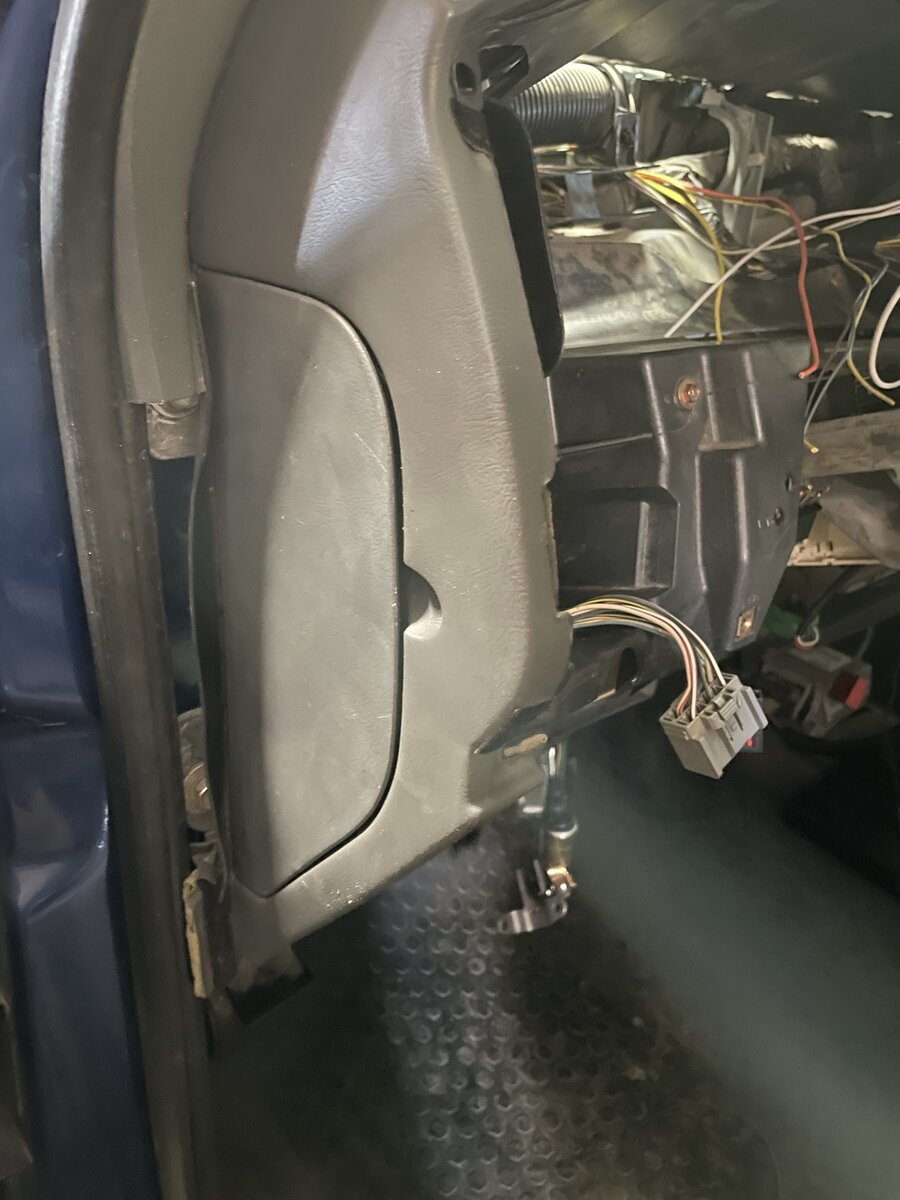
Much time spent finding the perfect mounting location and fabricating mounts for these electronics
This is the perfect place to put this in a late model Ranger, the old fuse box cover, Thanks Ford for keeping this cover even after the fuse box went MIA in 2002. The dakota is adjusted while driving using two buttons on the faceplate, or while idling, and it can also be adjusted via bluetooth with the Dakota app (can be installed on Android stereo/ head unit)


I have already set a few of these up in our trucks. I copied and pasted the setup instructions from another thread:


Now you need to setup your Dakota box so it will work for us with application 3
referring to the instructions found here: https://www.dakotadigital.com/pdf/sgi-100BT.pdf

Set the Dakota box to convert a high signal to a low signal (H-L) or application 3
Any signal over 32000 ppm is considered a HIGH signal (for us its 77,760ppm)
Any signal under 32000 is considered a LOW signal (for us the target is 8000ppm)

Application 3 settings seen here:


Set the CAL value to 1.65

Using output 3 will send 1/16 of that value to the black/grey 679 vss+ signal to modules.


The math goes like this:

Figuring out the VSS PPM:
Tire revolutions per mile x ring gear teeth = VSS generated signal to ABS pump
29" tire revolves 720 times in a mile
Our 8.8 ring gear has 108 teeth, so

720 x 108 = 77,760 pulses per mile (ppm)
being sent to the ABS motor from the rear axle VSS

77,760 needs to be factored up so that 1/16 of it is close to the target 8000ppm.
(1/16 of something is the same as saying multiply by 0.0625)
So

(77,760 x __________ ) x 0.0625 = 8000

77760 x 1.65 = 128,304

128,304 x 0.0625 = 8019 pretty dang close

Can also say it like this:
1/16 of 128,304 = 8019 PPM

That is how we get our CAL value of 1.65 and know we need to use output3 which is 1/16 of that value

This will give us a working speedometer that can be adjusted for larger tires, gearing changes, changes in pressure as you go!!


____________________


I know my crazy! Do you?
2007 Sport 4door 4x4 4.0L SOHC V6 Ranger
Back To Top PM Quote Reply

 Posted: Sat Apr 1st, 2023 07:10 pm
PM Quote Reply
271st Post
Eddie Money
Member


Joined: Mon Nov 13th, 2017
Posts: 1587
Name: 
Occupation: 
Interests: Burt gummer life ...
Status: 
Offline
Reputation: 
Reputation Points: 1587
"Added by eddie, posted 410custom"


Now I spent ALOT of time looking for the perfect location for the ARB locker air compressor

I have had one of these (older version) under the hood of my BII since 1999 or so?? It still works like new to this day/. My wifes FJ cruiser also mounted compressor under the hood. Under the hood works it keeps them out of the elements cuts down on the noise and makes for a cleaner install w all the wiring and plumbing following factory routes. Also closer to the power distribution and dash for the switches.

I wanted to put it under the hood for sure. Other options were under the truck, behind the grill, and a few others I looked at.
I finally decided to keep it simple
found a perfect location for the cruise control and used the factory cruise control bracket (or two) to mount things


ARB system wiring harness mounted in truck and ran


ARB HO Air compressor, factory mounting brackets are very nice, lots of ways to rotate and move things around to suit your needs
This is where I want the compressor to land


factory cruise control hanger melded w arb compressor mount


mounts with one bolt


The main fuse for the arb system easily accessed
Compressor mounted


Now the cruise control will need a bracket
I used a second factory cruise mount to make this so


Drilled one hole in truck


Clears the hood hinge cable and all wiring reaches no problem, perfect!!


____________________


I know my crazy! Do you?
2007 Sport 4door 4x4 4.0L SOHC V6 Ranger
Back To Top PM Quote Reply

 Posted: Sat Apr 1st, 2023 07:31 pm
PM Quote Reply
272nd Post
Eddie Money
Member


Joined: Mon Nov 13th, 2017
Posts: 1587
Name: 
Occupation: 
Interests: Burt gummer life ...
Status: 
Offline
Reputation: 
Reputation Points: 1587
Added by eddie,  posted by 410custom"


The tachometer works! Hooks up directly to wire from Holley. 
I show it working in the video. I show you how I wired the tachometer.


My chicken scratch notes from measuring for shafts. I
Love posting this behind the scenes stuff


Lets check out the driveshafts
I scored on some 1997 F1250 driveshafts locally
I shortened them and rebuilt with new U joints


Front


All parts kept in phase and square during re assembly


Beware the pink work bench towel!! Maybe hard for some viewers to see


Moog conversion u joint, they did not have a spicer conversion joint in town. Moog will work


Any “high welds” were knocked down with grinder. shafts cleaned, painted, assembled. The big metal “ring” on the rear shaft was removed (with torch) for clearance of the ranger crossmember


Done!!


____________________


I know my crazy! Do you?
2007 Sport 4door 4x4 4.0L SOHC V6 Ranger
Back To Top PM Quote Reply

 Posted: Sat Apr 1st, 2023 07:33 pm
PM Quote Reply
273rd Post
Eddie Money
Member


Joined: Mon Nov 13th, 2017
Posts: 1587
Name: 
Occupation: 
Interests: Burt gummer life ...
Status: 
Offline
Reputation: 
Reputation Points: 1587
"Added by eddie, posted by 410custom "

If it needs balancing then we can have it done. Shafts were balanced before I get them, as long as we keep them in phase and square I have not had an issue with like the last 4-5 trucks I have done. They are all still on the road. The “driveline” shop I used to pay to do this for me ($400-600+ now??)! They don't even balance them either I figured I could do a better job myself and save the money. So far I have been right!


We did find a driveshaft shop about 2 hour drive he is willing to help us for a fair price and he can balance. I'm happy with this method so far. There are some YouTube's that show us how to redneck balance if there ends up being a wobble (there won't)


____________________


I know my crazy! Do you?
2007 Sport 4door 4x4 4.0L SOHC V6 Ranger
Back To Top PM Quote Reply

 Posted: Sat Apr 1st, 2023 07:41 pm
PM Quote Reply
274th Post
Eddie Money
Member


Joined: Mon Nov 13th, 2017
Posts: 1587
Name: 
Occupation: 
Interests: Burt gummer life ...
Status: 
Offline
Reputation: 
Reputation Points: 1587
"Added by eddie, posted by 410custom "

[url=https://www.explorerforum.com/forums/account/][/url]

The instrument cluster

Now that I have a working 2005 cluster I wanted to make it appear to be his original 07 cluster with the white faces


So I took both clusters apart and swapped the good looking parts over


Everything cleaned and dusted ready for assembly. The needles are only pressed on lightly because they will need adjusting when power is applied


Much better to have a nice clean cluster
I really like these late model units, the 2005 is the last year with wiring inputs, after this they all went can bus and we will need some sort of can bus emulator to make customizations to any of the gauges or warning lights

 You can see the fork in the pictures. These late model needles take ALOT more force to remove then the old ones I was worried the first time I was going to break something pulling really hard.

Last edited on Sat Apr 1st, 2023 07:44 pm by Eddie Money


____________________


I know my crazy! Do you?
2007 Sport 4door 4x4 4.0L SOHC V6 Ranger
Back To Top PM Quote Reply

 Posted: Sat Apr 1st, 2023 07:47 pm
PM Quote Reply
275th Post
Eddie Money
Member


Joined: Mon Nov 13th, 2017
Posts: 1587
Name: 
Occupation: 
Interests: Burt gummer life ...
Status: 
Offline
Reputation: 
Reputation Points: 1587
"Added by eddie,  posted by 410custom"

Wait until you see the console and seats

After I sorted out the passenger seat it Took over a week to get the drivers seat to fit properly
It came out that is for sure, which is good because the way the drivers seat was before was unacceptable. I was even seat shopping just in case this was impossible. Had a line on some 2011 ranger seats but the dude wanted too much. I am super relieved that I was able to make these work. And work they do!!!

One of the best conversions I have ever done, but it has its moments hahahahaha
Losing sleep over drivers seat fitment has me battling to win this war

Seat retrofit with console was about as much work as converting to v8 lol


____________________


I know my crazy! Do you?
2007 Sport 4door 4x4 4.0L SOHC V6 Ranger
Back To Top PM Quote Reply

Current time is 11:19 am Top Page:  First Page Previous Page  ...  6  7  8  9  10  11  12  13  14  15  Next Page Last Page    

Ford-Rangers.com Ranger Forum > Tech Section > Member's Projects Showcase > 410Custom's builds a 2007 Ranger V8 - cu

Users viewing this topic


PHP Version: 8.2.28
Server version: 10.6.21-MariaDB
UltraBB 2.01.01 Copyright © 2008-2025 Jim & Chris
Page processed in 0.1030 seconds (40% database + 60% PHP). 109 queries executed.