Ford-Rangers.com Ranger Forum HomeFord-Rangers.com Ranger Forum Home
Home Recent Topics New posts Search search Menu menu Not logged in - Login | Register

Ford-rangers.com is a discussion forum, a Ranger forum for people who have questions about fixing or modifying
their Ford Rangers or people who just admire their Ranger. Please join and enjoy sharing experiences!

Front end parts replacement       #: 706
 Moderated by: NoPower, Mike69, MaDMaXX, Page:    1  2  Next Page Last Page  
New Topic Reply
 Rate Topic 
 Posted: Sat Mar 17th, 2018 02:50 pm
PM Quote Reply
1st Post
JAMMAN

Owns A Torsen


Joined: Mon Sep 18th, 2017
Location: Grove City, Ohio USA
Posts: 6429
Name: Jim ...
Occupation: 5 axis cnc programmer ...
Interests: RBV's ...
Status: 
Offline
Reputation: 
Reputation Points: 6429
OK Guys (and the one gal so far) I'm heading in to something I have never done on a torsion bar ranger. I'm replacing all 4 ball joints, 2 tie rod ends and the wheel bearings/hub.

No stranger to front ends but I USUALLY buy an entire upper control arm with the ball joint in it. This time due to that unusual adjustment thingy on the right side I want to just press the ball joints in. We have ample equipment at where I work to do this.

Problems/concerns/ thoughts from people who have actually done it on a torsion bar ranger?

I'm looking forward to it but if there is any strange thing I should know before hopping in to it please do tell.


____________________
00 XLT 4WD RCSB 3.GO! Jalapeño
01 XLT 2WD RC Steppie 3.0 auto Silver
The future belongs to those who show up.
Back To Top PM Quote Reply

 Posted: Sat Mar 17th, 2018 03:52 pm
PM Quote Reply
2nd Post
V8 Level II
Member


Joined: Tue Dec 5th, 2017
Location: Michigan, USA
Posts: 118
Name: 
Occupation: 
Interests: 
Status: 
Offline
Reputation: 
Reputation Points: 118
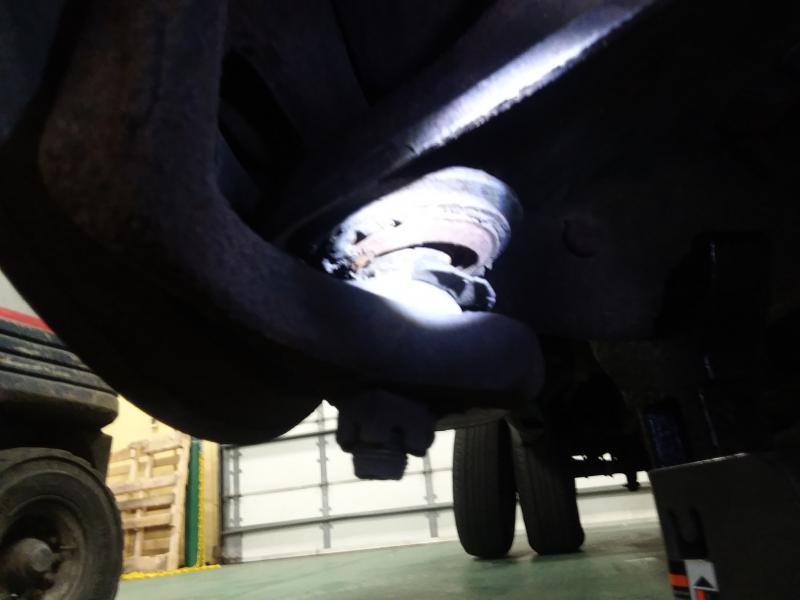
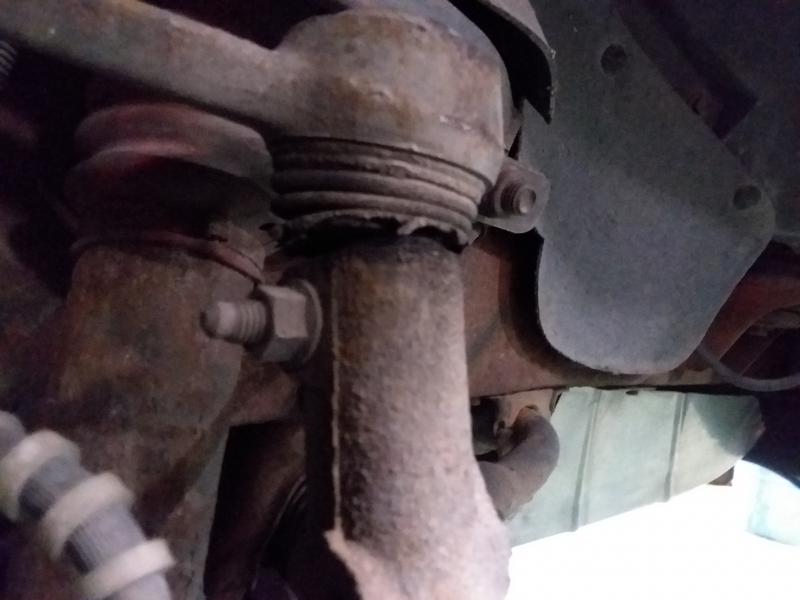
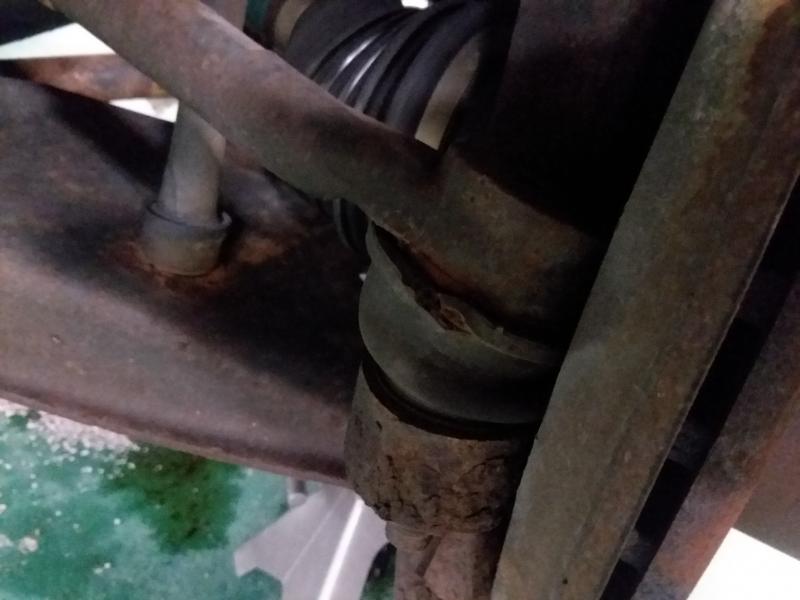
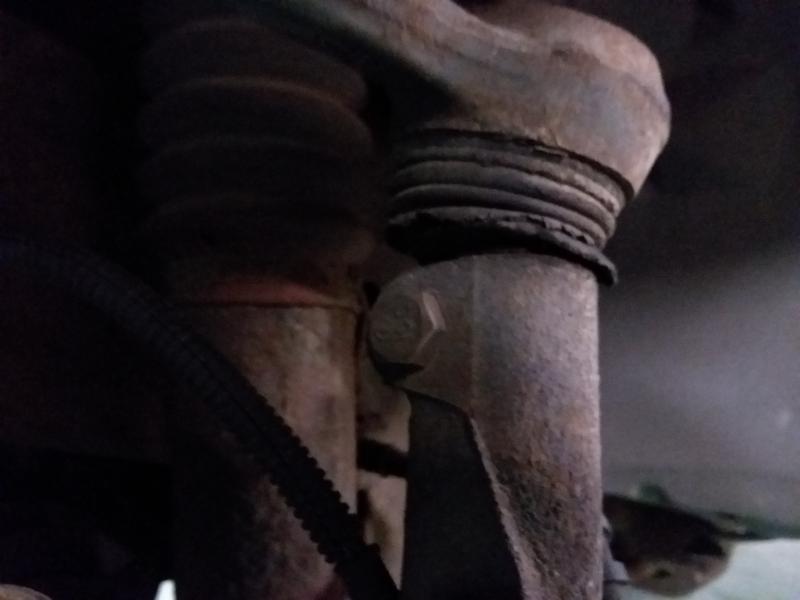
Factory upper ball joints are not meant to be serviced separately. If you still have Ford uppers, you can either get another set of complete factory style upper arms or get aftermarket arms with replaceable ball joints, often equipped with grease fittings as well.

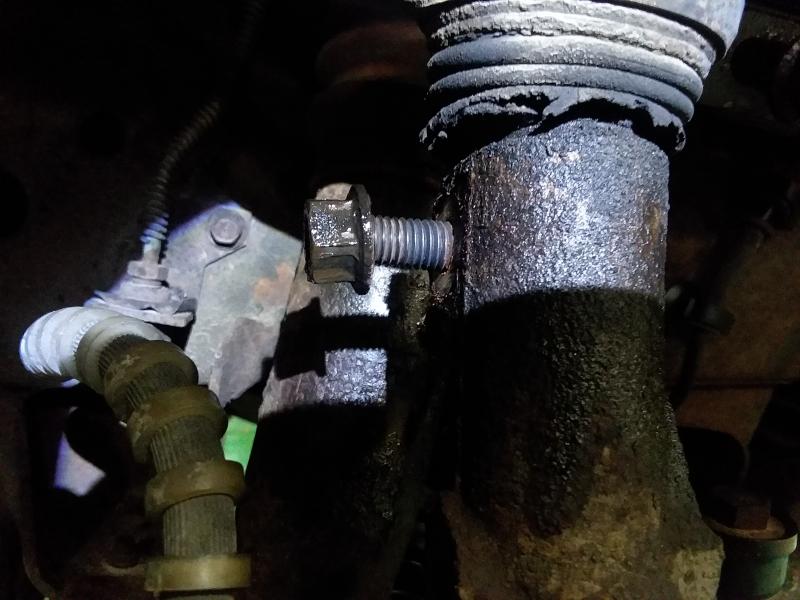
You can either get another ball joint carrier for the 2-piece RH control arm or replace the assembly with a one piece RH arm (mirror image of the left arm). Ford switched production over to one piece arms on both sides and you can do the same.

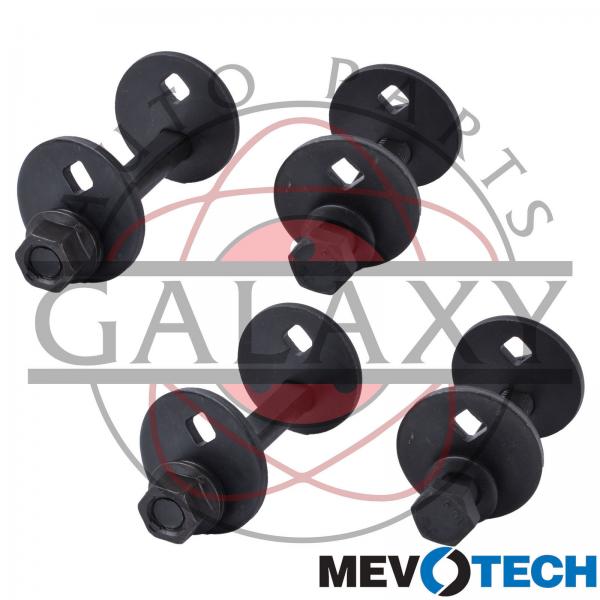
If your truck still has the original alignment plates, you will need to substitute a set of adjustment cams.

Last edited on Sat Mar 17th, 2018 03:58 pm by V8 Level II


____________________
2003 FX4 Level II, Supercharged 5.0L V8, Headers, Duals, BW4406 manual T/C
Aussie Locker, Torsen L/S, 4.10's, Bilstein 7100 rezzies, Cadillac/Mustang rear discs, Duff traction bars
Keypad Entry, Lock LEDs, sway bar discos, Heated seats, Explorer EATC, Trip Computer and consoles

Other rides:
2016 C-MAX Energi (plug-in Hybrid)
2011 Taurus SEL (highway cruiser)
2003 Ranger 2.3L M5ODR1 Regular Cab (drudge)

Back To Top PM Quote Reply

 Posted: Sat Mar 17th, 2018 03:55 pm
PM Quote Reply
3rd Post
NoPower

Don


Joined: Fri Oct 20th, 2017
Location: Grove City, Ohio USA
Posts: 590
Name: Don ...
Occupation: Retired ...
Interests: Grand Kids,Car Shows,DYI projects ...
Status: 
Offline
Reputation: 
Reputation Points: 590
As long as you keep a jack under the lower control arm you should be ok. Thats what I did when I replaced both upper arms on NoPower. I didn't know you could replace just the upper ball joints. The advantage of replaceing the complete uppers is you also get new bushings..


____________________
1984 ElCamino (Show Car)
2000 Mustang (Show Car)
1995 Chrysler Concord belong to Earl
2014 Ford Escape SE 1.6 Turbo
1958 Wife (Arm Candy)
15 Grand Children
Back To Top PM Quote Reply

 Posted: Sun Mar 18th, 2018 03:17 pm
PM Quote Reply
4th Post
beater
Member


Joined: Sat Dec 16th, 2017
Location: Easton, Pennsylvania USA
Posts: 5
Name: 
Occupation: 
Interests: 
Status: 
Offline
Reputation: 
Reputation Points: 5
I do not believe you can change just the upper ball joint.  I think you have buy the arm.
Even though I had that weird right side upper arm on my torsion bar Ranger I replaced both upper arms/ball joints with one piece Moog arms.  I added the camber cam adjustment bolts while I was in there.

Last edited on Sun Mar 18th, 2018 03:18 pm by beater


____________________
2002 Edge 3.0 4x4 regular cab
Back To Top PM Quote Reply

 Posted: Mon Mar 26th, 2018 12:32 pm
PM Quote Reply
5th Post
JAMMAN

Owns A Torsen


Joined: Mon Sep 18th, 2017
Location: Grove City, Ohio USA
Posts: 6429
Name: Jim ...
Occupation: 5 axis cnc programmer ...
Interests: RBV's ...
Status: 
Offline
Reputation: 
Reputation Points: 6429
Parts are in, got wheel bearings, lower ball joints, upper arms with ball joints (went 1 piece) and outer tie rod ends.


____________________
00 XLT 4WD RCSB 3.GO! Jalapeño
01 XLT 2WD RC Steppie 3.0 auto Silver
The future belongs to those who show up.
Back To Top PM Quote Reply

 Posted: Mon Mar 26th, 2018 01:08 pm
PM Quote Reply
6th Post
1qaz
Member


Joined: Sun Feb 25th, 2018
Location: USA
Posts: 198
Name: 
Occupation: 
Interests: 
Status: 
Offline
Reputation: 
Reputation Points: 198
We expect pictures with the progress updates. Not having to press ball joints in and out should certainly ease the amount of work needed to complete the job. The last time I did mine I swear I qualified for a PhD.

Back To Top PM Quote Reply

 Posted: Mon Mar 26th, 2018 01:37 pm
PM Quote Reply
7th Post
Jimmyspy
Shadetree Mechanic


Joined: Fri Oct 27th, 2017
Location: Toledo, Ohio USA
Posts: 114
Name: Jimmy ...
Occupation: Engineering Student ...
Interests: Truck Stuff ...
Status: 
Offline
Reputation: 
Reputation Points: 114
JAMMAN wrote:
Parts are in, got wheel bearings, lower ball joints, upper arms with ball joints (went 1 piece) and outer tie rod ends.
I believe you'll need a camber kit when switching from the two piece to the single piece UCA.


____________________
2002 XLT 4x4, 4.0l V6, Silver Frost Metalic, Superlifted and stuff
Back To Top PM Quote Reply

 Posted: Mon Mar 26th, 2018 02:02 pm
PM Quote Reply
8th Post
JAMMAN

Owns A Torsen


Joined: Mon Sep 18th, 2017
Location: Grove City, Ohio USA
Posts: 6429
Name: Jim ...
Occupation: 5 axis cnc programmer ...
Interests: RBV's ...
Status: 
Offline
Reputation: 
Reputation Points: 6429
Is this the ticket? I see like 4 different types, some have one hole some 2.


____________________
00 XLT 4WD RCSB 3.GO! Jalapeño
01 XLT 2WD RC Steppie 3.0 auto Silver
The future belongs to those who show up.
Back To Top PM Quote Reply

 Posted: Mon Mar 26th, 2018 04:10 pm
PM Quote Reply
9th Post
Jimmyspy
Shadetree Mechanic


Joined: Fri Oct 27th, 2017
Location: Toledo, Ohio USA
Posts: 114
Name: Jimmy ...
Occupation: Engineering Student ...
Interests: Truck Stuff ...
Status: 
Offline
Reputation: 
Reputation Points: 114
Looks like it.


____________________
2002 XLT 4x4, 4.0l V6, Silver Frost Metalic, Superlifted and stuff
Back To Top PM Quote Reply

 Posted: Sun May 6th, 2018 04:49 pm
PM Quote Reply
10th Post
JAMMAN

Owns A Torsen


Joined: Mon Sep 18th, 2017
Location: Grove City, Ohio USA
Posts: 6429
Name: Jim ...
Occupation: 5 axis cnc programmer ...
Interests: RBV's ...
Status: 
Offline
Reputation: 
Reputation Points: 6429
Heading in to this tonight, tires are about gone, things shaking around pretty bad.

Going to be like a 3 day adventure, doing it at the shop so wife has to pick me up tonight.

I'll get as far as I can tonight, going to kind of wing it not looking at any tutorials.

I did buy the camber kit, I have the bolts and such.

I'm thinking shocks also, no idea what to buy but I'm going to have to think quickly and need to order tonight if doing internet. OR could do prime wife has a membership. Buying local is not an option too expensive.

They only have to last a year or so, I'm wanting a single cab version of this truck with a little better body. I don't have rust but have plenty of dings. Would trade straight up for a single cab version in amazon green. Might sell all my projects and concentrate on the one I really want.

So wish me luck, I will take pics probably a lot of "what not to do's" LOL.


____________________
00 XLT 4WD RCSB 3.GO! Jalapeño
01 XLT 2WD RC Steppie 3.0 auto Silver
The future belongs to those who show up.
Back To Top PM Quote Reply

 Posted: Sun May 6th, 2018 06:21 pm
PM Quote Reply
11th Post
Tsquare
Member


Joined: Fri Nov 10th, 2017
Location: Suwanee, Georgia USA
Posts: 1540
Name: 
Occupation: Controlled Insanity ...
Interests: 
Status: 
Offline
Reputation: 
Reputation Points: 1540
Good luck with it. It is a pain in the butt.

I did the upper and lower control arms, sway bar bushings, and camber kit last month. Just as an fyi, leave the camber bolts loose, the lower control arm bolts loose and sway bar loose when you are reattaching the spindle.

Last edited on Mon May 7th, 2018 01:32 pm by Tsquare


____________________
Tony
NE ATL
'04 XLT regular cab 3.slo stepside
Semi retirement
Back To Top PM Quote Reply

 Posted: Sun May 6th, 2018 08:17 pm
PM Quote Reply
12th Post
Mike69

Mustang Nut


Joined: Sun Oct 22nd, 2017
Location: Horsepasture, USA
Posts: 1690
Name: Mike ...
Occupation: Semi-retired ...
Interests: Vintage Mustangs, RBV's, car shows, & woodworking ...
Status: 
Offline
Reputation: 
Reputation Points: 1690
Jim, When I did the upper control arms & lower ball joints on my 2000 I had never done this type of work on a 4x4 before. Just take your time & you will be fine. I did one side one weekend, & the other side the next weekend using our spare vehicle to drive in between to work. Also make sure you get an alignment after you are done.


____________________
21 Bronco Sport Big Bend (Wife's DD)
05 F150 XLT Reg Cab, 2WD, 5.4L, Auto (My DD)
00 Ranger Extd Cab 4x4 4.0 OHV, Auto
99 Explorer Sport 4x4 4.0 SOHC, Auto
69 Mustang Coupe 5.0, 5 spd 9" rear(Project)
14 Kawasaki Vulcan (Wife's Toy)
Back To Top PM Quote Reply

 Posted: Sun May 6th, 2018 09:39 pm
PM Quote Reply
13th Post
JAMMAN

Owns A Torsen


Joined: Mon Sep 18th, 2017
Location: Grove City, Ohio USA
Posts: 6429
Name: Jim ...
Occupation: 5 axis cnc programmer ...
Interests: RBV's ...
Status: 
Offline
Reputation: 
Reputation Points: 6429
Everything is going well so far, I actually got a little farther than I thought I would tonight. All the bolts are coming right off, a lot of it is because last year I did brakes and rotors, I cleaned all the screws, tapped all the holes and used copper anti seize compound.

Here is the tire condition that the front end caused:


some pics of the boots as I was disassembling. Took calipers off, brackets, took dust shield off (3 bolts with 8mm heads), Loosen top knuckle bolt, hammer it out, hit the top arm upward with a sledge. Got all the cotter pins out which till I was about 17 I thought were Carter pins because that's what my dad called them. He was a democrat.


Only got to work on it from 6:30 to 8:30 had to fill my vending machines first. That's my 3rd job out of 4.


____________________
00 XLT 4WD RCSB 3.GO! Jalapeño
01 XLT 2WD RC Steppie 3.0 auto Silver
The future belongs to those who show up.
Back To Top PM Quote Reply

 Posted: Mon May 7th, 2018 06:37 am
PM Quote Reply
14th Post
Mike69

Mustang Nut


Joined: Sun Oct 22nd, 2017
Location: Horsepasture, USA
Posts: 1690
Name: Mike ...
Occupation: Semi-retired ...
Interests: Vintage Mustangs, RBV's, car shows, & woodworking ...
Status: 
Offline
Reputation: 
Reputation Points: 1690
Jim, it looks like it is coming along good. All your dust boots look just like mine did when I did my ball joints at 105K miles. Both of my rotor dust shields were rusted pretty badly when I took them off. Are you replacing the hub & bearing assemblies because they were loose/noisy or because everything is apart & the mileage on the truck?.


____________________
21 Bronco Sport Big Bend (Wife's DD)
05 F150 XLT Reg Cab, 2WD, 5.4L, Auto (My DD)
00 Ranger Extd Cab 4x4 4.0 OHV, Auto
99 Explorer Sport 4x4 4.0 SOHC, Auto
69 Mustang Coupe 5.0, 5 spd 9" rear(Project)
14 Kawasaki Vulcan (Wife's Toy)
Back To Top PM Quote Reply

 Posted: Mon May 7th, 2018 08:21 am
PM Quote Reply
15th Post
JAMMAN

Owns A Torsen


Joined: Mon Sep 18th, 2017
Location: Grove City, Ohio USA
Posts: 6429
Name: Jim ...
Occupation: 5 axis cnc programmer ...
Interests: RBV's ...
Status: 
Offline
Reputation: 
Reputation Points: 6429
Because everything is apart and the mileage would be the reason. They seem OK but I can tell they are original.

BUT it looks like someone put a pair of half shafts in there the boots look new and there are stickers on the shaft still. Hope they were decent quality.


____________________
00 XLT 4WD RCSB 3.GO! Jalapeño
01 XLT 2WD RC Steppie 3.0 auto Silver
The future belongs to those who show up.
Back To Top PM Quote Reply

 Posted: Mon May 7th, 2018 11:02 am
PM Quote Reply
16th Post
CBB9M
23 year Ranger veteran


Joined: Sun Oct 22nd, 2017
Posts: 371
Name: Bill ...
Occupation: 
Interests: 
Status: 
Offline
Reputation: 
Reputation Points: 371
JAMMAN wrote:


Problems/concerns/ thoughts from people who have actually done it on a torsion bar ranger?

I'm looking forward to it but if there is any strange thing I should know before hopping in to it please do tell.


a) The LBJ's can be replaced using a jackstand to support the LCA and a 3# or so hammer. No press required.

b) If for some reason you fully relax a torsion bar, you'll probably be surprised at how little the LCA rotates in the course of doing this when compared against a coil sprung LCA.

c) Good quality and good current condition of the front shocks on these front end really matters; you can see why by looking at the distance between the LCA and that yellow urethane bumper that limits LCA travel. Vehicle on the ground, of course. The distance isn't much at all, so with worn (and maybe cheapo shocks), the LCA will routinely bottom on that bumper and along with a crappier ride, will assure a much higher noise level inside the vehicle.


____________________
-Bill

04 Ranger FX4 Level II, several mods
Back To Top PM Quote Reply

 Posted: Mon May 7th, 2018 01:11 pm
PM Quote Reply
17th Post
JAMMAN

Owns A Torsen


Joined: Mon Sep 18th, 2017
Location: Grove City, Ohio USA
Posts: 6429
Name: Jim ...
Occupation: 5 axis cnc programmer ...
Interests: RBV's ...
Status: 
Offline
Reputation: 
Reputation Points: 6429
Thanks Bill,

Already bought the press, a good quality one too but since I have it I'll try the hammer method, it has worked for everything else so far. I got quite a bit done during lunch break, I have both "steering knuckles" off now. Both the bearings were acceptable but I have new ones so who cares. Might keep them for projects later up the road.

I have experienced the coil springs so far the torsion bars are a cake walk by comparison. I haven't relaxed them, I am supporting under the LCA as close as I could get to the ball joint. Probably won't get to experience that this run.

I would hate to pay a gob for shocks but I do understand, might have to get out the wallet. Since I'm already in it I don't want to touch it again for a while.


____________________
00 XLT 4WD RCSB 3.GO! Jalapeño
01 XLT 2WD RC Steppie 3.0 auto Silver
The future belongs to those who show up.
Back To Top PM Quote Reply

 Posted: Mon May 7th, 2018 07:23 pm
PM Quote Reply
18th Post
JAMMAN

Owns A Torsen


Joined: Mon Sep 18th, 2017
Location: Grove City, Ohio USA
Posts: 6429
Name: Jim ...
Occupation: 5 axis cnc programmer ...
Interests: RBV's ...
Status: 
Offline
Reputation: 
Reputation Points: 6429
Some engineer at Ford decided to run a fuel and brake line after the upper arm was in on the driver side back. Looks good till you try to remove the bolt.


____________________
00 XLT 4WD RCSB 3.GO! Jalapeño
01 XLT 2WD RC Steppie 3.0 auto Silver
The future belongs to those who show up.
Back To Top PM Quote Reply

 Posted: Mon May 7th, 2018 07:26 pm
PM Quote Reply
19th Post
Mike69

Mustang Nut


Joined: Sun Oct 22nd, 2017
Location: Horsepasture, USA
Posts: 1690
Name: Mike ...
Occupation: Semi-retired ...
Interests: Vintage Mustangs, RBV's, car shows, & woodworking ...
Status: 
Offline
Reputation: 
Reputation Points: 1690
Yea they were a PITA to get the factory UCA bolts out & get the new bolts in past those lines.


____________________
21 Bronco Sport Big Bend (Wife's DD)
05 F150 XLT Reg Cab, 2WD, 5.4L, Auto (My DD)
00 Ranger Extd Cab 4x4 4.0 OHV, Auto
99 Explorer Sport 4x4 4.0 SOHC, Auto
69 Mustang Coupe 5.0, 5 spd 9" rear(Project)
14 Kawasaki Vulcan (Wife's Toy)
Back To Top PM Quote Reply

 Posted: Mon May 7th, 2018 10:02 pm
PM Quote Reply
20th Post
JAMMAN

Owns A Torsen


Joined: Mon Sep 18th, 2017
Location: Grove City, Ohio USA
Posts: 6429
Name: Jim ...
Occupation: 5 axis cnc programmer ...
Interests: RBV's ...
Status: 
Offline
Reputation: 
Reputation Points: 6429
I see this now :)


____________________
00 XLT 4WD RCSB 3.GO! Jalapeño
01 XLT 2WD RC Steppie 3.0 auto Silver
The future belongs to those who show up.
Back To Top PM Quote Reply

 Posted: Mon May 7th, 2018 10:46 pm
PM Quote Reply
21st Post
JAMMAN

Owns A Torsen


Joined: Mon Sep 18th, 2017
Location: Grove City, Ohio USA
Posts: 6429
Name: Jim ...
Occupation: 5 axis cnc programmer ...
Interests: RBV's ...
Status: 
Offline
Reputation: 
Reputation Points: 6429
Well Bill you must be a better hammer swinger than I am LOL the thing would not budge at all even with a sledge. My new press however did bring them right out STILL very tight.


This is my oldest son helping sandblasting:


We got a lot of pieces painted and ready:


Only snapped one bolt off, a small one needed to hold the ABS sensor wire to the knuckle:


I am blessed with having a machine shop at my fingertips:


And a pic of the carnage:


____________________
00 XLT 4WD RCSB 3.GO! Jalapeño
01 XLT 2WD RC Steppie 3.0 auto Silver
The future belongs to those who show up.
Back To Top PM Quote Reply

 Posted: Tue May 8th, 2018 08:16 am
PM Quote Reply
22nd Post
Mike69

Mustang Nut


Joined: Sun Oct 22nd, 2017
Location: Horsepasture, USA
Posts: 1690
Name: Mike ...
Occupation: Semi-retired ...
Interests: Vintage Mustangs, RBV's, car shows, & woodworking ...
Status: 
Offline
Reputation: 
Reputation Points: 1690
Jim, it is coming right along, you will be done in no time. When I did the F/E work on my Ranger I broke those bolts for the ABS wire in the knuckle too. When I did the lower ball joints I put a floor jack under the lower control arm & smacked them with a sledge hammer & after a few shots they popped out.


____________________
21 Bronco Sport Big Bend (Wife's DD)
05 F150 XLT Reg Cab, 2WD, 5.4L, Auto (My DD)
00 Ranger Extd Cab 4x4 4.0 OHV, Auto
99 Explorer Sport 4x4 4.0 SOHC, Auto
69 Mustang Coupe 5.0, 5 spd 9" rear(Project)
14 Kawasaki Vulcan (Wife's Toy)
Back To Top PM Quote Reply

 Posted: Tue May 8th, 2018 09:13 am
PM Quote Reply
23rd Post
410customs

Idahome


Joined: Wed May 2nd, 2018
Location: Panhandle, Idaho USA
Posts: 2165
Name: Jamie ...
Occupation: Elevator Design Worlds Tallest Buildings ...
Interests: Ranger Based Vehicles and OFFROAD ...
Status: 
Offline
Reputation: 
Reputation Points: 2165
I have done so many of these its silly
This was the bread and butter of my shop for a while, front end work on IFS explorers!! HOORAY!! LOL

yes lower ball joint use a hammer..Even the most stubborn ones if you punch that SOB right in the middle it will pop out. Support lower control arm with a JACK STAND for this

The drivers side, dont mess with the hvac lines, fuel lines etc until you remove the big white plastic retainer from the frame, then you can push them over far enough to get the camber bolt out. To get it in and out it rotates as you pull. It helps a great deal to remove the fowardmost bolt first then you can rotate the control arm to get a better angle on the rear bolt to clear the shock tower.

Use good parts, the cheapos will last maybe a season MAYBE. Mevotec TTX lowers are the best you can buy over the counter for the Explorer/Ranger IFS
MAS from Canada made some really nice HD ones but Dorman just bought MAS and I can no longer find them.
Otherwise its AC delco/Raebestos professional grade (gold w blue boots) they hold up okay. No MOOG!!
Motorcraft, spicer is good too. the TTX is the best, they do not make an upper? I have even written them begging for an upper.
ON my own personal trucks I will use the upper control arms that allow replacement of the joint for the next time around

Do not use cheapo wheel bearings, lucky to get 3-4 months from a set of the $40 each Ebay /Amazon bearings.

Stock CV axles / half shafts are best. If it aint broke dont try to fix it, seriously unless the boot is compromised the stock CV axles can go 200k+ miles no issue

LEAVE the upper control arm bushings slightly loose until the job is done, then return the vehicle to ride height on its tires, THEN torque the upper bolts. This is setting the pre load on the control arm bushings, very important. Otherwise you will rip the new bushings.

Looks good so far!
Yes I hate the engineer who decided HVAC lines go right where the control arm bolt wants to be, but its simple if you've done it a few times and know what to expect.


____________________
I build custom RBV, specializing in drivetrain conversions, wiring, suspension and complete custom trucks
Back To Top PM Quote Reply

 Posted: Tue May 8th, 2018 09:16 am
PM Quote Reply
24th Post
410customs

Idahome


Joined: Wed May 2nd, 2018
Location: Panhandle, Idaho USA
Posts: 2165
Name: Jamie ...
Occupation: Elevator Design Worlds Tallest Buildings ...
Interests: Ranger Based Vehicles and OFFROAD ...
Status: 
Offline
Reputation: 
Reputation Points: 2165
Mevotec TTX:


AC delco:


This is what I run, but I am having a hard time finding them anymore since Dorman just aquired MAS industries
http://mas-industries.com/premium-rd/

Last edited on Tue May 8th, 2018 09:18 am by 410customs


____________________
I build custom RBV, specializing in drivetrain conversions, wiring, suspension and complete custom trucks
Back To Top PM Quote Reply

 Posted: Tue May 8th, 2018 10:33 am
PM Quote Reply
25th Post
CBB9M
23 year Ranger veteran


Joined: Sun Oct 22nd, 2017
Posts: 371
Name: Bill ...
Occupation: 
Interests: 
Status: 
Offline
Reputation: 
Reputation Points: 371
JAMMAN wrote:
Well Bill you must be a better hammer swinger than I am LOL the thing would not budge at all even with a sledge. My new press however did bring them right out STILL very tight.
Actually, when I did mine I used a 3# (or thereabouts) hammer, supported the LCA on the outer end but as close to the LBJ as possible, whacked it a few times to break it loose, and the rest was history. Installing the new one was a matter of starting it square in the hole, tap it in a bit more, then a jackstand w/a small piece of steel plate was placed under the LBJ and final setting of the LBJ was made using the hammer and pounding on the LCA.

Something else I recall, leaving out the rather protracted conversation at the FEA shop (same owner 30+ years, 4-6 week wait to get in and a holding lot for cars left there for a future appt, this guy has a good rep).........contrary to my guy insisting that the vehicle would have a few driveability quirks unless I took his advice and had him set the camber well toward the most negative end of the range, I insisted that it be slightly negative but fairly close to 0* and that if things weren't right, then it was my mistake and I'd be buying another alignment. I'm still rolling on the alignment done back in 12/16.


____________________
-Bill

04 Ranger FX4 Level II, several mods
Back To Top PM Quote Reply

Current time is 01:56 pm Top Page:    1  2  Next Page Last Page    

Ford-Rangers.com Ranger Forum > Tech Section > Suspension Tech > Front end parts replacement

Users viewing this topic


PHP Version: 8.2.28
Server version: 10.6.21-MariaDB
UltraBB 2.01.01 Copyright © 2008-2025 Jim & Chris
Page processed in 0.0909 seconds (35% database + 65% PHP). 109 queries executed.