mhoward
Hey look ~ they ~ bounce!

Joined: Sun Oct 22nd, 2017
Posts: 2751
Name: Michael ... Occupation: Technology Manager ... Interests: Trucks / Guitars & Music / Things that go BANG ...
Reputation Points: 2751

|
How to Install a Factory Keyless Entry Keypad
Disclaimer #1: I cannot take credit for the technical details of this modification, as I gleaned information from several sources on the Internet, as well as some valuable info from Bob Wenzing (V8 Level II). I trolled many forums and online wiring diagrams to obtain and verify the info I needed. Some of the pictures are my own, others from the various sources. The only credit due me is bringing this information together and posting it here.
Disclaimer #2: You perform this modification AT YOUR OWN RISK. This how-to assumes you have the tools, knowledge, basic skills and ability to successfully perform the required steps. Also, this how-to describes the steps necessary to perform the mod on a 2001 – 2003 model Ranger. It MAY work on other model years, but I don't know if it will, so proceed with CAUTION!
Apology: I apologize for the lack of detail pics of this mod. When I performed it, I was not considering doing a how-to, so use your imagination to get an idea of some of the steps I took.
– Michael R. Howard (01/20/2019)
######################################
# Why Retrofit an OEM Keypad? #
######################################
1: This mod provides a feature that was never offered on a Ranger, which has a cool factor all its own.
2: Prevents you from being locked out of your truck. I had developed the stupid and dangerous habit of shutting off my truck, pulling the keys and hitting the lock button when exiting the cab. Then, one day at work I failed to pull the keys out of the ignition. That little stunt required my son to drive a 70-mile round trip to bring me a spare set of keys. If the keypad had been installed, this would not have been an issue.
######################################
# Things you will need #
######################################
· Power door locks (duh!)
· Laptop with FORScan EXTENDED LICENSE installed
· ELM327 OBDII connector
· Dremel and cutoff discs
· The inner strength (guts) to cut a hole in your truck door 
· Drill and standard hand tools
· Soldering gun, solder and shrink tube
· Parts from a donor vehicle
· Sandpaper, primer, rubbing compound
· Color-matching paint for your vehicle (if you want a more finished look), clear top coat
· Rustoleum brush enamel (to seal the bare metal edge resulting from the cutting)
######################################
# Obtain Salvage Parts from a Donor Vehicle #
######################################
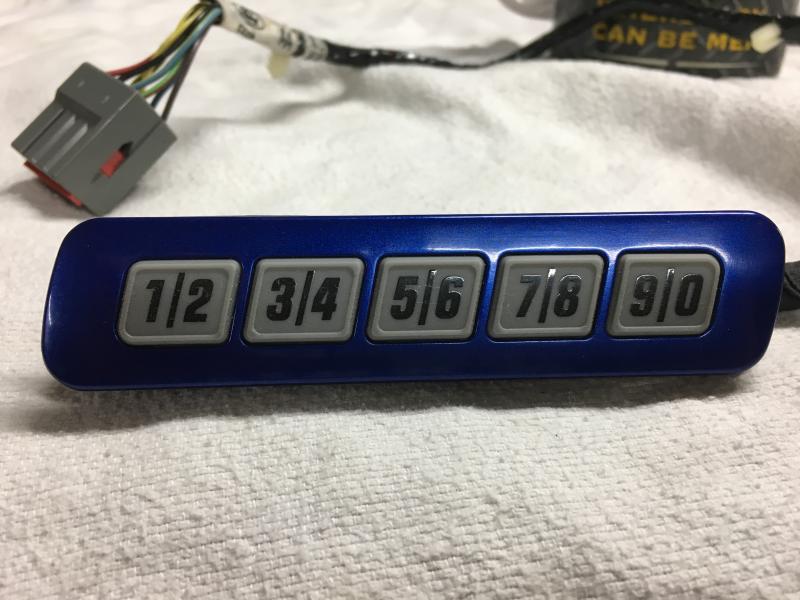
For this mod, I chose to purchase a new keypad, as I could not find one in decent shape in the desired style. Any keypad from a 1998 to 2001 Explorer or 2001 to 2005 Sport Trac will work and those can be found at salvage yards in good condition. I used a keypad for a 1998 Ford Windstar, as it is more aesthetically appealing (to me anyway). Assuming you are going for used parts, the following is what you will need from the donor vehicle:
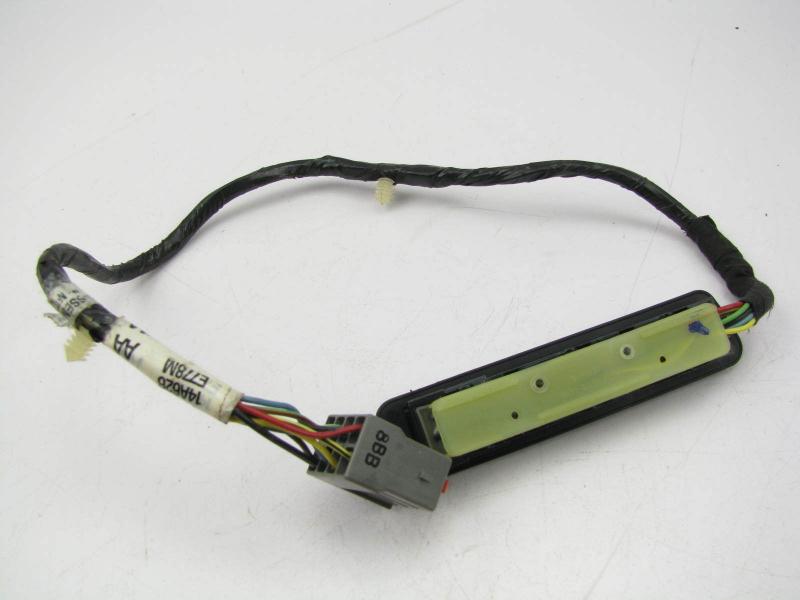
1) Keypad and attached harness
1) Gasket (keypad to body)
Be VERY careful when removing the keypad to prevent damaging the gasket
1) Spring steel retaining clip
1) Body side connector and as much of the harness as you can get
2) Central Security Module (CSM) connectors with 6 – 12 inches of wire
There are two connectors on the CSM, a 22-pin and a 26-pin get both of them
######################################
# Component Photographs #
######################################
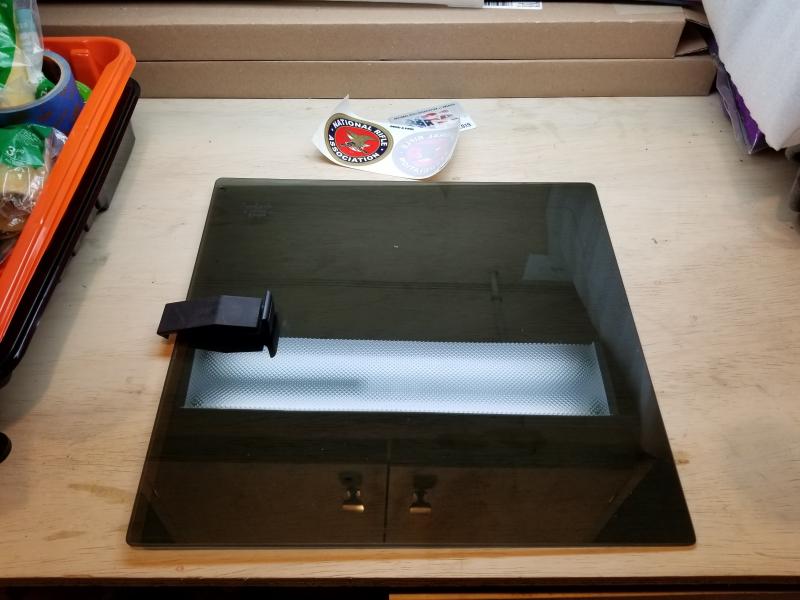
Once you have everything from the donor vehicle, take a little time to clean it all up. Once that is done, sand/prime/paint/polish the keypad bezel (if you opt to color-match it). Depending on what style of keypad you choose, the bezel can be removed by either removing 3 small pins or simply releasing the snap clips and pulling the bezel free from the number pad. I might also mention that there are two styles of connectors. One is square and one is round. Both have the same number of wires and color codes. Just make sure you get parts that will plug together.
######################################
# Wire Colors / Wire Function #
######################################
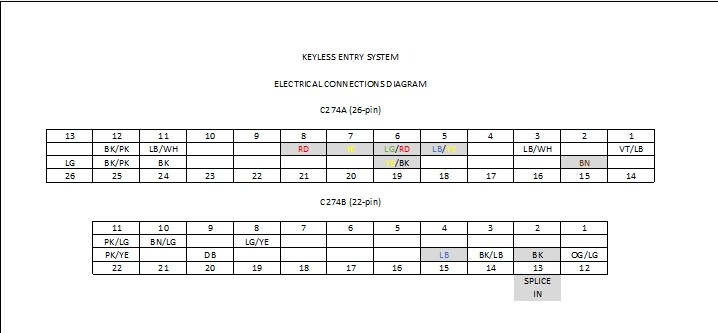
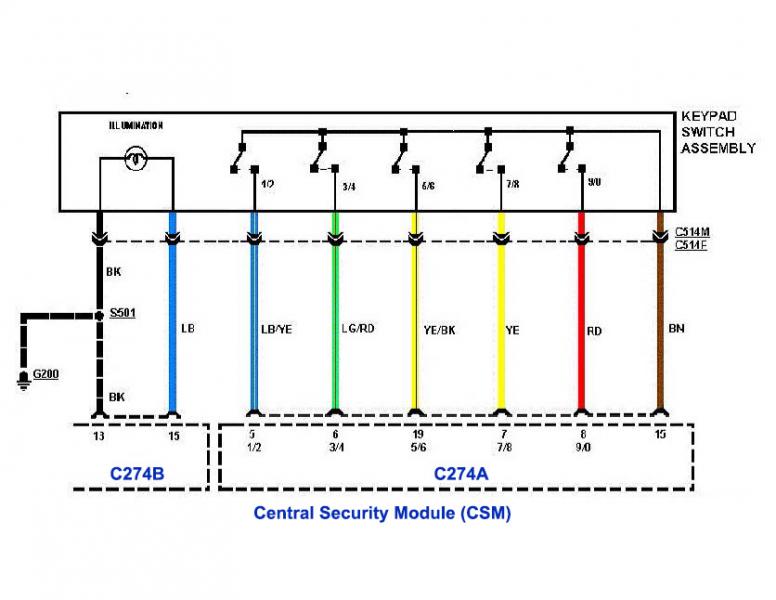
CSM Connector # Pin Wire Color Function
------------------------ --- -------------- -----------
C274a (26-pin) 5 LB/YE 1/2
6 LG/RD 3/4
7 YE 7/8
8 RD 9/0
15 BN Keypad common
19 YE/BK 5/6
---- --------- -----------
C274b (22-pin) 13 BK Ground (- 12v)
15 LB Illumination (+ 12v)
######################################
# Testing Keypad Functionality #
######################################
BEFORE YOU GO CUTTING A HOLE IN YOUR DOOR, YOU NEED TO VERIFY YOU CAN MAKE THIS WORK IN YOUR TRUCK!
Start by dropping the glove box down, then remove the passenger side airbag. Remove the two 7mm screws from the CSM module and release both connectors. This would be a good time to document the 5-digit Keyless Entry Code on the sticker of the CSM (a close-up picture of the label works well). Remember those CSM connectors you grabbed from the donor vehicle? Now you need to remove some pins from them and install into the appropriate position in your trucks connectors. Here are the ones you will need:
Remove the pins with the colored wires from each of the donor connectors and install them in the existing truck connectors. Keep in mind you have to release the pin lock on the connectors in order to remove/install the pins. Once you have that accomplished, temporarily wire the body-side connector to the newly installed wires and plug the keypad into it.
Now this is where it starts getting complicated. Connect your OBDII to the truck and laptop, then launch FORScan. Once you have connected to the truck, take a backup of your configuration and save it on your laptop (.abt file). Now click the Configuration and Programming section, select BCE and load address 4801 (48-01) with AS BUILT data. Document the existing HEX number (mine was DA00, which conflicts with the Ford database which said it should be 5800). Now, you can change that HEX number to either 7201 or FA01; whichever one works on your truck and click APPLY. It is a possibility that NEITHER of these codes will work with your truck. The 7201 code, which was provided to me by Bob Wenzing did not work on my vehicle, yet it works on his. You may have to consult a dealer tech about the appropriate code for your truck or do like I did and dig around the Internet to find a compatible code that works for you. To test, simply type the 5-digit code (from the CSM label) on the keypad and see if the doors unlock. Your first clue that you have a working code is on first number press, the keypad lights up. At the end of this document, you will find instructions on how to program your system with a personal code and other operational information.
Assuming you have the keypad functional at this point, it is on with the scary part of cutting a hole in your door for the keypad and getting things wired together permanently.
######################################
# Keypad Installation and Wiring #
######################################
NOTE: I strongly encourage you to use solder and shrink sleeve rather than butt connectors when performing the installation. The extra time and effort spent will ensure you have a reliable, long lasting and trouble-free system.
Remove the radio and bezel. Using solder and shrink sleeve:
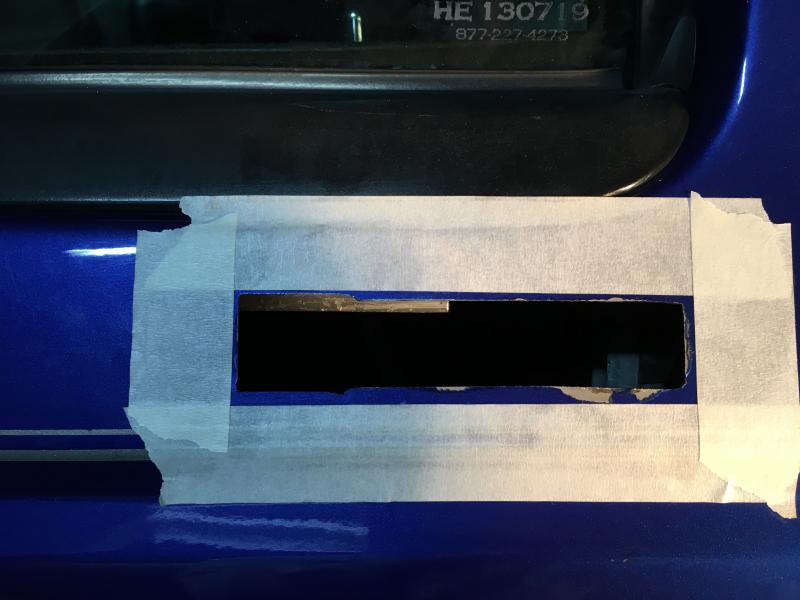
Extend the wires from the added pins on the CSM. They need to reach to the door by passing through the dash. Solder and shrink tube the connections at the CSM and once you have them to the driver side, you can take a few minutes to reinstall the airbag and radio. Remove the driver side door panel and pass the body side harness from the donor vehicle through the rubber flex tunnel and ensure you have enough to reach the keypad connector once that part is installed. Once that is finished, solder and shrink tube the wires you extended to the body side harness. Now, mask off your truck as shown below and cover the remaining exposed parts with old blankets or such to protect your paint from sparks when you Dremel the hole for the keypad.
 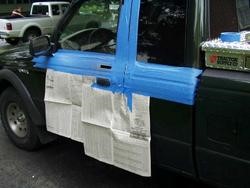
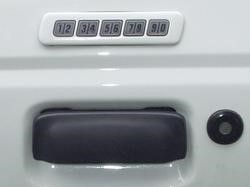
The positioning of the keypad is mostly guesswork, just make sure there is nothing that will interfere. Here are a couple of examples: green truck belongs to Carl (buckgnarly) and the white truck belongs to John (n3elz).
Mark the position with a Sharpie pen then carefully and SLOWLY Dremel cut the opening, being careful not to slip nor go too fast. I got the metal too hot on mine and this is what happened when I peeled the tape away:
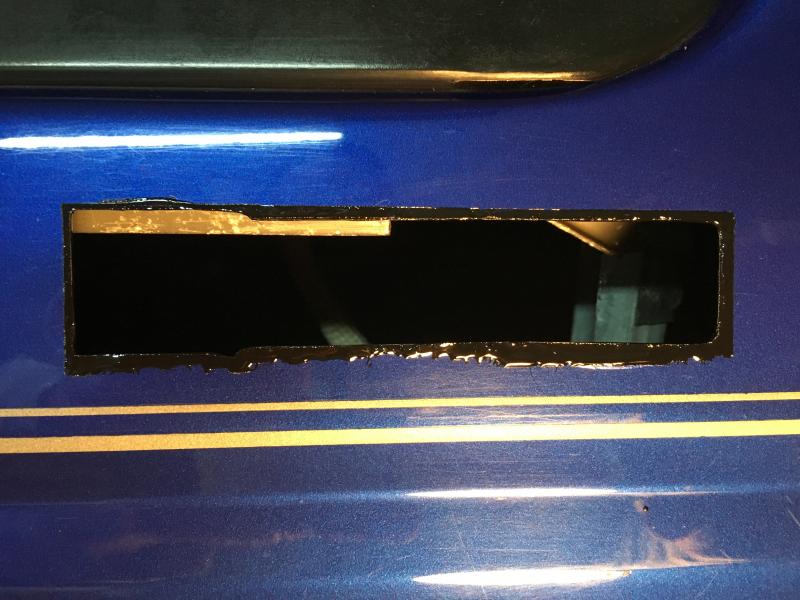
The top pic shows where the paint peeled down to the bare metal. Lucky for me the bezel will cover that, so I taped it off to paint the bare metal with Rustoleum enamel to prevent it from rusting. The bottom pic shows the absolutely pathetic job I did of dabbing the paint on with a brush (the garage was cold and the paint was super thick). Let the paint dry overnight so it will stay put when you install the keypad.
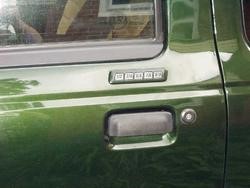
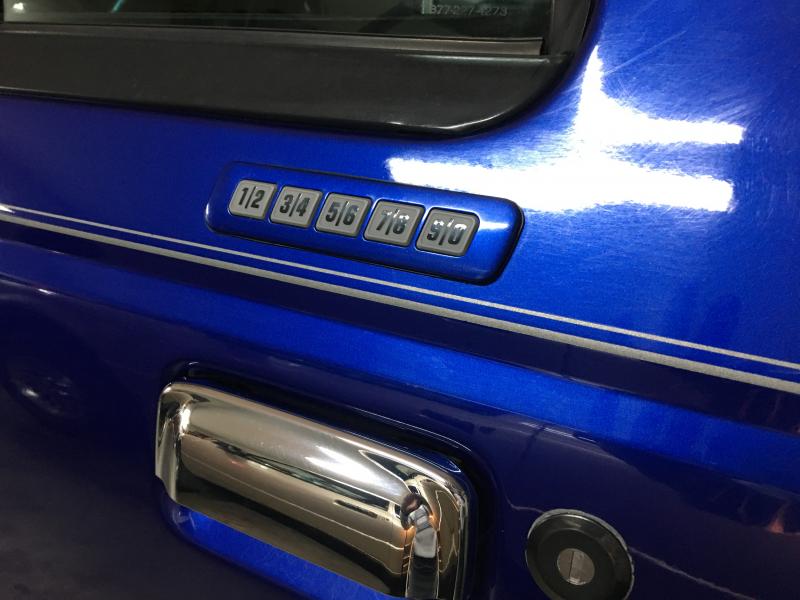
Now, install the keypad, gasket and spring clip. Ensure the harness is clear of the window, door latch and door lock mechanisms. I drilled a couple of holes and used the Christmas tree fasteners that were on my keypad harness to keep them in place and out of the way of moving parts. Plug the connector into the body side harness you installed earlier and test once more. If all checks out, reinstall your door panel trim and enjoy your new factory keyless entry keypad!
Finished product! 😊
######################################
# Operation and Programming #
######################################
Locking the doors:
Press the 7/8 and 9/0 pads simultaneously. Both doors will lock
Unlocking the doors:
Enter the factory code or personal code. Driver door will unlock
Press the 3/4 pad within 5 seconds and passenger door will unlock
Programming your own personal entry code:
1. Enter the factory-set code (keypad will illuminate when pressed)
2. Press the 1/2 pad within five seconds of step 1
3. Enter your personal 5 digit code within 5 seconds of step 2
Enter each digit within five seconds of the previous one
Erasing personal code
1. Enter the factory-set code
2. Press the 1/2 pad within five seconds of step 1
3. Press the 7/8 and 9/0 pads at the same time within five seconds of step 2
The system will now respond only to the factory-set codeLast edited on Sun Jan 20th, 2019 10:26 pm by mhoward
____________________
-- Michael
2003 Ranger Edge / Extended Cab / Flareside / 3.0L FLEX / 5r44e Auto / 2WD / 8.8 LS 4:10 / Sonic Blue Pearl
So many mods... so little time...
|