Ford-Rangers.com Ranger Forum HomeFord-Rangers.com Ranger Forum Home
Home Recent Topics New posts Search search Menu menu Not logged in - Login | Register
Ford-Rangers.com Ranger Forum > Tech Section > Member's Projects Showcase > Then, in the middle, and the rest of the

Ford-rangers.com is a discussion forum, a Ranger forum for people who have questions about fixing or modifying
their Ford Rangers or people who just admire their Ranger. Please join and enjoy sharing experiences!

Then, in the middle, and the rest of the       #: 875
 Moderated by: NoPower, Mike69, MaDMaXX, Page:  First Page Previous Page  1  2  3  4  5  6  Next Page Last Page  
New Topic Reply
 Rate Topic 
 Posted: Mon Mar 25th, 2019 08:37 am
PM Quote Reply
26th Post
Scrambler82
Old Bastard !


Joined: Fri Dec 22nd, 2017
Location: California USA
Posts: 2108
Name: Grev B ...
Occupation: Quality Assurance Engineer ...
Interests: Rangers, Photography, Metal Bending ...
Status: 
Offline
Reputation: 
Reputation Points: 2108
Pls do !

The Four Switch Panel  where the display was, took a little while.  I cut the shape out of a Budweiser Box first, shaped it a little, then transferred it to aluminum. 
Always take s a little trimming to get a good fit !

The Buggman did sell LED replacement lights for the Consoles Map Lights, I didn't use his but I have heard he has good LED Lighting Ideas.

Off-Topic:
I mentioned the Budweiser Box, I always keep a few pieces of a Bud Box around, these boxes has a cardboard consistence equal to or batter than Gasket Material, if nothing else it can get you out of the woods if trouble hits.  The
I make gaskets from it when I need one, the cardboard is a little thicker than standard gasket material, absorbs Hy-Tac (sp) Red Spray Gasket Sealer, I luv that stuff, and I have left these gaskets inlace... because they work !
They also come in handy for Templets, sturdy enough to hold the shape and easy to manipulate.
I had the usual oil leakage on my Harley drive chain side cover, was told to use double gaskets from a guy who side covers were still leaking.  I made a gasket from a Bud Box, Red or Blue, sprayed it with Hy-Tac, let it set for a hour or two, light spray again and put it on.. Wham-Bam, thank you to the Harley Gods... no leak... I am hooked on this stuff !


I'm working on getting a few things installed but have a major head cold at the moment... gotta get the visor on, then the Radio/Bezel, and then maybe the Power Window Conversion.
Ltr


____________________
Ltr,
2003 EDGE, Std Cab, Steppie, E4 Red, 5sp, 4x
5" SuperLift, 33" x 12.50 x 15"
Hurst Shifter
Mod'd Backrack to fit Steppie
Front and Rear Bumpers by Custom 4x4 Fabrication, OK; now Mike's Welding and Fabrication.
Working on more Mods, just need more time, longer days would work !
Back To Top PM Quote Reply

 Posted: Thu Apr 11th, 2019 07:04 pm
PM Quote Reply
27th Post
Scrambler82
Old Bastard !


Joined: Fri Dec 22nd, 2017
Location: California USA
Posts: 2108
Name: Grev B ...
Occupation: Quality Assurance Engineer ...
Interests: Rangers, Photography, Metal Bending ...
Status: 
Offline
Reputation: 
Reputation Points: 2108
I did an LED Taillight Assembly install a while back, over 5 years ago.
I don't remember the actual year of the assembly style but it wasn't an '03 and it had different connectors but they were easily modified.

The taillights were exactly what I wanted in the terms of looks but they only had two segments not three as I also wanted, so I had to do a switcher-rue, with the connectors and wiring.
I moved the backup lights to the bumper, moved the directional function to the backup light position in the housings, and made the brake lights... just brake/tail lights.
Having separate brake and turn signals is a safer way to have taillights and a little european.
The wiring method has been posted here already so I will only give you the high lights.
This is what I did:
1) Cut the Brake/Directional Light Wire off of the Socket and left about a three inch lead on the socket.
2) Cut the Backup Light Wire from the Socket leaving a three inch lead.
3) Cut the Brake Light Switch Wire NO from the Brake Light Switch Connector under the dash, taped it back.
4) Attached a new 16 ga. Wire to the NO side of the Brake Light Switch Connector and ran it to the Brake Light Socket.
5) Attached the Cut-Off Brake/Directional Light Wire, cut from the Brake/Directional Socket, to the Backup Light Socket position, making the backup lights the new directionals.


If this sounds complicated it isn't, just take your time, use good electrical practices to make sure things stay running smoothly.

Ant questions ask !

Here are the LED Tail Light Assemblies I used, I like the look and glad I did the mod.


Last edited on Thu Apr 11th, 2019 07:08 pm by Scrambler82


____________________
Ltr,
2003 EDGE, Std Cab, Steppie, E4 Red, 5sp, 4x
5" SuperLift, 33" x 12.50 x 15"
Hurst Shifter
Mod'd Backrack to fit Steppie
Front and Rear Bumpers by Custom 4x4 Fabrication, OK; now Mike's Welding and Fabrication.
Working on more Mods, just need more time, longer days would work !
Back To Top PM Quote Reply

 Posted: Tue Apr 16th, 2019 01:36 pm
PM Quote Reply
28th Post
Scrambler82
Old Bastard !


Joined: Fri Dec 22nd, 2017
Location: California USA
Posts: 2108
Name: Grev B ...
Occupation: Quality Assurance Engineer ...
Interests: Rangers, Photography, Metal Bending ...
Status: 
Offline
Reputation: 
Reputation Points: 2108
My latest adventure... The Projector Headlights !

I started by making a few measurements of the housing.
Findings:
1) there isn't enough room in the housing to put the Projector in side !
2) The Bulb Port, measures 1.345 ID !
3) The reflector portion of the headlights and the parking lights, they are chromed and I am not sure how to get the chrome off so I can paint them black.

I need to fins a piece of aluminum round stock that measures 1.5", this will allow me to get it turned down to the 1.345" of the bulb Opening (Port), so I can use my Jig to drill the mounting holes and to open up the housing for the project or to fit from the rear.


____________________
Ltr,
2003 EDGE, Std Cab, Steppie, E4 Red, 5sp, 4x
5" SuperLift, 33" x 12.50 x 15"
Hurst Shifter
Mod'd Backrack to fit Steppie
Front and Rear Bumpers by Custom 4x4 Fabrication, OK; now Mike's Welding and Fabrication.
Working on more Mods, just need more time, longer days would work !
Back To Top PM Quote Reply

 Posted: Wed Jan 15th, 2020 06:19 pm
PM Quote Reply
29th Post
Scrambler82
Old Bastard !


Joined: Fri Dec 22nd, 2017
Location: California USA
Posts: 2108
Name: Grev B ...
Occupation: Quality Assurance Engineer ...
Interests: Rangers, Photography, Metal Bending ...
Status: 
Offline
Reputation: 
Reputation Points: 2108
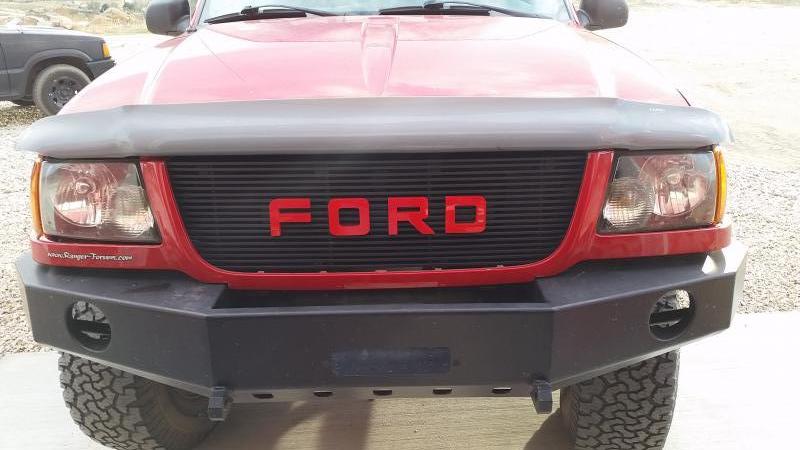
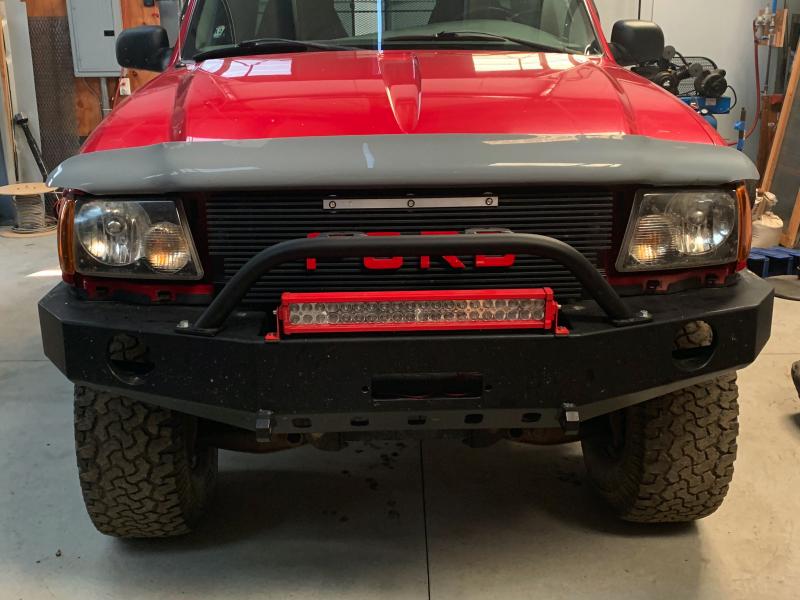
This is a picture of three installs.

1) Brush Guard, Custom 4x4Fabrication in OK City, OK, has expanded his product line to include a Bolt-On Brush Guard with two Light Tabs.
I got one, fits perfect, as all his work.  My Front and Custom Rear Bumpers are from there too and he is working on a Wheel to Wheel  Opening Rock Slider with Wrap up Protection for the Rocker Panel.

2) The LED Light Bar under the Brush Guard, X-Mas Gift, not wired but bolted in place.
eBay Special, price was really good, almost too good.
When hooking up directly to the battery it puts out a lot of light, more concerned how long it will work.

3) The three lights mounted at the top of the Grille.  Flush Mounted, 8mm, almost too bright LED Lights... I know another look-a-like Raptor Lighting scheme.   The aluminums bar will be painted black, hoping it will blend in.

The Grille surround is missing, I am trying to decide just how much I need to cut from the lower bar to allow the Winch to me mounted. (Warn 9.5)


To come:

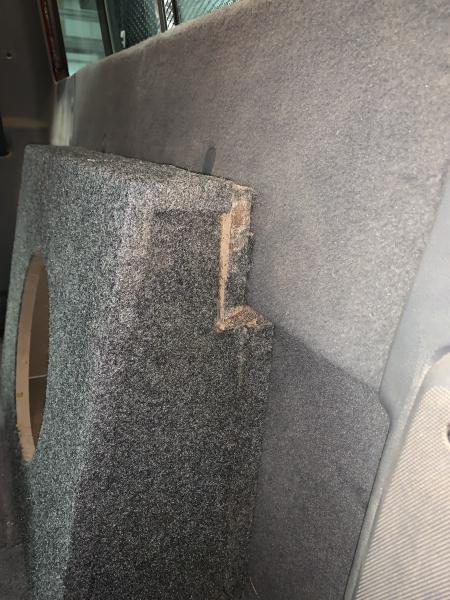
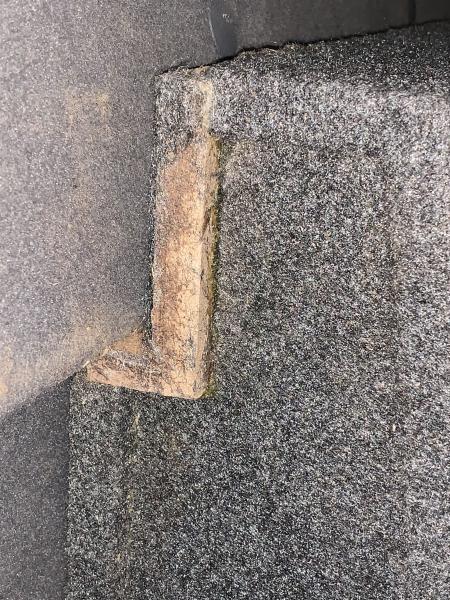
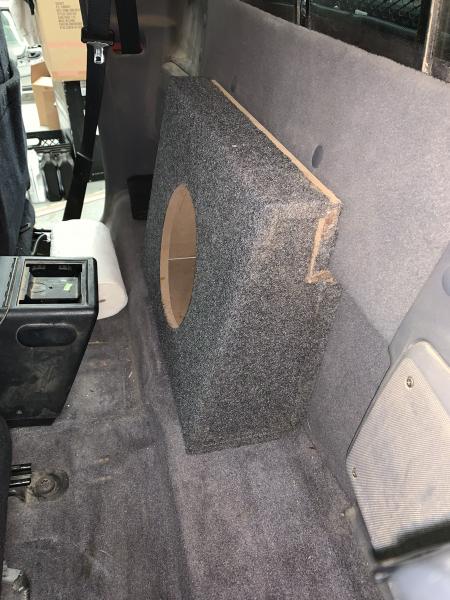
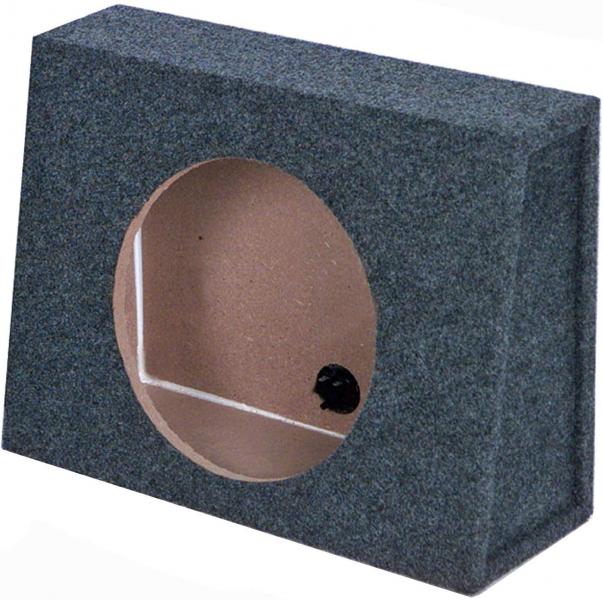
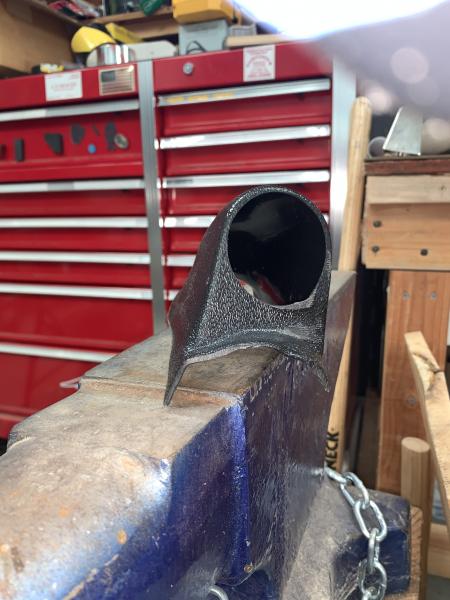
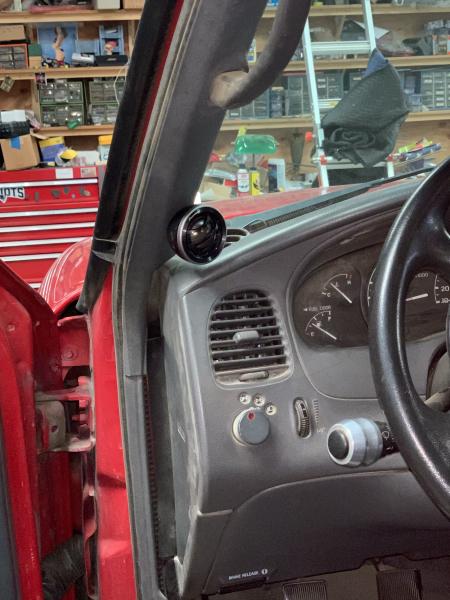
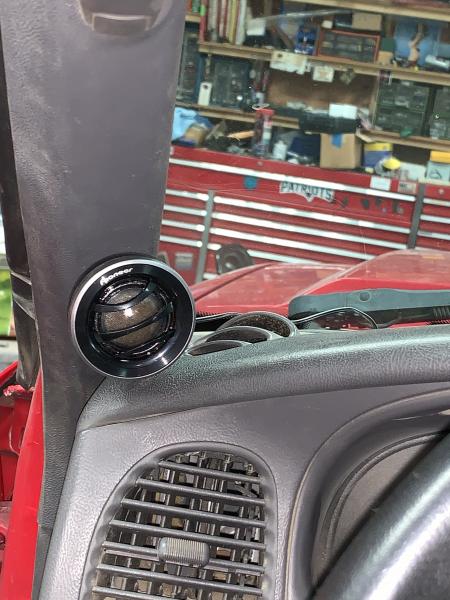
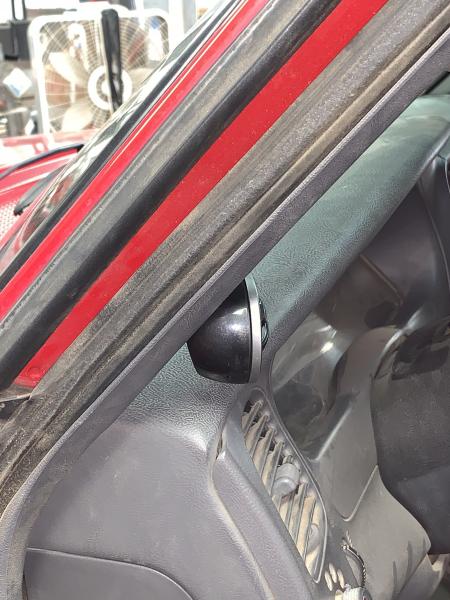
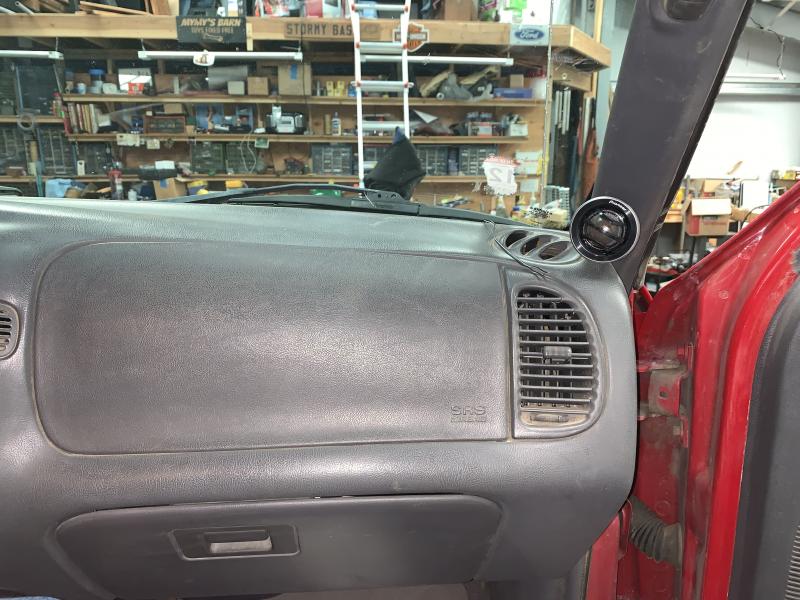
1) New Audio System, Alpine, iLX-207 Head Unit, Pioneer Speakers, x6, Sub by Pioneer, 10", modified enclosure.
2) Working on new motor, not sure which one yet but since I have a 5.0L ('93 SVO) I may stick to the tired and true motor and get it done.
3) Power Windows and Locks, OEM form a 2002, got the doors before moving to SOCal, just need to get it done.
4) New Seat Covers, I have them, based on the FX4 Seat Covers with RED Panels, but I am looking for what to use for foam.   OEMnot available anymore so I'm thinking custom shop stuff.
5) Powder Coat the Back Rack, after adding a little more steel to the lower sides.  
6) Wire up a lot of LED Lighting... Bed Lights, High Mounted Directionals and new 3rd Brake Light on the Back Rack, Brake Light Strip under the Tail Gate with three second flasher, and backup lights.
7) Projector Head Lights, this one might get done faster but it is on the list.
8) Windshield Visor

Powder Coating is at a local shop, nice to have a few within short driving distance, I have a few item left to gather and off they go.

OK that enough for now If I can get these done I will be happy.

Ltr

Last edited on Wed Jan 15th, 2020 09:48 pm by Scrambler82


____________________
Ltr,
2003 EDGE, Std Cab, Steppie, E4 Red, 5sp, 4x
5" SuperLift, 33" x 12.50 x 15"
Hurst Shifter
Mod'd Backrack to fit Steppie
Front and Rear Bumpers by Custom 4x4 Fabrication, OK; now Mike's Welding and Fabrication.
Working on more Mods, just need more time, longer days would work !
Back To Top PM Quote Reply

 Posted: Wed Jan 15th, 2020 08:34 pm
PM Quote Reply
30th Post
Tsquare
Member


Joined: Fri Nov 10th, 2017
Location: Suwanee, Georgia USA
Posts: 1540
Name: 
Occupation: Controlled Insanity ...
Interests: 
Status: 
Offline
Reputation: 
Reputation Points: 1540
I like the honey comb grill better. Sorry.


____________________
Tony
NE ATL
'04 XLT regular cab 3.slo stepside
Semi retirement
Back To Top PM Quote Reply

 Posted: Wed Jan 15th, 2020 09:50 pm
PM Quote Reply
31st Post
Scrambler82
Old Bastard !


Joined: Fri Dec 22nd, 2017
Location: California USA
Posts: 2108
Name: Grev B ...
Occupation: Quality Assurance Engineer ...
Interests: Rangers, Photography, Metal Bending ...
Status: 
Offline
Reputation: 
Reputation Points: 2108
I do like the Honeycomb Grille but I think this one looks just as good.
The picture above is with out the surround, that would clean up the look.
I wanted the '04 STX but it won't work in the '03 surround.


____________________
Ltr,
2003 EDGE, Std Cab, Steppie, E4 Red, 5sp, 4x
5" SuperLift, 33" x 12.50 x 15"
Hurst Shifter
Mod'd Backrack to fit Steppie
Front and Rear Bumpers by Custom 4x4 Fabrication, OK; now Mike's Welding and Fabrication.
Working on more Mods, just need more time, longer days would work !
Back To Top PM Quote Reply

 Posted: Thu Jan 16th, 2020 09:19 am
PM Quote Reply
32nd Post
410customs

Idahome


Joined: Wed May 2nd, 2018
Location: Panhandle, Idaho USA
Posts: 2165
Name: Jamie ...
Occupation: Elevator Design Worlds Tallest Buildings ...
Interests: Ranger Based Vehicles and OFFROAD ...
Status: 
Offline
Reputation: 
Reputation Points: 2165
I like it! make sure to get pics with the surround in place

Any plans to put some fogs in the bumper holes?

We have had very good luck with cheapo Ebay LED lights, have not broken one yet aside from a rock strike that took out a lens and allowed moisture in, but at those prices its not a big deal.......

Truck looks sharp!
Tires are wearing on the inside edge LMFAO big shock on a IFS Ranger......


____________________
I build custom RBV, specializing in drivetrain conversions, wiring, suspension and complete custom trucks
Back To Top PM Quote Reply

 Posted: Thu Jan 16th, 2020 10:20 am
PM Quote Reply
33rd Post
Scrambler82
Old Bastard !


Joined: Fri Dec 22nd, 2017
Location: California USA
Posts: 2108
Name: Grev B ...
Occupation: Quality Assurance Engineer ...
Interests: Rangers, Photography, Metal Bending ...
Status: 
Offline
Reputation: 
Reputation Points: 2108
410customs wrote:
I like it! make sure to get pics with the surround in place

Any plans to put some fogs in the bumper holes?

We have had very good luck with cheapo Ebay LED lights, have not broken one yet aside from a rock strike that took out a lens and allowed moisture in, but at those prices its not a big deal.......

Truck looks sharp!
Tires are wearing on the inside edge LMFAO big shock on a  IFS Ranger......

I have some somewhere... LoL !


I have Fog Light, cheapies:


Not are how they will work but not much invited so won't be a big problem.

The tires on the truck are seven years old, I would say I have got my monies worth out of them.
New tires, thinking the red lettered, need to look them up !
I've never found a shop that could completely align the front end with this lift kit.  Added the new adjuster but still no good.   
I am glad I have the time on them.

Ltr


____________________
Ltr,
2003 EDGE, Std Cab, Steppie, E4 Red, 5sp, 4x
5" SuperLift, 33" x 12.50 x 15"
Hurst Shifter
Mod'd Backrack to fit Steppie
Front and Rear Bumpers by Custom 4x4 Fabrication, OK; now Mike's Welding and Fabrication.
Working on more Mods, just need more time, longer days would work !
Back To Top PM Quote Reply

 Posted: Fri Jan 17th, 2020 09:59 pm
PM Quote Reply
34th Post
Tsquare
Member


Joined: Fri Nov 10th, 2017
Location: Suwanee, Georgia USA
Posts: 1540
Name: 
Occupation: Controlled Insanity ...
Interests: 
Status: 
Offline
Reputation: 
Reputation Points: 1540
That grill works.


____________________
Tony
NE ATL
'04 XLT regular cab 3.slo stepside
Semi retirement
Back To Top PM Quote Reply

 Posted: Fri Jan 17th, 2020 10:29 pm
PM Quote Reply
35th Post
Scrambler82
Old Bastard !


Joined: Fri Dec 22nd, 2017
Location: California USA
Posts: 2108
Name: Grev B ...
Occupation: Quality Assurance Engineer ...
Interests: Rangers, Photography, Metal Bending ...
Status: 
Offline
Reputation: 
Reputation Points: 2108
Tsquare wrote:
That grill works.
I thought hard on the Honeycomb vs any other grille.
None popped out at me so I let the OEM.
Then saw the new grille on another Ranger and went for it.
It is a lot easier to mount things to, i.e. the FORD and the Grille lights above the FORD.

I need to finish the grille paint the surround, pain the grille lights plate, get things back together.

My house remodel is almost done, so time will be back on my side.


____________________
Ltr,
2003 EDGE, Std Cab, Steppie, E4 Red, 5sp, 4x
5" SuperLift, 33" x 12.50 x 15"
Hurst Shifter
Mod'd Backrack to fit Steppie
Front and Rear Bumpers by Custom 4x4 Fabrication, OK; now Mike's Welding and Fabrication.
Working on more Mods, just need more time, longer days would work !
Back To Top PM Quote Reply

 Posted: Mon Feb 10th, 2020 07:09 pm
PM Quote Reply
36th Post
Scrambler82
Old Bastard !


Joined: Fri Dec 22nd, 2017
Location: California USA
Posts: 2108
Name: Grev B ...
Occupation: Quality Assurance Engineer ...
Interests: Rangers, Photography, Metal Bending ...
Status: 
Offline
Reputation: 
Reputation Points: 2108
Sent the Projector Conversion Pieces to a guy to have them installed, decided not to do it myself.
Also decided to have the new Audio System but in by a pro, I purchased all the parts but didn't do the install, too many projects.
Talk ing to a local shop here in SoCal, hoping we can come to some agreement.
I bought a Sub-Box, again didn't have the time to build one, didn't really know enough about building one, bought one and now I have to cut it down some, another project.
After that I'm hoping to get the Power Windows/Locks installed.

What's next ?


____________________
Ltr,
2003 EDGE, Std Cab, Steppie, E4 Red, 5sp, 4x
5" SuperLift, 33" x 12.50 x 15"
Hurst Shifter
Mod'd Backrack to fit Steppie
Front and Rear Bumpers by Custom 4x4 Fabrication, OK; now Mike's Welding and Fabrication.
Working on more Mods, just need more time, longer days would work !
Back To Top PM Quote Reply

 Posted: Sun Feb 16th, 2020 11:37 am
PM Quote Reply
37th Post
410customs

Idahome


Joined: Wed May 2nd, 2018
Location: Panhandle, Idaho USA
Posts: 2165
Name: Jamie ...
Occupation: Elevator Design Worlds Tallest Buildings ...
Interests: Ranger Based Vehicles and OFFROAD ...
Status: 
Offline
Reputation: 
Reputation Points: 2165
sub box did you buy?
Finding one that fits a ranger w/o cutting is a PITA
I have built hundreds of them I love building sub boxes!! Its a fun design and build project, working with wood is tooooooooo easy


____________________
I build custom RBV, specializing in drivetrain conversions, wiring, suspension and complete custom trucks
Back To Top PM Quote Reply

 Posted: Sun Feb 16th, 2020 12:14 pm
PM Quote Reply
38th Post
Scrambler82
Old Bastard !


Joined: Fri Dec 22nd, 2017
Location: California USA
Posts: 2108
Name: Grev B ...
Occupation: Quality Assurance Engineer ...
Interests: Rangers, Photography, Metal Bending ...
Status: 
Offline
Reputation: 
Reputation Points: 2108
410customs wrote:
sub box did you buy?
Finding one that fits a ranger w/o cutting is a PITA
I have built hundreds of them I love building sub boxes!! Its a fun design and build project, working with wood is tooooooooo easy

I purchased a Box that I thought would fit behind the seats... BUT, it was a little too big so I decided to return it AND as usual I ran into trouble on returning it.   The Seller wanted $23.00 to return a box that only cost $28.00 !  WTF is going on, I have heard of this return cost thing before but I have never been bitten.
After I told the seller I was going to report then to Amazon and post that their store was a scam, they lowered the price to $!6.00 for the return, but I decided to keep it and cut it down some to fit what I want.

I was told that by adding some sort of fiber filler, I can virtually increase the area of the box, IF I happen to cut it too small.  The Shallow 10" Woodier I have only need .35 - .5, I think cu. ft... and this one is .88, so I think I can cut some off.  I will be trying to make it narrow enough to fit the shelf behind the seats and put a notch in it to fit the notch in the Reg Cab under the window.   Plus I need the room for the seat... just need to e time... says the Master Procrastinator !
My problem will be resetting the rear panel of the box and hoping I can get the side pieces off of the piece I cut off so I can reuse it.  Why do I do this to myself evey time I start a project.
Can I add some Fat Mat to the inside of the Woofer Box, do you think it would hurt anything ?
I will be adding some of the Fat Mat to the insides of the outer panels and to the inside panel also.  I added some this Mat to the rest fo the Cab a while back, man did that make a difference in road noise.  All I have left to add mat to are the doors, and the inside of the roof.


____________________
Ltr,
2003 EDGE, Std Cab, Steppie, E4 Red, 5sp, 4x
5" SuperLift, 33" x 12.50 x 15"
Hurst Shifter
Mod'd Backrack to fit Steppie
Front and Rear Bumpers by Custom 4x4 Fabrication, OK; now Mike's Welding and Fabrication.
Working on more Mods, just need more time, longer days would work !
Back To Top PM Quote Reply

 Posted: Tue Feb 18th, 2020 11:59 am
PM Quote Reply
39th Post
Scrambler82
Old Bastard !


Joined: Fri Dec 22nd, 2017
Location: California USA
Posts: 2108
Name: Grev B ...
Occupation: Quality Assurance Engineer ...
Interests: Rangers, Photography, Metal Bending ...
Status: 
Offline
Reputation: 
Reputation Points: 2108
Audio Update: I changed my mind on the method of mounting of the Tweeters, from the Gauge Pods on the Windshield Pillars to What came in the box type Pods, smaller, well contained units.  After cutting the Gauge Pods and heating and forming them to the Ranger Pillars, I didn't like what they looked like.   The fit wasn't bad but not what I was looking for.    I mounted the Pods that came with the speakers and Wham-Bam, that's it, all done, just need to run some wire.

Next for the audio is the Sub Box, cut the back off, notch at the top edge, put a back cover on it, should work ok.  I think I will have approximately 0.55 cubic feet of air space and then there is always that fiber stuff.  the sub calls for a minimum of 0.35.


____________________
Ltr,
2003 EDGE, Std Cab, Steppie, E4 Red, 5sp, 4x
5" SuperLift, 33" x 12.50 x 15"
Hurst Shifter
Mod'd Backrack to fit Steppie
Front and Rear Bumpers by Custom 4x4 Fabrication, OK; now Mike's Welding and Fabrication.
Working on more Mods, just need more time, longer days would work !
Back To Top PM Quote Reply

 Posted: Wed Feb 19th, 2020 10:54 pm
PM Quote Reply
40th Post
Scrambler82
Old Bastard !


Joined: Fri Dec 22nd, 2017
Location: California USA
Posts: 2108
Name: Grev B ...
Occupation: Quality Assurance Engineer ...
Interests: Rangers, Photography, Metal Bending ...
Status: 
Offline
Reputation: 
Reputation Points: 2108
Cut the sub box down by 0.15 cu. ft., the enclosure is now around 0.68 cu. ft., just a little over the max for the new 10" Sub.
Cleared out the Radio Bezel and wiring, waiting for the new 10" Shallow Pioneer Sub.
Pulled out the '06 Mirrors, will start that mod soon; looking for tricks to take out the old mirror glass.


____________________
Ltr,
2003 EDGE, Std Cab, Steppie, E4 Red, 5sp, 4x
5" SuperLift, 33" x 12.50 x 15"
Hurst Shifter
Mod'd Backrack to fit Steppie
Front and Rear Bumpers by Custom 4x4 Fabrication, OK; now Mike's Welding and Fabrication.
Working on more Mods, just need more time, longer days would work !
Back To Top PM Quote Reply

 Posted: Thu Feb 20th, 2020 09:27 am
PM Quote Reply
41st Post
410customs

Idahome


Joined: Wed May 2nd, 2018
Location: Panhandle, Idaho USA
Posts: 2165
Name: Jamie ...
Occupation: Elevator Design Worlds Tallest Buildings ...
Interests: Ranger Based Vehicles and OFFROAD ...
Status: 
Offline
Reputation: 
Reputation Points: 2165
well done! I want to see the sub box creation!
I had to do that too...we stuffed a sub behind the drivers seat of Darth Ranger (the black 84)
After my buddy bought like 3 different sub boxes and none of them fit I was like dude what are you doing! I still have two of those sub boxes.....lol
So we had to cut down the back of the Rockford enclosure he bought and notch it so it would fit on the little shelf behind the drivers seat. For his box we closed it back up using a piece of plastic and then layers of fiberglass as there was no way to add any mdf/wood panel.
It worked out just fine!
In a small Ranger cab it does not take much of a sub to get some nice low end fill

I want to see what you have done with the tweeters and sub box!! Yes even the mistake pieces!

Adding polyfill to a sub enclosure does "fool" the speaker into thinking it has more air volume


____________________
I build custom RBV, specializing in drivetrain conversions, wiring, suspension and complete custom trucks
Back To Top PM Quote Reply

 Posted: Thu Feb 20th, 2020 12:51 pm
PM Quote Reply
42nd Post
Scrambler82
Old Bastard !


Joined: Fri Dec 22nd, 2017
Location: California USA
Posts: 2108
Name: Grev B ...
Occupation: Quality Assurance Engineer ...
Interests: Rangers, Photography, Metal Bending ...
Status: 
Offline
Reputation: 
Reputation Points: 2108
410customs wrote:
well done! I want to see the sub box creation!
I had to do that too...we stuffed a sub behind the drivers seat of Darth Ranger (the black 84)
After my buddy bought like 3 different sub boxes and none of them fit I was like dude what are you doing! I still have two of those sub boxes.....lol
So we had to cut down the back of the Rockford enclosure he bought and notch it so it would fit on the little shelf behind the drivers seat. For his box we closed it back up using a piece of plastic and then layers of fiberglass as there was no way to add any mdf/wood panel.
It worked out just fine!
In a small Ranger cab it does not take much of a sub to get some nice low end fill

I want to see what you have done with the tweeters and sub box!! Yes even the mistake pieces!

Adding polyfill to a sub enclosure does "fool" the speaker into thinking it has more air volume

I will try to get some pictures today.  Funny I don't always get pictures during the mod, single minded I guess.  I regret it after the fact but still I don't get them.

I will take pictures of the enclosure, and the Pioneer Tweeter Pod mounted, and dig the Gauge Pods out of the trash to get a picture.

The Cab is small, one of the reasons the Wife wants me to get another Truck, a NEW TRUCK, a four door truck, NOT !

I was thinking on an 8" Sub, Pioneer, but read the reviews on the shallow 10" Pioneer Sub and went for that, still waiting for it !

Ltr


____________________
Ltr,
2003 EDGE, Std Cab, Steppie, E4 Red, 5sp, 4x
5" SuperLift, 33" x 12.50 x 15"
Hurst Shifter
Mod'd Backrack to fit Steppie
Front and Rear Bumpers by Custom 4x4 Fabrication, OK; now Mike's Welding and Fabrication.
Working on more Mods, just need more time, longer days would work !
Back To Top PM Quote Reply

 Posted: Thu Feb 20th, 2020 03:34 pm
PM Quote Reply
43rd Post
Mike69

Mustang Nut


Joined: Sun Oct 22nd, 2017
Location: Horsepasture, USA
Posts: 1692
Name: Mike ...
Occupation: Semi-retired ...
Interests: Vintage Mustangs, RBV's, car shows, & woodworking ...
Status: 
Offline
Reputation: 
Reputation Points: 1692
Scrambler82 I agree with you I do not like 4 door trucks either. For me it is either a regular cab or an extended cab only.


____________________
21 Bronco Sport Big Bend (Wife's DD)
05 F150 XLT Reg Cab, 2WD, 5.4L, Auto (My DD)
69 Mustang Coupe 5.0, 5 spd 9" rear(Project)
14 Kawasaki Vulcan (Wife's Toy)
Back To Top PM Quote Reply

 Posted: Thu Feb 20th, 2020 06:20 pm
PM Quote Reply
44th Post
Scrambler82
Old Bastard !


Joined: Fri Dec 22nd, 2017
Location: California USA
Posts: 2108
Name: Grev B ...
Occupation: Quality Assurance Engineer ...
Interests: Rangers, Photography, Metal Bending ...
Status: 
Offline
Reputation: 
Reputation Points: 2108
Here is what I did to the Sub Enclosure, I do not have step by step pictures.
I took a 10" Wedge Enclosure, cut a notch in upper back to fit the step in the back wall of the cab.
Then cut the back off approximately 1.5".
Cleaned up the Cut Off pieces and glued the back to the enclosure and flipped the notch cut and glued it back in place.
Effectively, and this is an approximate guess, I cut 0.19 cubic feet of volume out of an Enclosure that started at 0.88 cubic feet, so I end up with a volume of 0.67 !
The sub I want to order requires 0.20 to 0.60 so this enclosure isn't too far off, hoping it works.

Here is the pictures are the enclosure now sets, it still need to have new felt add to the enclosure and the Wire Connectin.
Full View from Passenger showing top mod.
You can see the Cut Notch but the back looks like it wasn't touched.
it fits tight, I have to put the top under the lip then push the lower end in place.


Driver's side view fo the Notch Cut out and reversed.
The notch was cut to fit under this lip, but it is a little tight; should have cut it a 1/2 to 3/4 of an inch lower, I was trying to get a tight fit but didn't allow for the felt.
After some sanding hoping it will fit better.


Passenage side view of the Notch.
The piece that was cut from the notch, has been flipped and glued in place.  
You can see the lip that used to go around the outside of the box now follows the new lines... that worked out better than I thought.
Also, I left the side pieces on the notch (the step portion) until I glued everything together, this helped the notch piece to hold its shape.
Once the glue dried, using a hammer the side pieces on the cut out piece were removed with no I'll affect. ( Hope you can understand that )


Full view Driver's side.


I still to do some sanding, add the felt and the wire connection.
The Wire Connection used to on the rear but will end up on whichever side has the wires coming at it !
I plan on the passenger side but I am leaving that up to the installation shop.
The Console can fit back in OEM Position but I am not sure if I will be keeping it, time will tell. ( New automatic shifter will dictate where things go )
There you have what has been done, sorry I didn't even think about taking pictures along the way.
Ltr

here is what I started with:

Last edited on Thu Feb 20th, 2020 10:29 pm by Scrambler82


____________________
Ltr,
2003 EDGE, Std Cab, Steppie, E4 Red, 5sp, 4x
5" SuperLift, 33" x 12.50 x 15"
Hurst Shifter
Mod'd Backrack to fit Steppie
Front and Rear Bumpers by Custom 4x4 Fabrication, OK; now Mike's Welding and Fabrication.
Working on more Mods, just need more time, longer days would work !
Back To Top PM Quote Reply

 Posted: Thu Feb 20th, 2020 06:36 pm
PM Quote Reply
45th Post
Scrambler82
Old Bastard !


Joined: Fri Dec 22nd, 2017
Location: California USA
Posts: 2108
Name: Grev B ...
Occupation: Quality Assurance Engineer ...
Interests: Rangers, Photography, Metal Bending ...
Status: 
Offline
Reputation: 
Reputation Points: 2108
Tweeter Pods, I started the Tweeter install part of the audio system here in my shop so I could mount them where I wanted them.
I had talked a little to the Install shop about the location and the owner said it didn't matter as long as it was within so many inches of the 6.75" Door Speakers.
I started with Gauge Pods, trimmed them up and heated them to mold each one to fit the Windshield Pillars, they didn't turn out too bad, still needed some work to finish the fitment but when I taped them in place I didn't like them.

On to Plan B,  I took the Pioneer Tweeter Pods that came with the front speaker system, and tried them, I like what I saw, minimalistic in both size and placement.
Wiring isn't run but I am leaving tha tup to the shop.


The Gauge Pods, one right hand and one left hand.
The Plastic cut easily, the plastic heated up a little quicker than I thought but all'n all, formed well, just not well enough.


You can see on this one, the opening for the gauge, it is melted a little, too much heat, too fast !


Plan B, Pioneer Pods, Mounted on the Windshield Pillars.
This location keep the Tweeters close enough to the main front speakers but in direct line with the passengers.


I was surprised how secure they were once the two supplied screws were tightened.
I can drill deeper and hit metal to secure it more if needed; I will drive it for a while and see how it holds up.

The Audio System Project is started, as soon as the new woofer arrives I will get an install day and send the package, Truck and parts to the audio shop.


One project less to worry about.

Ltr

Last edited on Thu Feb 20th, 2020 06:49 pm by Scrambler82


____________________
Ltr,
2003 EDGE, Std Cab, Steppie, E4 Red, 5sp, 4x
5" SuperLift, 33" x 12.50 x 15"
Hurst Shifter
Mod'd Backrack to fit Steppie
Front and Rear Bumpers by Custom 4x4 Fabrication, OK; now Mike's Welding and Fabrication.
Working on more Mods, just need more time, longer days would work !
Back To Top PM Quote Reply

 Posted: Sat Feb 22nd, 2020 09:28 am
PM Quote Reply
46th Post
410customs

Idahome


Joined: Wed May 2nd, 2018
Location: Panhandle, Idaho USA
Posts: 2165
Name: Jamie ...
Occupation: Elevator Design Worlds Tallest Buildings ...
Interests: Ranger Based Vehicles and OFFROAD ...
Status: 
Offline
Reputation: 
Reputation Points: 2165
Perfect! Sub box really came out nice
I like the tweeters too, agree the pods would have been too much
Nothing sounds better then staging the highs up high, keep the mids at dash level and put the lows down by your feet....sounds so good!

Is that a Patriots sticker? oh man.........


____________________
I build custom RBV, specializing in drivetrain conversions, wiring, suspension and complete custom trucks
Back To Top PM Quote Reply

 Posted: Sat Feb 22nd, 2020 09:55 am
PM Quote Reply
47th Post
JAMMAN

Owns A Torsen


Joined: Mon Sep 18th, 2017
Location: Grove City, Ohio USA
Posts: 6436
Name: Jim ...
Occupation: 5 axis cnc programmer ...
Interests: RBV's ...
Status: 
Offline
Reputation: 
Reputation Points: 6436
I'm actually going to the garage right now to pull my sub box out, it is similar and I might (with the notch) be able to make it fit in mine (inspired from this thread).

It does look however like I mounted my shorty console back a little from what you have yours. Any chance I could get you to measure to the back of your console from under the notch? If yours fit and mine wont then I would get the same enclosure you did.

Ty-


____________________
00 XLT 4WD RCSB 3.GO! Jalapeño
01 XLT 2WD RC Steppie 3.0 auto Silver
The future belongs to those who show up.
Back To Top PM Quote Reply

 Posted: Sat Feb 22nd, 2020 10:59 am
PM Quote Reply
48th Post
Mike69

Mustang Nut


Joined: Sun Oct 22nd, 2017
Location: Horsepasture, USA
Posts: 1692
Name: Mike ...
Occupation: Semi-retired ...
Interests: Vintage Mustangs, RBV's, car shows, & woodworking ...
Status: 
Offline
Reputation: 
Reputation Points: 1692
Jim, when you mounted your shorty console did you drill the holes for the mounting bolts where the dimples are in the floor?  The dimples in the floor are where the factory mounted the studs to the floor to bolt the console to.


____________________
21 Bronco Sport Big Bend (Wife's DD)
05 F150 XLT Reg Cab, 2WD, 5.4L, Auto (My DD)
69 Mustang Coupe 5.0, 5 spd 9" rear(Project)
14 Kawasaki Vulcan (Wife's Toy)
Back To Top PM Quote Reply

 Posted: Sat Feb 22nd, 2020 11:29 am
PM Quote Reply
49th Post
JAMMAN

Owns A Torsen


Joined: Mon Sep 18th, 2017
Location: Grove City, Ohio USA
Posts: 6436
Name: Jim ...
Occupation: 5 axis cnc programmer ...
Interests: RBV's ...
Status: 
Offline
Reputation: 
Reputation Points: 6436
Yes, sort of. In a short cab they do not line up 100% with the dimples, as a matter of fact the drivers rear dimple needs a spacer and cannot be used on location if you align it to the front dimples. I ended up using rivet nuts for all of them and a spacer for the rear 2... and I had to slot the magnesium to slide it back enough so the hump in the bottom of the console matched the hump in the floor. The short cab was never produced with a short console to the best of my knowledge.


____________________
00 XLT 4WD RCSB 3.GO! Jalapeño
01 XLT 2WD RC Steppie 3.0 auto Silver
The future belongs to those who show up.
Back To Top PM Quote Reply

 Posted: Sat Feb 22nd, 2020 11:33 am
PM Quote Reply
50th Post
Scrambler82
Old Bastard !


Joined: Fri Dec 22nd, 2017
Location: California USA
Posts: 2108
Name: Grev B ...
Occupation: Quality Assurance Engineer ...
Interests: Rangers, Photography, Metal Bending ...
Status: 
Offline
Reputation: 
Reputation Points: 2108
JAMMAN wrote:
I'm actually going to the garage right now to pull my sub box out, it is similar and I might (with the notch) be able to make it fit in mine (inspired from this thread).

It does look however like I mounted my shorty console back a little from what you have yours. Any chance I could get you to measure to the back of your console from under the notch? If yours fit and mine wont then I would get the same enclosure you did.

Ty-


First my shorty console is pushed forward for the OEM location but not secured I wanted to get it out of the way, but I think I have cut the Enclosure enough so I can mount the Console back in OEM place and still clear my Woofer Screen.

Just a note:  or two... maybe three or four !
1) I used a table saw to make the cut, a sharp blades works best.
--The tale saw keeps the cuts smooth and matching if, like me, you make the cuts on multiple sides.
2) I cut my notch first. 
--This allows the cut out section to be flipped and refill the notched area, so don't destroy it when removing the notch.
--Make sure you measure three or four times, the one I cut should have been cut down another three quarter of or an inch for a little better fitment.
3) I then, using the table saw again, cut 1/5" off the entire rear of the box, the notch was already cut out so I only had to cut three sides.
4) I knocked off the extra little pieces on the side of the cut off back piece, cleaned up the edges and removed any felt, and glued the back in place, and clamped the hell out of it.
5) The cut out notch piece.
--This piece will need to be trimmed to fit the notch but it will fit back in and once glued in place should work ok.
--I left the small pieces on the sides of the cut out Notched piece until it was glued in place, but I thinkI could have had an easier time gluing and clamping it back without them.

Clean up was easy, I used a sharp wide wood chisle to clean amy old glue but the felt was stuck on really good, I will need to address that before adding more felt to cover up my mistakes.

So I cut the notch, cut the backoff, cleaned and glued, and lucked out that it fit, tight but that's good too. (Tight is Nice) !
I calculated the volume of the cut off back area,  and subtracted that amount from the advertised volume of the Enclosure and ended up with approximately 0.70 cubic feet of volume in the box, maybe little less but close enough.   My new sub wants a volume of .50 cubic feet, I think close enough, but I am sure someone will want 0.50... LoL !

Good Luck with your cutting.

Ltr


____________________
Ltr,
2003 EDGE, Std Cab, Steppie, E4 Red, 5sp, 4x
5" SuperLift, 33" x 12.50 x 15"
Hurst Shifter
Mod'd Backrack to fit Steppie
Front and Rear Bumpers by Custom 4x4 Fabrication, OK; now Mike's Welding and Fabrication.
Working on more Mods, just need more time, longer days would work !
Back To Top PM Quote Reply

Current time is 05:01 pm Top Page:  First Page Previous Page  1  2  3  4  5  6  Next Page Last Page    

Ford-Rangers.com Ranger Forum > Tech Section > Member's Projects Showcase > Then, in the middle, and the rest of the

Users viewing this topic


PHP Version: 8.2.28
Server version: 10.6.22-MariaDB
UltraBB 2.01.01 Copyright © 2008-2025 Jim & Chris
Page processed in 0.1004 seconds (37% database + 63% PHP). 107 queries executed.