Ford-Rangers.com Ranger Forum HomeFord-Rangers.com Ranger Forum Home
Home Recent Topics New posts Search search Menu menu Not logged in - Login | Register

Ford-rangers.com is a discussion forum, a Ranger forum for people who have questions about fixing or modifying
their Ford Rangers or people who just admire their Ranger. Please join and enjoy sharing experiences!

The jalapeño       #: 1274
 Moderated by: NoPower, Mike69, MaDMaXX, Page:  First Page Previous Page  1  2  3  4  5  6  7  Next Page Last Page  
New Topic Reply
 Rate Topic 
 Posted: Sat May 18th, 2019 02:05 pm
PM Quote Reply
51st Post
black06xlt
Coal miner


Joined: Sat Nov 25th, 2017
Location: Flushing, Ohio USA
Posts: 1738
Name: 
Occupation: 
Interests: my wife my kids ford rangers ...
Status: 
Offline
Reputation: 
Reputation Points: 1738
Cut the bolt off flat and use a nut and bolt with a big washer on the bottom of the floor. Same thing happened in my 06 and whitey. Whitey I was able to take a punch and knock the bolt through the floor. On my 06 the seat bolt holes are reinforced better I had to drill it out and nut and bolt it


____________________
1995 ranger splash (pieces)
Back To Top PM Quote Reply

 Posted: Sat May 18th, 2019 04:50 pm
PM Quote Reply
52nd Post
JAMMAN

Owns A Torsen


Joined: Mon Sep 18th, 2017
Location: Grove City, Ohio USA
Posts: 6436
Name: Jim ...
Occupation: 5 axis cnc programmer ...
Interests: RBV's ...
Status: 
Offline
Reputation: 
Reputation Points: 6436
When I get the hole big enough in the right location I have a strip of 1/2 X 1 CRS I'm going to cut about 3" long and tap it in the center. Making a nut. I want to keep the same size bolt.


____________________
00 XLT 4WD RCSB 3.GO! Jalapeño
01 XLT 2WD RC Steppie 3.0 auto Silver
The future belongs to those who show up.
Back To Top PM Quote Reply

 Posted: Sat May 25th, 2019 12:01 am
PM Quote Reply
53rd Post
JAMMAN

Owns A Torsen


Joined: Mon Sep 18th, 2017
Location: Grove City, Ohio USA
Posts: 6436
Name: Jim ...
Occupation: 5 axis cnc programmer ...
Interests: RBV's ...
Status: 
Offline
Reputation: 
Reputation Points: 6436
Ordered an original motocraft crank sensor today picking it up tomorrow it is in.

Finished putting the passenger seat together with the rails from the old one so the bucket will fit. Might be a 3 screw seat for a while.


____________________
00 XLT 4WD RCSB 3.GO! Jalapeño
01 XLT 2WD RC Steppie 3.0 auto Silver
The future belongs to those who show up.
Back To Top PM Quote Reply

 Posted: Sun May 26th, 2019 12:29 pm
PM Quote Reply
54th Post
JAMMAN

Owns A Torsen


Joined: Mon Sep 18th, 2017
Location: Grove City, Ohio USA
Posts: 6436
Name: Jim ...
Occupation: 5 axis cnc programmer ...
Interests: RBV's ...
Status: 
Offline
Reputation: 
Reputation Points: 6436
Unusual but a 1/2 hour journey and no bucking/cutting out so far. Going to take it to work 3 times, if it makes it 3 times I will claim victory.

I still don't think it was "the original motorcraft crank sensor" I just think the off brand I bought was defective. This one had about 150 ohms less resistance than the other which puts it closer to the mean of the range. The other one was at the top of the range. Time will tell.

Now my power steering pump is fuzzling out on me, jerking while turning at idle. Hope it is the pump since I have one.


____________________
00 XLT 4WD RCSB 3.GO! Jalapeño
01 XLT 2WD RC Steppie 3.0 auto Silver
The future belongs to those who show up.
Back To Top PM Quote Reply

 Posted: Sun May 26th, 2019 01:13 pm
PM Quote Reply
55th Post
chris

Wrench spinner


Joined: Thu Oct 5th, 2017
Location: Leigh On Sea
Posts: 642
Name: Chris ...
Occupation: Retired ...
Interests: Science, technology, horses ...
Status: 
Offline
Reputation: 
Reputation Points: 642
In my experience, power steering hiccoughs are either low fluid, air in the system or belt slipping...


____________________
MG power
Back To Top PM Quote Reply

 Posted: Sun May 26th, 2019 04:41 pm
PM Quote Reply
56th Post
JAMMAN

Owns A Torsen


Joined: Mon Sep 18th, 2017
Location: Grove City, Ohio USA
Posts: 6436
Name: Jim ...
Occupation: 5 axis cnc programmer ...
Interests: RBV's ...
Status: 
Offline
Reputation: 
Reputation Points: 6436
Fluid is dark and pump is somewhat hard to turn with belt off. I replaced the belt when I did the sensor.

I kinda experienced hydraulic assisted death wobble during a subsequent trip to Mcdonalds, had to look down to see if I was driving a Jeep.


____________________
00 XLT 4WD RCSB 3.GO! Jalapeño
01 XLT 2WD RC Steppie 3.0 auto Silver
The future belongs to those who show up.
Back To Top PM Quote Reply

 Posted: Mon Aug 5th, 2019 10:53 am
PM Quote Reply
57th Post
JAMMAN

Owns A Torsen


Joined: Mon Sep 18th, 2017
Location: Grove City, Ohio USA
Posts: 6436
Name: Jim ...
Occupation: 5 axis cnc programmer ...
Interests: RBV's ...
Status: 
Offline
Reputation: 
Reputation Points: 6436
Over the weekend I finally routed out the holes I had drilled for the overhead console tang clearance.

I found the heat sensor I had saved.

I have a receiver for a remote starter I hid in the sunglasses storage part of the OHC and ran that wire with the OHC wire harness.

I ran a set of wires to the 3rd brake light area so if buggman ever gets me another third brake light with turn signals the wiring will already be there.

Been planning this for a while and wanted to run all the wires before I put the headliner back up. I have the expo visors too with the mirrors and lights (which scream "give me LED's")

the real trick was getting this now bulky wad of wires down the A pillar fitting under the cover.
Easy you may say? Well not if you already have brackets mounted for grab handles! In hindsight I would have notched the brackets a little for the wires but they did fit. Also in hindsight if you are not going to use the auto dim rear view mirror (I decided not to but left the wires) you could cut those wires and save a little space.

ALSO if you bother to remove the wire harness for this project from an expo, get the other side of the plug too. The plug from the harness for the OHC doesn't go far enough into the dash behind the fuse box to cut it afterward so you need the connector or to cut and splice extra wire in before fishing it through like I am.

Anyhow by next weekend I should have the OHC, mirror visors and headliner all in place and working. I hope.

Then I move to the door locks (aftermarket) and the remote starter. I put a button on the radio bezel where the lighter used to be so I can use it as a start button.

This is getting deep LOL. I'll upload some pictures.


____________________
00 XLT 4WD RCSB 3.GO! Jalapeño
01 XLT 2WD RC Steppie 3.0 auto Silver
The future belongs to those who show up.
Back To Top PM Quote Reply

 Posted: Mon Aug 5th, 2019 11:01 am
PM Quote Reply
58th Post
JAMMAN

Owns A Torsen


Joined: Mon Sep 18th, 2017
Location: Grove City, Ohio USA
Posts: 6436
Name: Jim ...
Occupation: 5 axis cnc programmer ...
Interests: RBV's ...
Status: 
Offline
Reputation: 
Reputation Points: 6436
I didn't take pics! Except for the microphone location which I'll include here too. Here are some from the beginning of the headliner project.


____________________
00 XLT 4WD RCSB 3.GO! Jalapeño
01 XLT 2WD RC Steppie 3.0 auto Silver
The future belongs to those who show up.
Back To Top PM Quote Reply

 Posted: Thu Aug 8th, 2019 07:09 am
PM Quote Reply
59th Post
JAMMAN

Owns A Torsen


Joined: Mon Sep 18th, 2017
Location: Grove City, Ohio USA
Posts: 6436
Name: Jim ...
Occupation: 5 axis cnc programmer ...
Interests: RBV's ...
Status: 
Offline
Reputation: 
Reputation Points: 6436
S  l  o  w  progress as usual for me and my schedule but the wiring was a success and I ran several other wires while it was apart. well it is still apart but you know what I mean.


____________________
00 XLT 4WD RCSB 3.GO! Jalapeño
01 XLT 2WD RC Steppie 3.0 auto Silver
The future belongs to those who show up.
Back To Top PM Quote Reply

 Posted: Thu Aug 8th, 2019 10:54 am
PM Quote Reply
60th Post
410customs

Idahome


Joined: Wed May 2nd, 2018
Location: Panhandle, Idaho USA
Posts: 2165
Name: Jamie ...
Occupation: Elevator Design Worlds Tallest Buildings ...
Interests: Ranger Based Vehicles and OFFROAD ...
Status: 
Offline
Reputation: 
Reputation Points: 2165
wicked cool! "Slow IS fast"..... (my neighbor always says that, sometimes he is right! by working slowly and doing it right now, you will not have to re visit = fast to the final outcome!)


____________________
I build custom RBV, specializing in drivetrain conversions, wiring, suspension and complete custom trucks
Back To Top PM Quote Reply

 Posted: Thu Aug 8th, 2019 12:30 pm
PM Quote Reply
61st Post
JAMMAN

Owns A Torsen


Joined: Mon Sep 18th, 2017
Location: Grove City, Ohio USA
Posts: 6436
Name: Jim ...
Occupation: 5 axis cnc programmer ...
Interests: RBV's ...
Status: 
Offline
Reputation: 
Reputation Points: 6436
Thanks, I try to be careful sometimes to the painful point.

I put a buggman LED panel in the OHC before reassembling it. Everything seems to work as it should first time.

Trying to shake his tree for another rear brake light but I think he is AWOL again. I don't have time to do one myself. I have plates to do lol


____________________
00 XLT 4WD RCSB 3.GO! Jalapeño
01 XLT 2WD RC Steppie 3.0 auto Silver
The future belongs to those who show up.
Back To Top PM Quote Reply

 Posted: Sun Aug 11th, 2019 12:21 am
PM Quote Reply
62nd Post
JAMMAN

Owns A Torsen


Joined: Mon Sep 18th, 2017
Location: Grove City, Ohio USA
Posts: 6436
Name: Jim ...
Occupation: 5 axis cnc programmer ...
Interests: RBV's ...
Status: 
Offline
Reputation: 
Reputation Points: 6436
FINALLY got the headliner back on today. But there was a little problem at the end... while maneuvering myself into positions that used to be easy years ago, I stepped on the plastic handle that tilts the driver seat and busted the plastic rod off on the inside. So it is almost together but I can't adjust the seat now.

My ground wire for the lighted visor:


And finally, just before I was disappointed by seeing the plastic seat lever on the ground beside the truck:


____________________
00 XLT 4WD RCSB 3.GO! Jalapeño
01 XLT 2WD RC Steppie 3.0 auto Silver
The future belongs to those who show up.
Back To Top PM Quote Reply

 Posted: Sun Aug 11th, 2019 12:31 am
PM Quote Reply
63rd Post
Eddie Money
Member


Joined: Mon Nov 13th, 2017
Posts: 1587
Name: 
Occupation: 
Interests: Burt gummer life ...
Status: 
Offline
Reputation: 
Reputation Points: 1587
Looks real nice!!!


____________________


I know my crazy! Do you?
2007 Sport 4door 4x4 4.0L SOHC V6 Ranger
Back To Top PM Quote Reply

 Posted: Sun Aug 11th, 2019 07:51 am
PM Quote Reply
64th Post
JAMMAN

Owns A Torsen


Joined: Mon Sep 18th, 2017
Location: Grove City, Ohio USA
Posts: 6436
Name: Jim ...
Occupation: 5 axis cnc programmer ...
Interests: RBV's ...
Status: 
Offline
Reputation: 
Reputation Points: 6436
Thank you. It was my first time but I had read multiple articles.


____________________
00 XLT 4WD RCSB 3.GO! Jalapeño
01 XLT 2WD RC Steppie 3.0 auto Silver
The future belongs to those who show up.
Back To Top PM Quote Reply

 Posted: Sun Aug 11th, 2019 10:21 am
PM Quote Reply
65th Post
410customs

Idahome


Joined: Wed May 2nd, 2018
Location: Panhandle, Idaho USA
Posts: 2165
Name: Jamie ...
Occupation: Elevator Design Worlds Tallest Buildings ...
Interests: Ranger Based Vehicles and OFFROAD ...
Status: 
Offline
Reputation: 
Reputation Points: 2165
Try doing the headliner in a 4 door exploder or a BII! fun fun
The best part is when you are storing your prized 1990 perfect shape mocha eddie bauer bronco II headliner in storage to keep it safe when you realize the cats that share the storage space decided it would make a perfect scratching post.... took more then 6 months to find another mocha BII headliner I am LUCKY we found another!!

Now the broken recline lever? Lets see it.... on explorers I either
1. weld the arm back on
2. convert to a pull strap. Using some black webbing material from an old backpack, a needle and some tough black thread.... make a loop/strap for the recline lever. I use bailing wire to attach the new strap to the seat recline mechanism, make a loop large enough to stick 2-3 fingers in and you will never have to worry about breaking the recline lever again...


____________________
I build custom RBV, specializing in drivetrain conversions, wiring, suspension and complete custom trucks
Back To Top PM Quote Reply

 Posted: Sun Aug 11th, 2019 12:39 pm
PM Quote Reply
66th Post
JAMMAN

Owns A Torsen


Joined: Mon Sep 18th, 2017
Location: Grove City, Ohio USA
Posts: 6436
Name: Jim ...
Occupation: 5 axis cnc programmer ...
Interests: RBV's ...
Status: 
Offline
Reputation: 
Reputation Points: 6436
Uhhhhh... you forgot duct tape and chewing gum lol.

I'm thinking option 3. Since I recently threw out the old rails ike an idiot I'll take the single cab rail assembly with the rod in good shape off my v8 project that is just sitting there and see if I can find another before firing up the v8. 

I appreciate the tips as always.


____________________
00 XLT 4WD RCSB 3.GO! Jalapeño
01 XLT 2WD RC Steppie 3.0 auto Silver
The future belongs to those who show up.
Back To Top PM Quote Reply

 Posted: Sun Aug 11th, 2019 05:20 pm
PM Quote Reply
67th Post
Mike69

Mustang Nut


Joined: Sun Oct 22nd, 2017
Location: Horsepasture, USA
Posts: 1692
Name: Mike ...
Occupation: Semi-retired ...
Interests: Vintage Mustangs, RBV's, car shows, & woodworking ...
Status: 
Offline
Reputation: 
Reputation Points: 1692
Jim, nice job on the OHC install.


____________________
21 Bronco Sport Big Bend (Wife's DD)
05 F150 XLT Reg Cab, 2WD, 5.4L, Auto (My DD)
69 Mustang Coupe 5.0, 5 spd 9" rear(Project)
14 Kawasaki Vulcan (Wife's Toy)
Back To Top PM Quote Reply

 Posted: Sun Aug 11th, 2019 09:44 pm
PM Quote Reply
68th Post
JAMMAN

Owns A Torsen


Joined: Mon Sep 18th, 2017
Location: Grove City, Ohio USA
Posts: 6436
Name: Jim ...
Occupation: 5 axis cnc programmer ...
Interests: RBV's ...
Status: 
Offline
Reputation: 
Reputation Points: 6436
Thanks Mike, I had several inspirations including you :)


____________________
00 XLT 4WD RCSB 3.GO! Jalapeño
01 XLT 2WD RC Steppie 3.0 auto Silver
The future belongs to those who show up.
Back To Top PM Quote Reply

 Posted: Tue Aug 13th, 2019 11:14 pm
PM Quote Reply
69th Post
Eddie Money
Member


Joined: Mon Nov 13th, 2017
Posts: 1587
Name: 
Occupation: 
Interests: Burt gummer life ...
Status: 
Offline
Reputation: 
Reputation Points: 1587
Are you getting close to phase 2?


____________________


I know my crazy! Do you?
2007 Sport 4door 4x4 4.0L SOHC V6 Ranger
Back To Top PM Quote Reply

 Posted: Wed Aug 14th, 2019 07:26 am
PM Quote Reply
70th Post
Arthur
Member
 

Joined: Sat Apr 13th, 2019
Location: Canada
Posts: 117
Name: 
Occupation: 
Interests: 
Status: 
Offline
Reputation: 
Reputation Points: 117
Nicely done.

I really have to do mine too, OHC and dome light have been sitting on a shelf for a couple months now... :whatever:
Maybe I'll wait till I do speakers and stereo, get all the wiring (routing :'() done at once.


____________________
2008 XLT 4x4 4.0 5Spd. Pretty much stock except 33's and Bilsteins: A bit broken for now.
2007 FX4 Level II auto: new project!
Back To Top PM Quote Reply

 Posted: Wed Aug 14th, 2019 08:48 am
PM Quote Reply
71st Post
JAMMAN

Owns A Torsen


Joined: Mon Sep 18th, 2017
Location: Grove City, Ohio USA
Posts: 6436
Name: Jim ...
Occupation: 5 axis cnc programmer ...
Interests: RBV's ...
Status: 
Offline
Reputation: 
Reputation Points: 6436
Couple months LOL mine has been like 2-1/2 maybe 3 years.

The hardest part about it is taking that first cut in your headliner. I wrestled with emotions I didn't think I had as I was going toward it with the razor knife.

I did have a hard time routing wires around the grab handle brackets.

I also noticed 2 things, an explorer lighted visor will hit the grab handle on the way down or up.

They seem to tilt upward toward the middle too when you don't use the latch (?) that came with the visor, the one that supports that second visor add on thingy. I used the ranger latch but I am going to install the sub visor and the original latch for the lighted visors because of the tilt.


____________________
00 XLT 4WD RCSB 3.GO! Jalapeño
01 XLT 2WD RC Steppie 3.0 auto Silver
The future belongs to those who show up.
Back To Top PM Quote Reply

 Posted: Wed Aug 14th, 2019 03:23 pm
PM Quote Reply
72nd Post
Mike69

Mustang Nut


Joined: Sun Oct 22nd, 2017
Location: Horsepasture, USA
Posts: 1692
Name: Mike ...
Occupation: Semi-retired ...
Interests: Vintage Mustangs, RBV's, car shows, & woodworking ...
Status: 
Offline
Reputation: 
Reputation Points: 1692
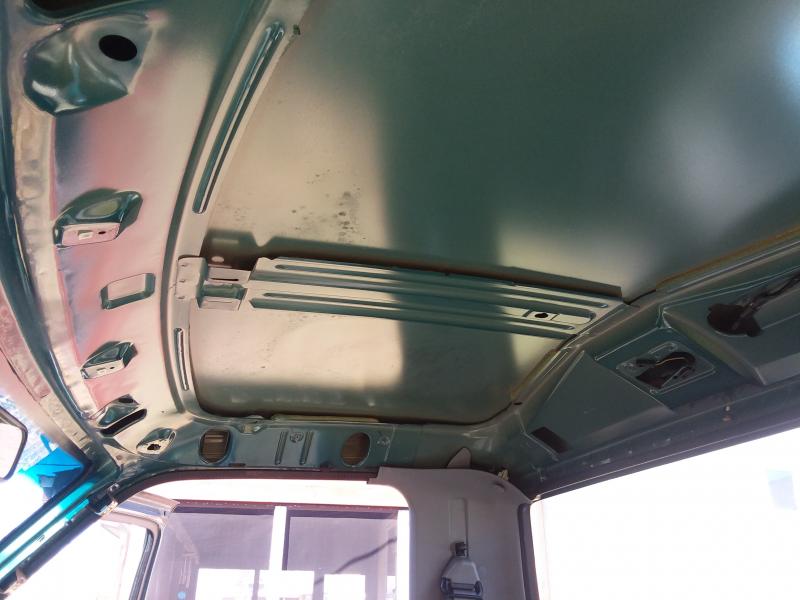
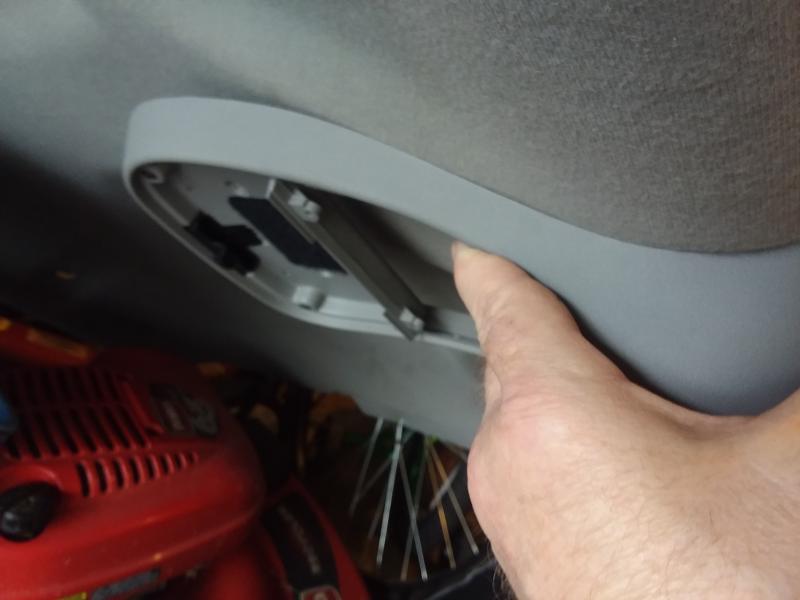
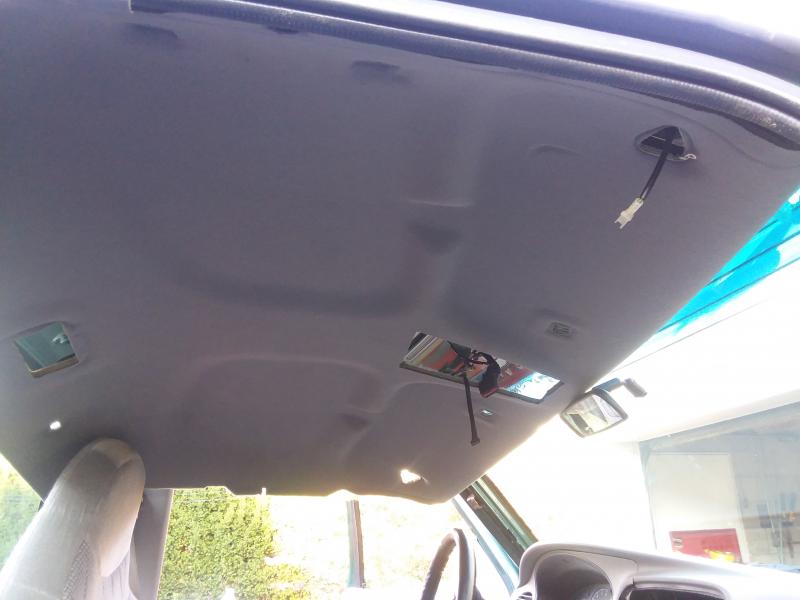
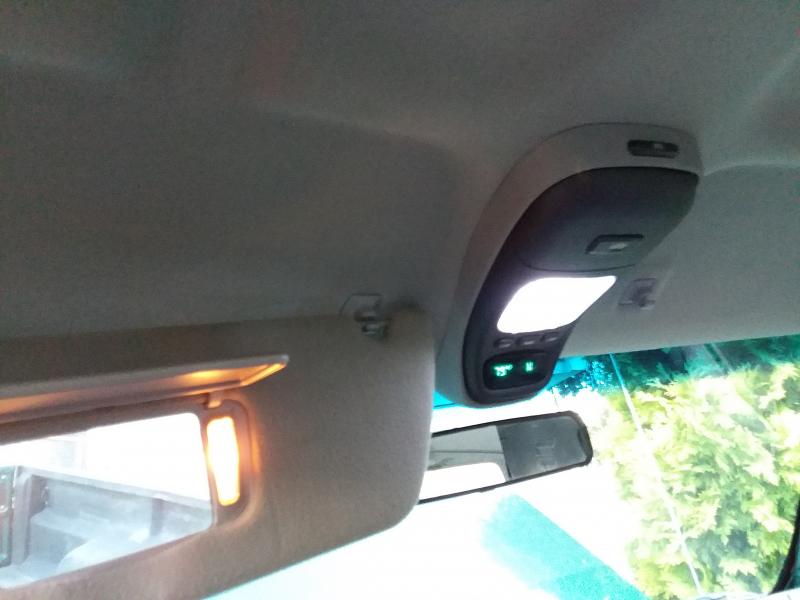
Jim, I have the Explorer lighted visors that I have yet to hook up so technically they are non-lighted visors :P & I noticed that when you put the visor down on the drivers side it hits the a pillar grab handle. When I installed the Explorer visors I did not use the sub visors.


____________________
21 Bronco Sport Big Bend (Wife's DD)
05 F150 XLT Reg Cab, 2WD, 5.4L, Auto (My DD)
69 Mustang Coupe 5.0, 5 spd 9" rear(Project)
14 Kawasaki Vulcan (Wife's Toy)
Back To Top PM Quote Reply

 Posted: Wed Aug 14th, 2019 06:42 pm
PM Quote Reply
73rd Post
JAMMAN

Owns A Torsen


Joined: Mon Sep 18th, 2017
Location: Grove City, Ohio USA
Posts: 6436
Name: Jim ...
Occupation: 5 axis cnc programmer ...
Interests: RBV's ...
Status: 
Offline
Reputation: 
Reputation Points: 6436
They hit just enough to make you notice, then they go right past it. I think I'll just live with it, it is a super mod if you go out to lunch at work.... you can see if you have anything in your teeth.


____________________
00 XLT 4WD RCSB 3.GO! Jalapeño
01 XLT 2WD RC Steppie 3.0 auto Silver
The future belongs to those who show up.
Back To Top PM Quote Reply

 Posted: Wed Aug 14th, 2019 07:48 pm
PM Quote Reply
74th Post
JAMMAN

Owns A Torsen


Joined: Mon Sep 18th, 2017
Location: Grove City, Ohio USA
Posts: 6436
Name: Jim ...
Occupation: 5 axis cnc programmer ...
Interests: RBV's ...
Status: 
Offline
Reputation: 
Reputation Points: 6436
Was nice to drive it all day. This thing runs incredibly good.

Attachment: 20190814_194026.jpg (Downloaded 18 times)


____________________
00 XLT 4WD RCSB 3.GO! Jalapeño
01 XLT 2WD RC Steppie 3.0 auto Silver
The future belongs to those who show up.
Back To Top PM Quote Reply

 Posted: Wed Aug 14th, 2019 10:29 pm
PM Quote Reply
75th Post
Eddie Money
Member


Joined: Mon Nov 13th, 2017
Posts: 1587
Name: 
Occupation: 
Interests: Burt gummer life ...
Status: 
Offline
Reputation: 
Reputation Points: 1587
JAMMAN wrote:
Was nice to drive it all day. This thing runs incredibly good.
Blue light hurts my eyes, but your dash cluster looks really nice lit up!!


____________________


I know my crazy! Do you?
2007 Sport 4door 4x4 4.0L SOHC V6 Ranger
Back To Top PM Quote Reply

Current time is 05:12 pm Top Page:  First Page Previous Page  1  2  3  4  5  6  7  Next Page Last Page    

Ford-Rangers.com Ranger Forum > Tech Section > Member's Projects Showcase > The jalapeño

Users viewing this topic


PHP Version: 8.2.28
Server version: 10.6.22-MariaDB
UltraBB 2.01.01 Copyright © 2008-2025 Jim & Chris
Page processed in 0.0967 seconds (32% database + 68% PHP). 107 queries executed.