Ford-Rangers.com Ranger Forum HomeFord-Rangers.com Ranger Forum Home
Home Recent Topics New posts Search search Menu menu Not logged in - Login | Register

Ford-rangers.com is a discussion forum, a Ranger forum for people who have questions about fixing or modifying
their Ford Rangers or people who just admire their Ranger. Please join and enjoy sharing experiences!

Grab handle revisited       #: 1309
 Moderated by: NoPower, Mike69, MaDMaXX,
New Topic Reply
 Rate Topic 
 Posted: Wed Oct 3rd, 2018 08:53 am
PM Quote Reply
1st Post
JAMMAN

Owns A Torsen


Joined: Mon Sep 18th, 2017
Location: Grove City, Ohio USA
Posts: 6436
Name: Jim ...
Occupation: 5 axis cnc programmer ...
Interests: RBV's ...
Status: 
Offline
Reputation: 
Reputation Points: 6436
For those of you that did the grab handle mod... how did you remove the bracket?

I tried drilling, I have 4 offset spinning rivets now, I can't get a 3" cutoff wheel in there.

Maybe dremel or carbide burr?


____________________
00 XLT 4WD RCSB 3.GO! Jalapeño
01 XLT 2WD RC Steppie 3.0 auto Silver
The future belongs to those who show up.
Back To Top PM Quote Reply

 Posted: Wed Oct 3rd, 2018 09:08 am
PM Quote Reply
2nd Post
410customs

Idahome


Joined: Wed May 2nd, 2018
Location: Panhandle, Idaho USA
Posts: 2165
Name: Jamie ...
Occupation: Elevator Design Worlds Tallest Buildings ...
Interests: Ranger Based Vehicles and OFFROAD ...
Status: 
Offline
Reputation: 
Reputation Points: 2165
Please explain this mod?

I have over the years re enforced the overhead grab handles on my Bronco several times. Passengers keep ripping them out!! I added A pillar handles on both sides as well. I kept having to add larger and larger self drilling screws and the passengers kept ripping them out.

My idea is to now to weld up some bolts pointing downwards and attach the handles to that.

What is this mod you speak of?
Thanks dude!


____________________
I build custom RBV, specializing in drivetrain conversions, wiring, suspension and complete custom trucks
Back To Top PM Quote Reply

 Posted: Wed Oct 3rd, 2018 09:22 am
PM Quote Reply
3rd Post
JAMMAN

Owns A Torsen


Joined: Mon Sep 18th, 2017
Location: Grove City, Ohio USA
Posts: 6436
Name: Jim ...
Occupation: 5 axis cnc programmer ...
Interests: RBV's ...
Status: 
Offline
Reputation: 
Reputation Points: 6436
A-pillar grabs. I have them on a 98 and want to transfer them to my 2000 since the molding is the same color it will look stock.

So I need to get the 4 rivets out of the old bracket. Proving to be more of a challenge than I thought.


____________________
00 XLT 4WD RCSB 3.GO! Jalapeño
01 XLT 2WD RC Steppie 3.0 auto Silver
The future belongs to those who show up.
Back To Top PM Quote Reply

 Posted: Wed Oct 3rd, 2018 09:36 am
PM Quote Reply
4th Post
410customs

Idahome


Joined: Wed May 2nd, 2018
Location: Panhandle, Idaho USA
Posts: 2165
Name: Jamie ...
Occupation: Elevator Design Worlds Tallest Buildings ...
Interests: Ranger Based Vehicles and OFFROAD ...
Status: 
Offline
Reputation: 
Reputation Points: 2165
Drill then with a stepped drill bit?
That is my first plan of attack for aluminum rivets
I always have a pack of Harbor freight stepped drill bits around, they are fantastic!

Last edited on Wed Oct 3rd, 2018 09:36 am by 410customs


____________________
I build custom RBV, specializing in drivetrain conversions, wiring, suspension and complete custom trucks
Back To Top PM Quote Reply

 Posted: Wed Oct 3rd, 2018 09:40 am
PM Quote Reply
5th Post
JAMMAN

Owns A Torsen


Joined: Mon Sep 18th, 2017
Location: Grove City, Ohio USA
Posts: 6436
Name: Jim ...
Occupation: 5 axis cnc programmer ...
Interests: RBV's ...
Status: 
Offline
Reputation: 
Reputation Points: 6436
They be spinning though. Even the mighty step drill cannot conquer spinning items.


____________________
00 XLT 4WD RCSB 3.GO! Jalapeño
01 XLT 2WD RC Steppie 3.0 auto Silver
The future belongs to those who show up.
Back To Top PM Quote Reply

 Posted: Wed Oct 3rd, 2018 09:55 am
PM Quote Reply
6th Post
410customs

Idahome


Joined: Wed May 2nd, 2018
Location: Panhandle, Idaho USA
Posts: 2165
Name: Jamie ...
Occupation: Elevator Design Worlds Tallest Buildings ...
Interests: Ranger Based Vehicles and OFFROAD ...
Status: 
Offline
Reputation: 
Reputation Points: 2165
Yes it can! Put a screwdriver under the head and pry up while drilling.........can stop the spinning

Otherwise you need a dremmel to shave the head off clean


____________________
I build custom RBV, specializing in drivetrain conversions, wiring, suspension and complete custom trucks
Back To Top PM Quote Reply

 Posted: Wed Oct 3rd, 2018 04:28 pm
PM Quote Reply
7th Post
Bird76Mojo
Ranger aficionado


Joined: Mon Apr 23rd, 2018
Location: Indiana USA
Posts: 112
Name: 
Occupation: 
Interests: 
Status: 
Offline
Reputation: 
Reputation Points: 112
Chisel and hammer. Easy peasy. Even easier with a pneumatic hammer and chisel bit.


GB :)

Back To Top PM Quote Reply

 Posted: Thu Oct 4th, 2018 02:30 pm
PM Quote Reply
8th Post
Kealel
Certified Ranger Nutjob


Joined: Sat Oct 21st, 2017
Posts: 174
Name: Keegan ...
Occupation: Engineer ...
Interests: Rangers. Duh. Also Robots. ...
Status: 
Offline
Reputation: 
Reputation Points: 174
I used a Phillips screwdriver (one with a lifetime warranty) to pop out the center of the rivet, along with the use of a BFH. Once that was out I took out drill-bits step by step to drill out the rivets. If they span I used a flathead screwdriver to scrape the edges off the rivet so they popped out the back.


____________________
Past:
Baby Girl: 2006 XL 3.0 ~RIP~ 1/26/2015

Current:
Penguin: 2002 XLT 3.SLOW 4x2

River/Kaitlyn: 2003 EDGE 3.GO! 4x2... For now?
~Aspiring Mini Level 2~

The Duck: 2003 Ford Ranger FX4 Level 2 - TWIN STICKS!

Back To Top PM Quote Reply

 Posted: Thu Oct 18th, 2018 02:41 pm
PM Quote Reply
9th Post
JAMMAN

Owns A Torsen


Joined: Mon Sep 18th, 2017
Location: Grove City, Ohio USA
Posts: 6436
Name: Jim ...
Occupation: 5 axis cnc programmer ...
Interests: RBV's ...
Status: 
Offline
Reputation: 
Reputation Points: 6436
I fell in the hole:


____________________
00 XLT 4WD RCSB 3.GO! Jalapeño
01 XLT 2WD RC Steppie 3.0 auto Silver
The future belongs to those who show up.
Back To Top PM Quote Reply

 Posted: Fri Oct 19th, 2018 08:43 pm
PM Quote Reply
10th Post
JAMMAN

Owns A Torsen


Joined: Mon Sep 18th, 2017
Location: Grove City, Ohio USA
Posts: 6436
Name: Jim ...
Occupation: 5 axis cnc programmer ...
Interests: RBV's ...
Status: 
Offline
Reputation: 
Reputation Points: 6436
Got them off, didn't take pics because I was covered in metal shavings.

Drill did not work.

I tried chisel as suggested. Worked on one, another it pulled the rivet right out of the assembly.

I tried a cutoff wheel, not enough room.

Here's what worked and if I would have started here it would have taken about 20 minutes total.

I used a straight die grinder (air powered) and a carbide burr with a round tip, it was about 3/8 diameter on a 1/4 shank.

On the rivets that were not pre damaged I was able to gnaw them off in no time flat. Unfortunately there were only 3 out of 8  un touched. The ones already mauled spun from the burr friction and jumped around pelting me and the car with tiny metal shavings.

Attachment: 19D667_AW01.jpeg (Downloaded 22 times)


____________________
00 XLT 4WD RCSB 3.GO! Jalapeño
01 XLT 2WD RC Steppie 3.0 auto Silver
The future belongs to those who show up.
Back To Top PM Quote Reply

 Posted: Tue Oct 23rd, 2018 07:32 pm
PM Quote Reply
11th Post
JAMMAN

Owns A Torsen


Joined: Mon Sep 18th, 2017
Location: Grove City, Ohio USA
Posts: 6436
Name: Jim ...
Occupation: 5 axis cnc programmer ...
Interests: RBV's ...
Status: 
Offline
Reputation: 
Reputation Points: 6436
So removing the A pillar cover revealed 4 holes in the place where they should be:


And I was going to drill them out for 6MM BUTTTTT the 10-24 rivets fit 100% snug right out of the box and I thought... 4 X #10-24 is actually stronger than the 2 puny bolts holding the handle on. So I used them:


I checked the bracket and it fits 100% but I'm leaving the trim off so I can take the headliner out to do the OHC install.


____________________
00 XLT 4WD RCSB 3.GO! Jalapeño
01 XLT 2WD RC Steppie 3.0 auto Silver
The future belongs to those who show up.
Back To Top PM Quote Reply

 Posted: Sun Nov 4th, 2018 04:41 pm
PM Quote Reply
12th Post
Mike69

Mustang Nut


Joined: Sun Oct 22nd, 2017
Location: Horsepasture, USA
Posts: 1692
Name: Mike ...
Occupation: Semi-retired ...
Interests: Vintage Mustangs, RBV's, car shows, & woodworking ...
Status: 
Offline
Reputation: 
Reputation Points: 1692
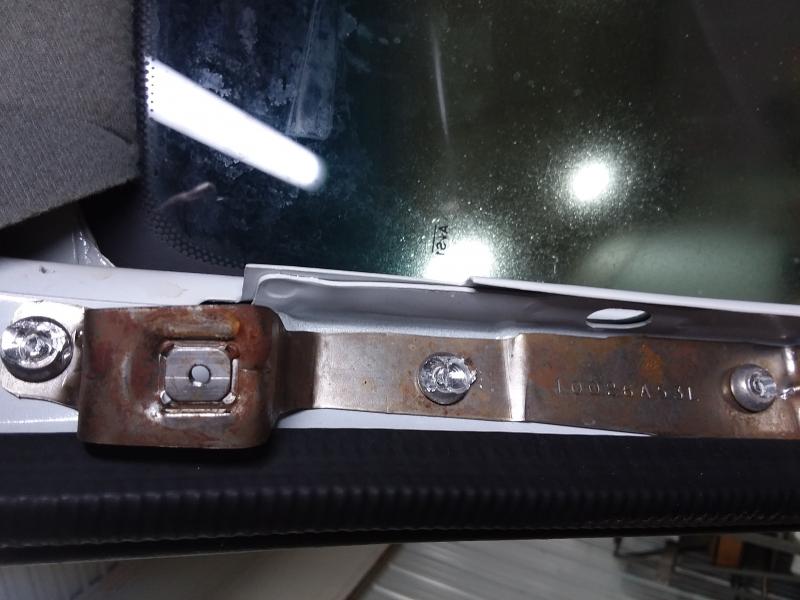
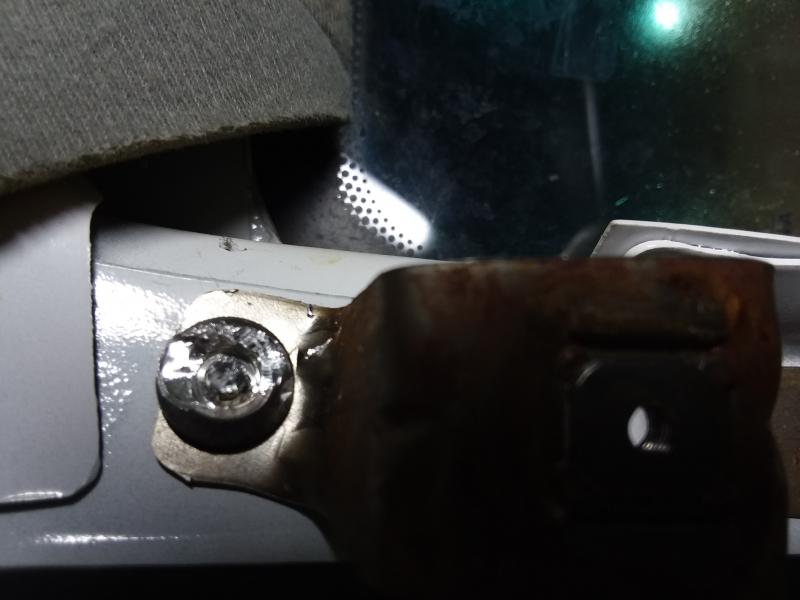
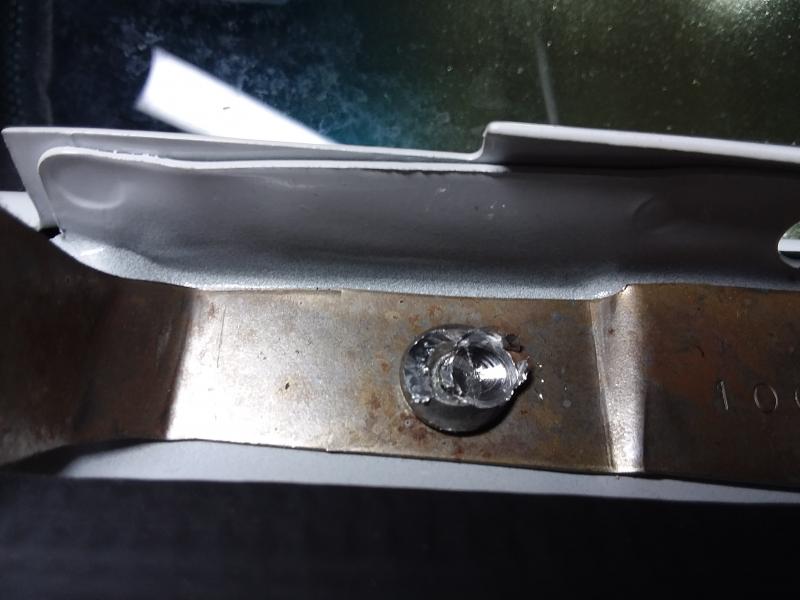
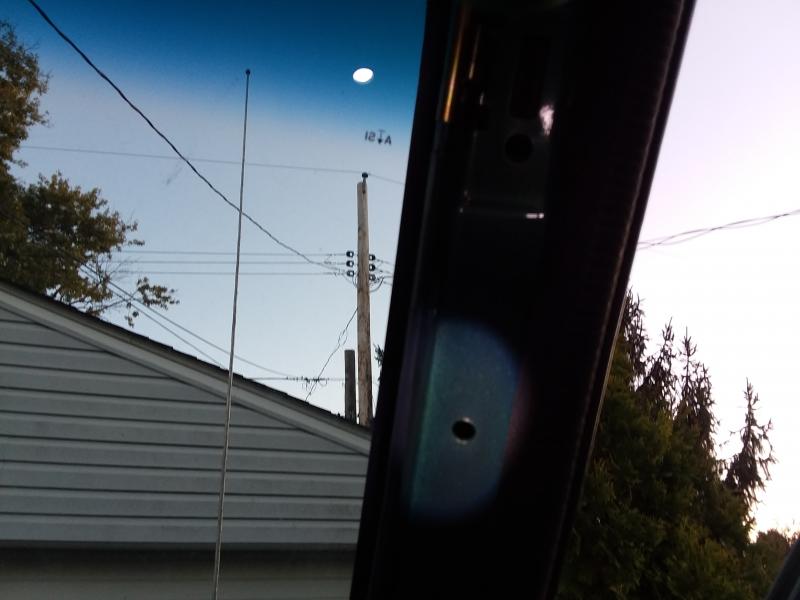
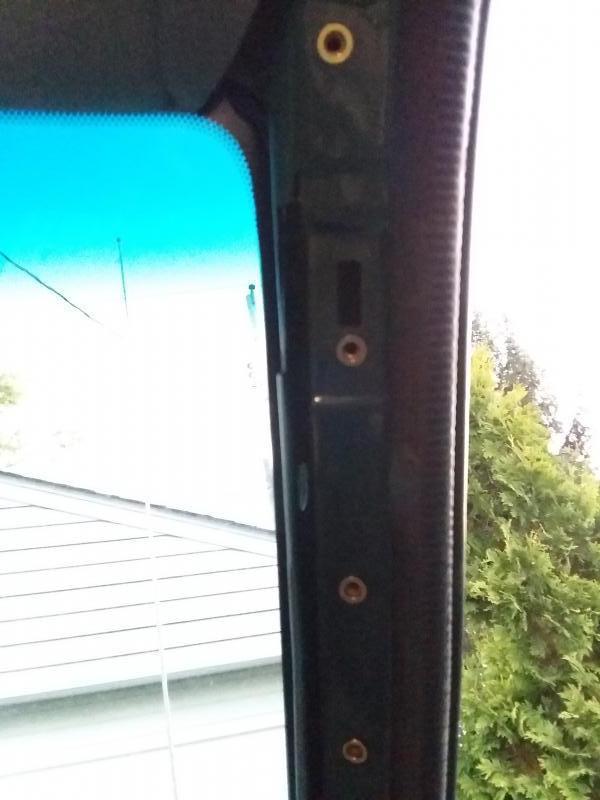
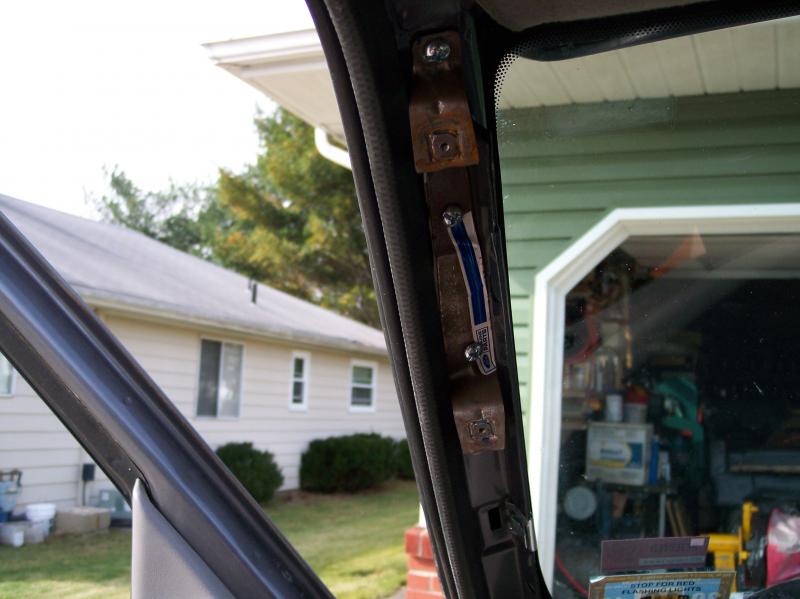
I purchased the brackets new, so I did not have that problem. It was very convenient that the holes are already drilled in the "A" pillar.


____________________
21 Bronco Sport Big Bend (Wife's DD)
05 F150 XLT Reg Cab, 2WD, 5.4L, Auto (My DD)
69 Mustang Coupe 5.0, 5 spd 9" rear(Project)
14 Kawasaki Vulcan (Wife's Toy)
Back To Top PM Quote Reply

 Posted: Sun Nov 4th, 2018 09:32 pm
PM Quote Reply
13th Post
MaDMaXX

Hails from the land of rust!


Joined: Sat Oct 21st, 2017
Location: Oregon USA
Posts: 1368
Name: 
Occupation: 
Interests: Motorsport/Firearms/IT ...
Status: 
Offline
Reputation: 
Reputation Points: 1368
Yeah, best to leave the factory holes at the same size, get the riv nuts to fit - i too bought the handles new as they were only about $12 ea.


____________________
2002 - 3.0 - 4x2 - Edge

Upgrades/Maintenance log
Back To Top PM Quote Reply

Current time is 12:05 pm Top  

Ford-Rangers.com Ranger Forum > Tech Section > Interior Tech > Grab handle revisited

Users viewing this topic


PHP Version: 8.2.28
Server version: 10.6.22-MariaDB
UltraBB 2.01.01 Copyright © 2008-2025 Jim & Chris
Page processed in 0.0694 seconds (37% database + 63% PHP). 72 queries executed.