squirrelhunter
Tree rat eradicator

Joined: Sun Mar 11th, 2018
Posts: 228
Name: Occupation: Disabled ... Interests: Hunting, shooting, reloading, fishing and auto mechanics ...
Reputation Points: 228

|
Scrambler82 wrote:
Get pictures of what comes in the kit and what extra you need to buy and the steps you did to do the job.
Write down what you did and make up a How-To !
If you don't want to do a writeup but you have all of the pictures and info let me knoW, I will write it up for you and e-mail it back to you so you can post it.
I think this is a good How_to for sure, there will be others wanted to do this.
Yeah if you don't mind could you write it up for me,I've never done 1. I started to and after I had some done I realized I hadn't described taking it apart and don't know how extensive I need to be.I've got all the pictures and it's not very hard at all. It's just a matter of replacing these factory parts which are the top row with the kit parts which are the second row.

The only factory parts the are reused are the splined washer and snap ring.

The bearing adjustment nut is the nut with the pin which faces out towards you when installed.
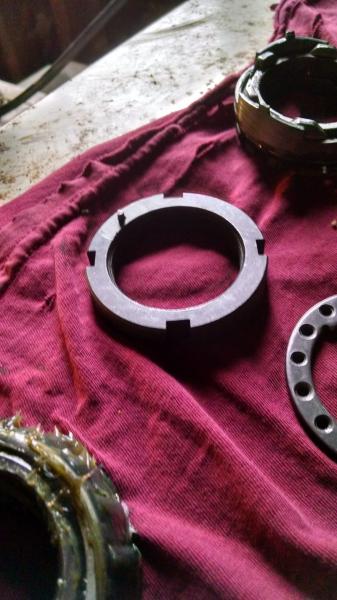
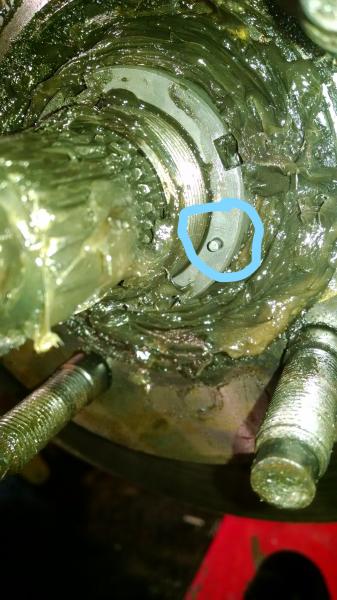
The washer with the holes goes on next after the adjustment nut is adjusted like the factory 1,the tab on it goes in the keyway and a hole on the pin.

Then the locking nut is next and torqued to 150 ft. lbs.

Then the splined washer and snap ring go on.
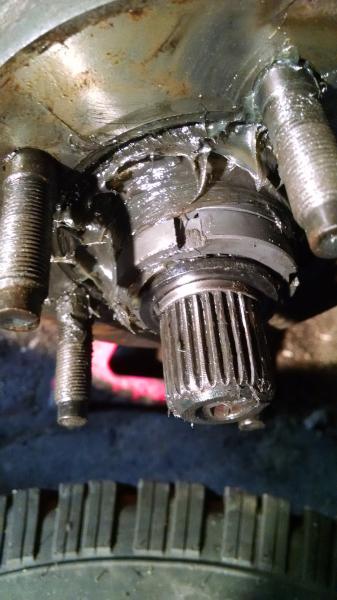
Than the hub goes on and that's it.

You will need to get a spindle nut socket to do it which is separate from the kit.
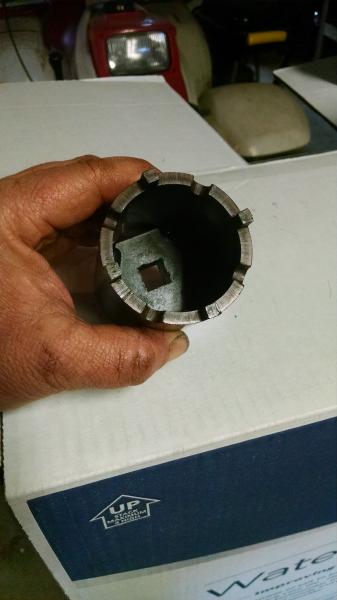
I had trouble with torquing the lock nut to 150lbs,I got the driver's side done but it kept slipping off the passenger side. A 6 sided nut would be a lot easier to keep the socket on than the 4 posts in slots in my opinion. After 3 or 4 times I noticed the slots were beveled out with big burrs along the edges so I had to take it back off,file all the burrs off and tried flipping it over because the other side wasn't beveled really. I still couldn't keep it from slipping out. I know I had to be close to the right torque as much strength as I was putting on it so I just left it that way.
I've got a few more pictures than this but this is the just of it.
my email is squirrelhunter42plus2@yahoo.com so you can mail it to me when you're done. I really appreciate this. I'd probably forget steps or not be descriptive enough.
Another thing,the wrong instructions came with it so I had to get them from their site,here it is.
http://www.ruggedridge.com/instructions/15003.65.pdf
The kit fits 90-97 Rangers,mine's a 94.
There may be some differences in the factory parts I don't know.Last edited on Mon Mar 18th, 2019 11:46 am by squirrelhunter
____________________
1994 F150 XLT
1999 Ranger XLT 4x4
|


