| PM | Quote | Reply | Full Topic |
Gunslinger
Joined: Sat Nov 4th, 2017
Posts: 426
Status:
Offline
Reputation: 

Reputation Points: $user_rep
PSA
 :Buy quality LEDs. The 194s you get from china are just garbage. I don't like trashing products, but there's nothing good to say about them for automotive purposes. Color quality isn't all that great, viewing angle is just OK, but nothing stellar, and they don't last six months. Literally. Buy quality LEDs. I highly recommend those from SuperBrightLEDs.com. Not a sponsor, wasn't paid to type that. Just a happy customer.
 Tip: Average 194 brightness is 25-30 lumens. You can learn more about LEDs in the how to linked here. (Click here.)
Well, get your tools because I'm going to show you how to do this. Here's what you need.
-1/4 socket set and ratchet
-1000 grit wet or dry sand paper
-Six new LEDs in the color you want.
-a bucket with water or spray bottle
-a gps
-a day.
-a friend.
-a plastic fork (metal will damage components)
-masking tape
Before we begin, have a dedicated GPS on hand. We will be pulling needles off the gauges and they are not keyed. Also, take a picture of the gauge cluster with everything warmed up and a full tank of gas. This will help you position the needles back where they need to go.
First off, we need to disassemble the dash to gain access to the gauge cluster itself. A youtuber by the name of ChrisFix has an excellent video showing this process, so give his video a watch.
(Linky)
Now that we've disassembled the dash, we need to go deeper. Grab the appropriate socket and remove the gold screws holding the lens onto the cluster and set aside.
Tip: Clean the lens while you have it out. There is no better time to do this.
Take your plastic fork and pull the needles off. This may require some force.
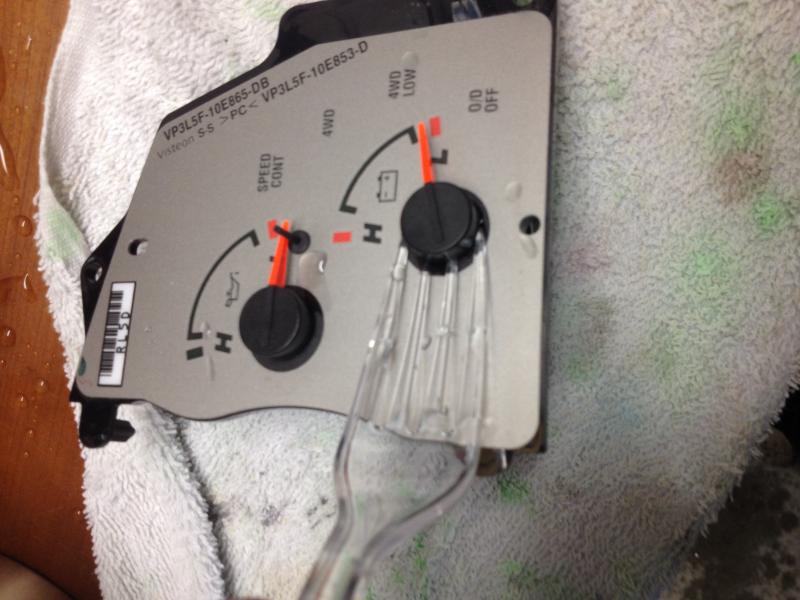
Now, the faces are sonic welded on in a couple places. Be patient and peel slowly, or risk ripping the face.
On the back of the face, you'll notice a white layer covers the parts where lines shine through. Mask off what you don't wish to sand, using an overhead light or flashlight to help you.
Next, grab your 1000 grit sandpaper and get it and the face nice and wet. You will go nowhere in a hurry without the water. Start sanding away at the colored layer until it disappears completely. You should see absolutely no color when looking at the front of the face with a light behind it. This does not take long at all.

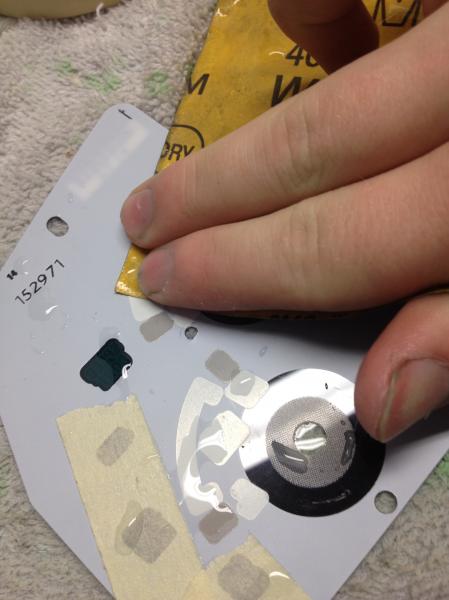

When you're done, peel the tape away and dry them off.
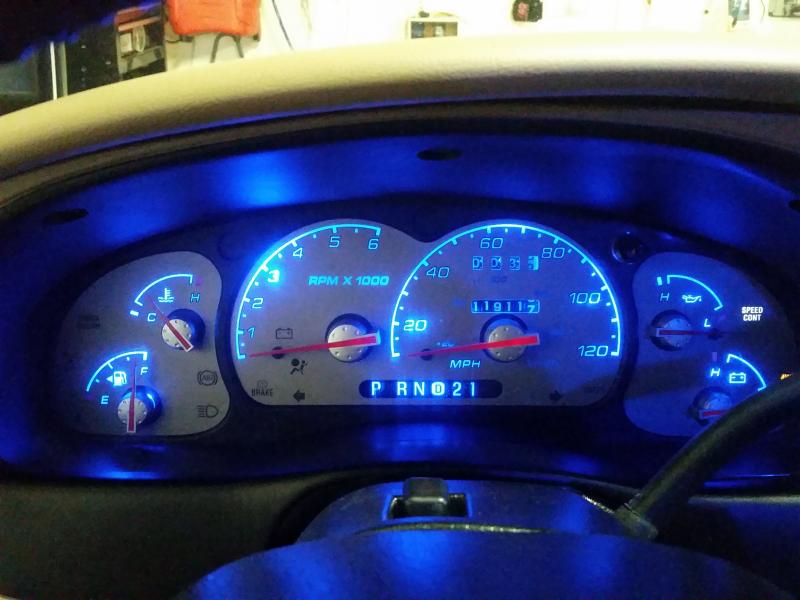
Replace the six 194 bulbs with the LEDs of your choice. I have chosen blue. Before reassembling the cluster, plug it back into the truck temporarily and turn the parking lights on as you would normally to confirm all six bulbs light up. If one does not, flip it around 180 degrees and try again. LEDs are polarized, and not all of them contain extra circuitry to circumvent this behavior. The ones I bought do contain this feature, which makes the job easier.
Take the cluster back out and lay the faces on top where they should go. Use masking tape to hold them on, but do not reinstall the lens just yet. Take the cluster back out to the truck with the needles and begin the 'fun' part.
Start with the fuel, battery, and temperature needles. Turn the key on and put them where you think they should go. Turn the key off and turn it back on. Don't start the truck just yet. Don't be discouraged if they move away from where you put them, this is normal. Remove and readjust as necessary until they stay where you put them.
Now, start the truck and place the RPM needle on. Having a scan tool to tell you how fast the engine is spinning is a big help, here. Otherwise, use your 'spiritual connection' that we all have to our pride and joy to guess about where it usually is. This is where that picture we took earlier will help, being mindful of the difference between cold idle and warm idle speeds. Rev the engine a little to get the needle to move. It should return to where you put it. If not, remove and try again.
A similar process can be used for the oil pressure gauge needle, except starting and stopping the engine to test it rather than revving the engine.
For this next part, you need a fairly long straight road with little traffic. Please, be smart and don't put others at risk while doing this, please.
If desired, remove the instrument cluster bezel entirely. Instead of disconnecting the plugs from the switches, remove the switches from the bezel. The cruise control lamp runs through one or two of these switches and will not operate without them.
Get on your stretch of road with your friend holding the GPS. Get the truck up to around 25-35 and set the cruise control if you have it. At this time, let your friend take the wheel to keep the truck straight while you focus on getting the needle on correctly. Increase or reduce speed then return to the speed you were at while installing the needle. The GPS speed should match the speedometer's needle. If it does, go home and ensure the rest of the needles still say what they should. If they do, proceed.
Remove the gauge cluster again while being careful not to touch the needles. Lay it flat on the bench, gauge side up, and install the gauge cluster's lens. If you've placed the tape optimally, you don't have to remove it to keep it out of view.
With the cluster put back together, check one last time that everything still works as it should. If it does, reassemble the dash and bask in the glory that is your freshly upgraded cluster!
Last edited on Sun Nov 26th, 2017 11:44 pm by TheArcticWolf1911
____________________
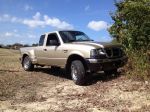
1999 Ford Ranger XLT - 3.0 V6 4x4 - Loaded (Totaled) 143k. Rest in Peace, Gold Dust.